Showing posts with label vegetarian. Show all posts

Tuesday, July 13, 2010

Quinoa and Asparagus Salad

This is another one of those insanely easy side dishes that would be well suited for taking to a summer picnic.  I made the quinoa earlier in the week during a cooking frenzy so when it was time prepare this recipe all I did was toss it together and eat.  It's filling, delicious, and just spicy enough to keep things interesting.  I of course made it vegan my using dairy free butter spread but I'm sure it's even better with the real thing.

I didn't change a thing so this very short post is brought to you by my love for 101Cookbooks where you can find the recipe for this simple salad.  Go check it out if you've been hiding under a rock and haven't discovered this trove of healthy whole food recipes.

Monday, July 12, 2010

White Bean Dip

This is what dinner looks like when I neglect to plan out recipes ahead of time.  Don't get me wrong, it was delicious but more random than I'm used to.

The fella and I were both hungry and uninspired.  All we had were a couple random vegetables and a bunch of dry beans that no one wanted to put the effort into boiling.  Then while looking through the oddities of my cupboard I found one can of white beans neither of us could remember buying.  Not one to look down upon random dinner providing beans, I whipped them into a dip I remembered seeing in my food blog browsing earlier in the day.  And tada we had protein and an almost balanced meal.

I'm not a fan of raw garlic (it's not a fan of me either I found out in my elimination dieting so at least the feeling is mutual) so I cooked mine before adding it.  But if you're a the garlicky-er the better type and loss in a few cloves raw, this is the easiest dip imaginable.  It's like hummus for when you're all hummus-ed out or not in the mood to plan ahead for soaking chickpeas.  Especially on the forbidden corn chips this dip was extraordinary. 

White Bean Dip

1 tablespoon olive oil
2 cloves garlic, finely chopped

2 cups (or 1 15-ounce can) cooked white beans
1/4 cup olive oil
1/4 cup vegetable broth
2 sprigs fresh thyme
1/2 a lemon, juiced 
salt and pepper, to taste


If you decide to cook the garlic, saute it briefly in the olive oil over medium heat just until it is no longer raw before tossing in the food processor.


If using canned beans, drain and rinse them, then place in food processor.  If using dried beans, cook 1 cup of white beans of your choice using your preferred method and put in food processor when cooked through.


Put all of the remaining ingredients in the food processor with the garlic and beans and pulse a few times until the mixture is very smooth.  Check the seasoning to see if more salt, pepper or thyme is needed.  Also add additional liquid at this point if you would like the dip to be thinner.  Blend again until well combined. 

Modified from an original recipe at Affairs of Living blog.

Tuesday, July 6, 2010

Adzuki Bean and Mango Curry

In case you've never tried adzuki beans let me tell you that you're missing out.  They have the texture of a black bean and a flavor along the lines of a sweeter version of a kidney bean.  You can use them in place of any similar sized bean for something different. 

The only problem is these pretty pink beans are a bit hard to track down.   I get mine in the bulk pins at Whole Foods (I know it's a gluten free no no but I wash then thoroughly and have never had a problem.)  Eden Organics also has them canned flavored with seaweed at all the local groceries I go to so they are out there if you look.

Putting beans regardless of how unique they are with mango in a curry might sound odd.  I thought so too until I actually gave it a try.  The sweetness of the mango mellows the spices and gives this curry a really interesting mouthfeel making it seem much richer than it really is.  With the coconut milk included this either becomes a weight maintenance only dish or a curry to eat while skipping the rice.  To make this for a low fat/high fiber meal just sub out the coconut milk for some vegetable broth and add a bit of tomato paste to get a thick sauce without the fat.

I found this Adzuki Bean and Mango Curry recipe over at the City Life Eats blog along with a handful of other really tasty ideas for recipes for us picky allergic eaters.  It's sometimes a hard blog to navigate but this recipe is perfect so I'm just sending you over there to check it out since I didn't change a thing.

Monday, July 5, 2010

Peanut Butter Brownies with Chocolate Chips


This is my attempt at modifying another recipe from the Lisa's Kitchen blog to make it gluten and sugar free.  I was hoping to make it 100% Montignac friendly as well but I couldn't justify putting almond flour in something with a cup of peanut butter in it so I used brown rice flour instead.  That means this is a decent treat for dessert on the maintenance phase since it just has a hint of carby goodness in it instead of a refined flour.

My version isn't perfect as its a little dry so feel free to play around with the ingrediants and let me know if you could up with a different flour ratio.  Besides slightly dry baked goods are an excuse to have ice cream along side it and ice cream makes everything better.  And we all know how well peanut butter and chocolate go together so there really isn't anything else I should have to say to sell you on these yummy bars.


Peanut Butter Brownies with Chocolate Chips

7 tablespoons of melted vegan shortening (I used Earth Balance butter flavor spread)
1/2 cup plus 2 tablespoons agave nectar
1 cup crunchy peanut butter (divided use)
1 large egg
1 teaspoon vanilla
scant 3/4 cup chickpea flour
scant 1/2 cup brown rice flour
2 tablespoons arrowroot powder
1/4 teaspoon baking soda
3/4 teaspoon cream of tartar
2 ounces unsweetened baking chocolate finely chopped (or 1/2 cup chocolate chips)

Grease an 8 inch square pan with shortening. Line with parchment paper, leaving some overlap. Grease the paper in the bottom of the pan with more shortening.

In a large bowl, combine the melted shortening, agave nectar and 1/2 cup of the peanut butter until smooth. Beat in the egg and vanilla. Gently beat in the flours, arrowroot, baking soda and cream of tartar. Stir in the chocolate and remaining peanut butter.

Spread evenly into the prepared pan and bake at 350 degrees for 15 to 20 minutes or until it passes the tooth pick test.

Thursday, July 1, 2010

Cherry Chutney


Is it dessert or is it a condiment?  After thoroughly enjoying it a little at a time over the last couple of days I'm still not sure.  What I am positive about however is that it was easy to throw together, its tasty and very very interesting.

 Though I'm not sure what the original recipe has in mind I'm going to go along with the idea that this is mostly likely a dessert because I've liked it a lot after dinner with a scoop of whiskey flavored ice cream on top.  The ice cream was an experiment that went wrong in the texture department as it froze but is still tasty enough on top of other things.  The sweetness of the ice cream gives the cherry and vinegar combination enough kick in the dessert direction.  Originally this recipe calls for some tangy cheese as a topping which sounds intriguing and would probably bring this back over into the condiment/side dish category.

Which ever way you do it this is a very unique treat.  I was lazy and used frozen cherries rather than pitting endless cherries for this recipe and I can't taste any downside to the laziness.  I'm also cheap so rather than using a fresh vanilla bean I fished one out of my homemade vanilla and used part of that boozy goodness to make the chutney which I recommend.  But then I condone adding alcohol to most things. 

Cherry Chutney

3 cups (or 400 grams) red cherries, pits removed
3 cloves
1 tablespoon agave nectar
1 dried Szechuan pepper, crushed up a bit
3 tablespoons fruit vinegar (I used raspberry and fig vinegars from Vom Fass)
1 vanilla bean, scraped

In a medium size pot over medium heat mix cherries, cloves, agave nectar, Szechuan pepper.  Cover and let cook for 5-10 minutes or  until the cherries start to soften and turn into a jam like consistency. Add vinegar and reduce liquid for an additional 5-7 minutes. When the cherries are soft and look like a jam remove mixture from the heat, let it cool and serve in small bowls.  Serve topped with ice cream, whipped cream or some tart crumbly cheese.

Recipe adapted from one at the Citron and Vanille Blog.

Wednesday, June 30, 2010

Sun Dried Tomato Salad

Another day another perfect summer salad.  This one is courtesy of the Lisa's Kitchen Blog where there is no shortage of out of this world vegetarian recipes.  Whenever I want to cook a really unique curry this is the blog I go to because this is perhaps the only other person as obsessed with Indian cooking as I am.  She has some of the coolest recipes and flavor combinations, stuff I'd never think to cook.


Like this salad, I was a little leery of the cooked beans, raw veggies and lots of sun dried tomatoes combo but after I poured on the sun dried tomato dressing I became a believer.  The flavors are just what I was looking for an a warm afternoon when I didn't want to turn on the stove for more than 5 minutes.  The tomatoes and balsamic vinegar create a nice tangy edge for the beans. 

The fella who isn't a huge fan of tomatoes wouldn't stop eating this.  He said it was like a less evil version of mayo encased potato salad.  And he's right the parmesan cheese (I used a half nutritional yeast half ground almonds substitute for vegan parm) and garlic create a pleasant creaminess that reminded us both of mayo but without the heaviness and the fat.  And because there is no mayo involved this would be a killer salad for a picnic. 

This is another salad that is going into heavy rotation on my summer menus.

Tuesday, June 29, 2010

Vegetarian Mexican Salad

This is me trying something new in the hopes of posting more often.

When I cook something unfortunate or something that didn't work for me I'm going to post it and link to the recipe in case you want to give it a try and in the hopes you'll have better luck cooking it than I did.  Maybe you will cook it and love it then tell me where I went wrong.  I make plenty of mistakes I just don't usually take the time to post about them unless they are particularly epic.

And when I make something fabulous that was amazing but the recipe was perfect I'll just do an easy cheater post and point you in the direction of the talented blogger that created it.  This Mexican salad which is a knock off of a dish at Chipotle restaurant is a perfect example.  It comes from the Healthy Irishmen Blog  where chef Gavan Murphy, and sometimes his wife, post fabulous healthy recipes using fresh organic produce.  They  have some great recipes to browse through and aside from the potato and bread dishes most of his recipes are French diet friendly.

The recipe for Vegetarian Mexican Salad is especially worth checking out.  This is the kind of salad that always looks appealing at restaurants but I never think to try to make at home where I can control the fat and salt content.  Now that I know how I will be making this beauty all summer.  The super spicy and tangy dressing is my favorite part but if you aren't into breathing fire you'll want to take the amount of peppers down a notch.  I also cheated to make this salad even easier by buying some jarred salsa (because the fella won't eat raw tomatoes and I was lazy), mashing an avocado on my lettuce rather than making guacamole, and then sprinkling organic canned corn and some cilantro on the salad rather than making the corn salsa. And if you're on the weight loss phase you'll want to skip the corn all together since it has a high GI but there are so many other tasty things on this salad you won't be missing anything.

Friday, June 25, 2010

Pear and Caramel Ice Cream with Rasperry Topping

I've loved ice cream for as long as I can remember.  So it was only natural when I started cooking everything myself that I would eventually start making fabulous ice creams as well.  My fella was even awesome enough to buy me the best ice cream making book ever, David Lebovitz's The Perfect Scoop, for my birthday last year.  I started playing around with making some of the recipes with agave and fructose for the French Diet but never got around to posting about them because I was too busy licking the ice cream maker clean after each experiment.

More recently this same book has been just left sad and lonely sitting on my shelf as I did the elimination diet and found out how truly ill dairy in all forms makes me.  My body can try to deny me many things but the only thing I will not give up is ice cream.  Even if I have to buy $6 pints of coconut milk ice cream sweetened with agave nectar at Whole Foods I will neglect myself other things to afford that ice cream.  So I decided to go back to my favorite ice cream book and start cooking dairy free sugar free versions of some of David Lebovitz's recipes. 

I will not give up ice cream and I will not leave my favorite dessert cookbook to get dusty on the shelf.  So in between moving and looking for a new job in a new city across the country I'm going to treat myself to homemade dairy free ice cream.  This will be the summer that I dare to make dairy free ice cream amazing.

My first experiment was with the Pear Caramel Ice Cream I'd made a couple of times before with heavy cream and really enjoyed.  It's a simple recipe so I didn't have to make a lot of substitutions to make it work as a dairy free recipe.  The toughest part was playing with caramelizing agave nectar.  It is possible but it doesn't quite give the thick, dark, and slightly scorched flavor of caramelized sugar however.  But like many things in sugar free or gluten free cooking if you stop thinking about what you're missing and focus on the new flavor you're discovering its still super delicious.

Pushing the pears through a sieve is a pain in the butt, I know but it is worth it for the creamy texture the process gives you.  If you don't care then by all means eat the grainy slightly chunky mixture as it is or give it a go round in your food processor to break it up a bit.

This ice cream is even better with some raspberry topping to add a tartness to the almost overpoweringly sweet caramel ice cream.  And if you're really feeling out going this all goes great on my Gooey Hazelnut Flour Brownies.  These three things together make the ultimate dessert. But worry not the highly decadent ice cream holds up very well on it's own.   I end up eating the whole batch before I even have time to turn on the oven.


When your agave nectar starts to look like this you've achieved caramel.


Pear Caramel Ice Cream

3 medium-sized ripe pears, peeled, cored and diced
1/2 scant cup of agave nectar
2 cups full fat coconut milk
1/8 teaspoon salt
a few drops lemon juice

Pour the agave nectar into a heavy saucepan, cooking over medium high heat while watching it very carefully.  When it darkens and starts to look like the picture above (this will take awhile, 10 to 15 minutes) begin pushing the liquid around with a heat proof spatula so the middle doesn't burn.

When the agave is a uniformly dark color and syrupy thick stir in the diced pear.  The caramel might become hard or make scary hissing noise but don't be afraid keep adding the pears and stirring the mixture for about 10 minutes or until the pears are cooked through.

Remove the pot from the heat and add about 1/2 cup of the coconut milk and stir.  Now add in the rest of the coconut milk and a couple drops of lemon juice.  

Let this mixture cool to almost room temperature then puree in the food processor until smooth.  Press this mixture though a mesh strainer or sieve with your flexible spatula.  This will remove the tough fibers of the pear.

Chill this mixture then run it through your ice cream maker.


Recipe adapted to be dairy and sugar free from a David Lebovitz recipe in the Perfect Scoop.


Raspberry Topping

handful of fresh or frozen raspberries
drizzle of agave nectar
water, as needed

Drop the raspberries and a generous drizzle of agave nectar into the food processor and blend.  If it is too thick add a small amount of water until you get the consistency you like.  Use to top the Pear Caramel Ice Cream.  This also is a nice topping for your oatmeal in the morning.


Wednesday, June 16, 2010

Greens and Beans

They might not be pretty but these beans have sole.

This is my go-to for when there are random greens wilting in the crisper and random beans threatening to turn evil because I made too many for another recipe earlier in the week.  I can't believe it's taken me this along to post about this considering I eat some variation of it once a week at least.  But here it finally is ready for you to bask in the awesomeness that is it's ease of preparation and it's ability to use up those pesky left over ingredients in a tasty way.

The great part of this recipe is you can change it up with whatever combo of greens and beans you have on hand.  White beans are best: garbanzo, fava, navy, cannellini, or giant white lima beans are all beans I've used with success.  Then mix and match your beans with spinach, kale, rainbow chard, beet greens, or pretty much any other dark leafy green you happen to have around.  Lima beans with beet greens and a drizzle of lemon juice or garbanzos with kale and some fresh rosemary are my favorite combination but feel free to mix and match and let me know what you come up with.

Greens and Beans

1/2 pound of dried beans (or about 2 cups left over, cooked beans)

3 tablespoons oil
2 cloves garlic, diced
rosemary, lemon juice, or other seasoning (optional)
salt and pepper, to taste
handful of greens

If you're starting out with dried beans prepare them according to package directions.  Once you have your beans prepped, in a large (preferably non stick) pan, heat the oil over medium high heat.  When the oil is hot, toss in the beans and cook them, agitating them every so often so that they don't burn, for about 15 minutes or until they are browned on all sides.  If your beans are sticking to the pan or drying out too quickly, pour in a little more oil to moisten things up. 

Once the beans are toasted, lower the heat a bit and add the garlic, any other seasoning you would like and sprinkle with salt and pepper.  Cook for another couple minutes or until garlic is to your preferred level of doneness.  Now add some greens and allow the warm beans to wilt down the greens.  Once your greens are wilted you're ready to eat.

Tuesday, June 15, 2010

Chickpea "Fries"

Just because I'm on a crazy diet doesn't mean I can't have an urge for a burger and fries.  And because I'm highly motivated to satisfy my cravings while sticking to the parameters of the diet I made it happen in a weird and wonderful way.

For burgers we had the very hearty and healthy Quinoa and Mung Bean Burgers from The Whole Life Nutrition Kitchen blog.  They are the people whose elimination diet I'm on so I figured they knew what they were doing.  With some avocado and sprouts they did the trick though without citrus they were a little bland.  Apparently I need to come up with a citrus substitute that doesn't lead to migraines.  Hmm.

Since I'm testing chickpeas to see if they cause a reaction (so far so good...yay!) I found a recipe for chickpea flour "fries" that seemed way too interesting to not try.  They are a little labor intensive but as a potato substitute, it is well worth the effort.  Next time I would mix something interesting directly into the batter though because they were hard to season after cooked.

This diet also has had the odd side effect of me craving odd things like Brussles sprouts which I was never a fan of before.  So I threw together some pan braised Brussles sprouts with some butternut squash thrown in to make then even tastier.   This randomly chosen flavor combination is one I keep recreating week after week.  I even got the fella to eat one Brussles sprouts while calling me "mom,"  I don't even think he tried to feed it to the dog.


Chickpea Fries

2 cups water
1 cup chickpea flour
1 tablespoon olive oil
salt and pepper, to taste

oil for frying

Put 2 cups of water in a medium pot on the stove to bring to boil.

Grease a small baking sheet with a rim and set aside.

When the water is boiling turn heat down to medium low and, slowly begin adding the flour in a bit at a time whisking well so no lumps form.  Continue this process until all the flour is combined with the water and you have a very thick polenta like paste.  Stir in the oil and salt and pepper at this point, mixing well.  Keep stirring as you let the mixture cook for one minute.

Turn the mixture out onto the greased baking sheet.  Careful it's super hot! If you have what I call "barista fingers" that can handle the heat, begin flattening out the mixture until it is about 1/8 of an inch thick.  If you are like my fella  and have lily white programmer's fingers you might need to press this mixture out with a barrier (like a silicone mat or greased parchment paper) between you and the hot goop because you really do need to work with this while it is still quite warm.

When you have it flattened out into a sheet of chickpea goo place the baking sheet in the fridge for 30 minutes or over night. 

When you're ready to eat the "fries" take them out of the fridge and use a pizza cutter to cut them into your preferred shape, the recipe suggests triangles but I wanted mine to cook faster and look like fries so I cut them thin.  Pour about 1/4 inch of oil in the bottom of a frying pan and bring up to temperature.  Fry the pieces of chickpea batter in small batches for about 3 to 4 minutes.  When they are slightly golden brown on the edges remove from oil to a plate covered with paper towel.  While they are still warm, sprinkle with salt or rosemary for added flavor.

Friday, June 4, 2010

Rice Flour Crepes with Blueberries and Coconut Whipped Cream

I haven't been posting much lately because I haven't been eating much of interest.  

See the ridiculous thing is I'm a foodie with serious food sensitivities.  Figuring out that gluten was causing me problems helped out my digestive issues a lot.  Getting rid of dairy made me feel a lot better too.  However there were still things that seemed to be causing me problems and even after keeping a food diary, seeing a nutritionist, an allergist and a gastroentrologist I still couldn't figure out what was making me ill.  Unwilling to "just live with it" as all but one of my doctors advised I decided to take the next step and go on an elimintation diet.

The people over at Whole Life Nutrition Kitchen had one that seemed reasonable so I'm giving it a try.  Eating nothing but green smoothies for a couple days, giving up chocolate, coffee and alcohol and eating only the simplest of unseasoned foods has not been easy.  But after my body got over the initial shock I felt better than I ever had before.  If eating green salads and brown rice with lentils and nothing else was going to get rid of my unending digestive woes I was willing to do it.

At this point I've added in a few foods without any issues so I do have some variety in my diet.  So far I have sadly discovered citrus, cinnamon and parsnips are all problem foods for me.  So as this goes on I'll be healthier and feel great but my diet is getting more and more restricted.  In order to not let thoughts like that get me down I spent the afternoon plotting out a dessert that I could eat on this diet.  Something other than me peeling a mango and eating it like the crazy sweet-food starved person I am.  

Out of that I came up with this recipe for these vegan hypoallergenic rice crepes that fit with the strict parameters of the first phase of the elimination diet.  They are so amazing you would never guess they are missing things like eggs, dairy, wheat or sugar.  I went crazy and made some dairy free whipped cream as well since I was craving it but the crepes though simple are great without anything but your choice of fruit.  The fella and I enjoyed ours with blue berries while sitting out on the porch and enjoying the warm sunny evening.


Vegan Rice Flour Crepes 

1 tablespoon ground flax seed
2 tablespoons hot water

1/2 cup brown rice flour
1/4 teaspoon salt
1/4 teaspoon agave nectar

In a very small bowl mix the ground flax seeds with the hot water and mix well.  Allow mixture to sit undisturbed until it becomes very sticky.

In a medium bowl mix together the remaining ingredients until well incorporated then add in the flax seed mixture.. Your mixture will be very a little runny and gritty. 

Heat a nonstick frying pan over medium heat and gently grease it with cooking spray. When the pan is at temperature add 1/4 a cup of the crepe mixture to the pan and agitate the pan to roll the mixture around the bottom making it as thin as possible. Cook the crepe for one minute then flip and cook for a 1 1/2 on the other side.

Repeat with the remaining mixture, being sure to stir the crepe batter before putting it in the pan as the heavy rice flour will quickly sink to the bottom of the bowl in the time it has taken you to make the preceding crepe.


Blueberry Filling

1 cup frozen blueberries
1 teaspoon agave nectar

Place both ingredients in a small sauce pan over medium heat and allow to simmer until the melting berries turn into a thin syrupy mixture.


Coconut Whipped Cream

1 14-can full fat coconut cream (the kind that separates out)
1 tablespoon melted coconut oil
1 teaspoon agave nectar

Place a metal bowl and the beaters for your electric mixer in the freezer.  Open the can of coconut milk and place in the refrigerator until the solid part of the coconut milk solidifies a bit more and is easier to skim out of the can.

After about 10 minutes remove the coconut milk from the fridge and place the solid mass floating on the top of the can in the frosty bowl that was in the freezer, leaving behind the liquid part of the coconut milk to use for other purposes.  Add the coconut oil and agave nectar to the coconut milk and return the bowl to the freezer until the mixture becomes mostly solid but not frozen through.  This will take awhile, probably between 30 to 90 minutes.  Check it often.

When the coconut mixture is stiff, begin beating the mixture with the cold electric beaters.  You will get both some soft peaks and some cold ice creamy textured bits during this process.  It won't exactly be "real" whipped cream but its so delicious it won't really matter.

Tuesday, May 25, 2010

Chocolate Lava Cake

The only thing sexier than this beautiful little molten pile of chocolate is the woman who wrote the recipe.  

Suzanne Pirret is what would happen if Nigella Lawson and a sultry sex writer got together and decided to write a book.  She's my food writing hero.  She is hot and funny and totally engaging.  Not usually words one uses when describing a cookbook but this one is all those things and more.  Then again I suppose hotness its to be expected from someone wearing a form fitting white dress and 6 inch Louis Vuittons on the cover of a book called The Pleasure is All Mine.  Get your head out of the gutter, it's a book full of fancy but easy recipes for one because eating alone is no reason not to treat yourself well.

Seeing as I've been obsessed with this book as of late I've already shared her recipes for TomYum Kung Soup and Lemongrass Steamed Fish.  But I wouldn't be able to live with myself if I didn't write about the best recipe in the entire book.  It of course involves chocolate and is insanely decadent.  That didn't stop me from making this luscious melty mouth filling treat over a dozen times last week in order to experiment with getting the sugar free version of the recipe perfect.  It was tough but I made it through.  This is the type of rigorous testing I suffer through just for my loyal blog readers.     

In the end I came up with a gluten and sugar free recipe that is so good I couldn't tell the difference between the one that had sugar and the one that didn't.  I have to warn you though Suzanne Pirret says this is a single serving treat, unless you're immune to high doses of sexy chocolate induced caffeination you might want to find someone to share it with.  Or not who am I kidding it's too good to resist eating the whole damn thing.  

If you want to make the sugary version or need help figuring out how making this cake works check out this video for the recipe and watch Suzanne Pirret work her magic.  Someday I'll be the type of person coordinated enough to wear a designer dress and high heels while working with chocolate.  Or at least I can dream.


Chocolate Lave Cake

3 ounces unsweetened dark chocolate

1 tablespoon butter (soy butter also works nicely)
3 teaspoons fructose
1 egg

 1 tablespoon almond flour
1 dash sea salt

unsweetened cocoa powder
drizzle of agave nectar

Preheat the oven to 360 degrees.

In a small sauce pan over low heat very slowly melt the chocolate.  When chocolate starts to melt, briefly remove pot from heat and stir, then place back on heat to further melt.  Repeat the process until chocolate is completely melted and set aside to cool a bit.

Melt the butter in a small mixing bowl then whisk in fructose and egg until well combined.  Slowly begin to drizzle in the melted chocolate, whisking as you pour.  You want to add the warm chocolate a little at a time so it doesn't cook the raw egg.  The mixture should be very stiff and thick at this point, too dense to stir easily and that is the perfect texture.

Add in the flour and salt and stir once again briefly. 

Grease a small ramekin then sprinkle the inside with cocoa powder.   Tap the sides of the ramekin to remove any excess powder then pour the batter into it.  Bake for 9 minutes.  Don't over cook!  

When the cake is done cooking it should be firm on the outside but liquid on the inside.  If you tip the cake over a plate and it slides out it's done.  Drizzle with agave nectar or top with ice cream to take an edge off the bitterness of the chocolate.

Modified to be sugar and gluten free from a Suzanne Pirret recipe in The Pleasure Is All Mine.

Monday, May 3, 2010

Sorrel Quiche

It's CSA season again.  That means its spring (yay no more snow!)  And it also means weekly confrontations with vegetables you have never seen before.  Sorrel? Ramps? Nettles? Say what?  I find it extremely exciting to hunt down recipes for these new vegetables, its like a treasure hunt than ends in a great meal.

This year the fella and I weren't able to go for a CSA since we'll very likely be moving out of state in the next couple of months and didn't want to abandon our box of veggies halfway through the season.  Instead the fella has been enjoying going to the farmer's market each Saturday and playing a little game called "stump Emily with wacky produce."  The star of the first episode of this little adventure was sorrel.  It's in a lot of French recipes but what do you do with it when you have a grocery bagful?  That's a very good question to which I answer; quiche!

But if you're on my site you're either on a low carb diet or just enjoy my typo ridden recipes and I'm gluten free so how do you make a tasty crustless quiche?  In this case covering the bottom of the pie plate with goat cheese worked out nicely as a crust substitute.  In fact this recipe was just all around fabulous and easy.  If you don't have sorrel go for spinach.  And if you're avoiding cow milk cheeses here is a fun tip: ground raw cashews taste very similar to Parmesan so it's a great thing to sprinkle on quiche or pasta without the unpleasant lactosey side effects.

Sorrel and Goat Cheese Quiche

5 ounces chevre
3 cups sorrel, coarsely chopped
1 handful scallions, chopped
4 eggs
1 1/2 cups soy milk
1/4 teaspoon salt
1 handful ground cashews (or Parmesan cheese)

Preheat oven to 375 degrees. Spread goat cheese (or any strong flavored cheese) in the bottom of a well greased pie plate.  Cover with chopped sorrel and scallions. Beat eggs, salt and milk together. Pour over greens. Sprinkle with ground cashews. Bake for 35 to 40 minutes or until top is golden brown.

Tuesday, April 20, 2010

Coconut Flour Bread

This is literally the easiest bread recipe in existence.  The hardest part about it is finding the coconut flour to cook it with.  Coconut flour I must warn you is not cheap.  I think a pound was $12 at my local grocery store.  But it is worth it for the experience and to try a totally new flour.  Coconut flour is ridiculously high in fiber and about a 45 on the glycemic index so it is perfect for this diet.  I really enjoyed having a bread that was different than anything else I've ever baked, it's naturally sweet and has a crisp outside and tender chewy middle that makes it have the mouth feel of toast without actually requiring a toaster.

Actually a word of warning on that issue, unless you have a very narrow toaster, because this makes such a tiny loaf the bread, it will just fall in the toaster never to be heard from again.   So if you want it warm just stick it in a warm frying pan for a minute or so to get warm.  Another thing, grinding up unsweetened coconut you already have at home will not make coconut flour no matter how finely you grind it.  Believe me I've tried and I haven't figured out how to fake it with out lumpy horrible results so this is one case where I'm going to have to advise you to suck it up an pay full price at the store for it.  You won't be sorry you did. 


Coconut Flour Bread

6 eggs
1/2 cup melted coconut oil 
1 tablespoons agave nectar
1/2 teaspoon sea salt
3/4 cup coconut flour 

Mix all ingredients together and pour into a small buttered loaf pan. Bake at 350 degrees for 40 minutes. 

Monday, April 12, 2010

Double Chocolate Flourless Torte

It has been a hell of a day over here in my world so I'm going to just let this fabulous chocolate treat speak for itself.  Long story short; it's amazing and easy and I wish I had not already eaten it all so I could have some right now in my time of need.  Also please feel free to oo and aw over my new dessert plates.  That's all.


Double Chocolate Flourless Torte

1 cup dark chocolate (4 one-ounce squares)
1/2 cup almond flour
1/4 cup cocoa powder
1/2 teaspoon salt
3 eggs
1/3 cup agave nectar
1/2 cup oil

Preheat oven to 350 degrees.

Break up the squares of dark chocolate a little bit (I used unsweetened baking chocolate and still thought the recipe was too sweet) then place in food processor and pulse until coarsely ground.  Remove 1/2 of the ground chocolate for later. 

Add in almond flour, cocoa powder, and salt and combine for a couple more seconds in food processor.  Add eggs to food processor and pulse again, then add in agave, oil and orange zest.  Combine until smooth.  Add the remaining 1/2 cup of chocolate pieces back to the mixture and stir briefly.

Transfer batter into a well greased 10 to 12 inch round pan.  Bake for 20 to 25 minutes or until it passes the tooth pick test.

Adapted from a recipe on Elana's Pantry.

Wednesday, March 31, 2010

Extremely Spicy Bean Curry

The fella and I love spicy food especially of the Indian variety but this recipe was something else.  He was actually pretty okay with it but I made the mistake of trying it for the first time while I was at work.  I wasn't expecting it to be that overly spicy because I'm no wimp.  Boy was I wrong.  Gladly the lunch room was empty that day because this curry was so hot I was crying.  In a very good and happy way its just I don't exactly make a habit of sitting alone in public at work weeping over my food.  It gives people the wrong impression I guess.

This curry is so good it manages to both be very very hot and tasty at the same time.  So if you're not big on spice I would suggest making it with the least amount of chilies suggested in the recipe and it should have a nice bit of kick to it.  If you really want to challenge yourself go ahead and add all the chilies and be prepared to have a pleasant fire in your mouth. 

And don't be put off by the long list of ingredients, they are mostly spices that require no effort on your part other than tossing them in the pan so it is actually a really quick meal once the beans are cooked.  I even cheat by making my beans in the crockpot while I'm at work so I can start cooking as soon as I get home.  With that short cut this very hot meal takes almost no effort.

So there you go all my friends that are fans of insanely hot food, give this a try and let me know if it's hot enough for you.  If not I'm scared of but impressed by your idea of spicy.


Extremely Spicy Bean Curry

1/2 cup of dried chickpeas
1/4 cup of dried kidney beans
1/4 cup of lentils (puy lentils or black lentils are best)
2 tablespoons of coconut oil
1 generous teaspoon of black mustard seeds
1 teaspoon of cumin seeds
1 teaspoon of ground cumin
1 teaspoons of agave nectar
1 1/2 teaspoons of sea salt
1 teaspoon of ground coriander
1 teaspoon of turmeric
dash of cayenne
2 - 4 dried red chilies
1 large tomato, finely chopped
1 small clove garlic, minced
2 - 4 fresh red or green chilies, finely chopped


Rinse the chickpeas, kidney beans and lentils in a strainer. Soak overnight in enough water to cover. Drain, transfer to a large pot and bring to a boil. Reduce the heat to low, cover and simmer until the beans are tender - roughly 1 hour.  Or put beans in crockpot covered in water at low heat for 6 hours.

Heat the oil in a frying pan over medium heat. When hot, toss in the mustard seeds and cook until they begin to pop. Add the cumin seeds, ground cumin, agave nectar, salt, coriander, turmeric, cayenne and dried chilies. Stir quickly and add the tomatoes, garlic, and fresh chilies. Stir a few times and cook until the tomato is softened - roughly 5 minutes.

Drain off some of the water from the cooked beans and add the tomato mixture to the pot. Simmer, uncovered, stirring occasionally, for another 10 - 15 minutes or until the sauce thickens. Garnish with the fresh parsley or cilantro.  

Original recipe from Lisa's Kitchen blog. 

Tuesday, March 30, 2010

Vegan Mac and Cheese

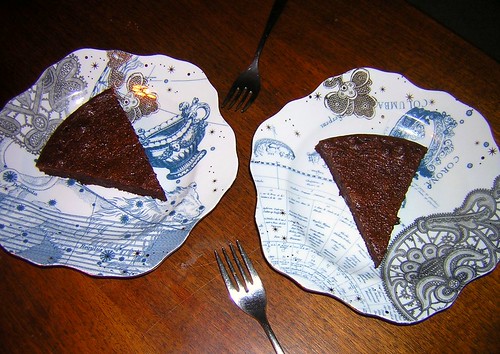
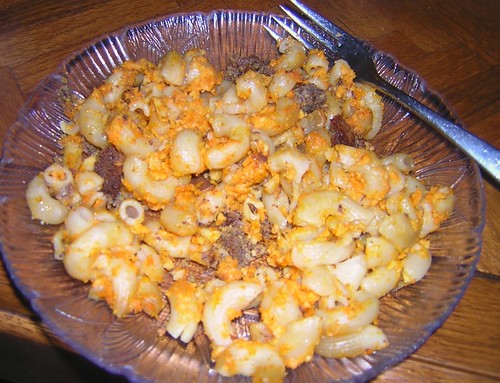
 It's tasty and it's the right color but it still didn't cure my mac and cheese craving.

Anyone on this crazy French Diet is familiar with figuring out diet friendly substitutions for the forbidden foods you crave.  Pureed cauliflower takes over for the super carby mashed potatoes.  Almond flour becomes your best friend when you crave naan or pizza.  And ribboned vegetables make a great stand in for pasta.  But sometimes the thing you are craving is just out of your reach because it just might not be possible to make with the dietary restrictions you're working with.

 Just this sort of culinary failure is plaguing me today.  All I wanted was some macaroni and cheese.  I have no idea why.  When I could have eaten all of it I wanted it never occurred to me to eat it because it was never a favorite of mine.  But true to my contrary nature the second my body decided to was totally intolerant to dairy my brain went on a frantic quest to try to convince me I needed to eat mac and cheese immediately or the world would end.

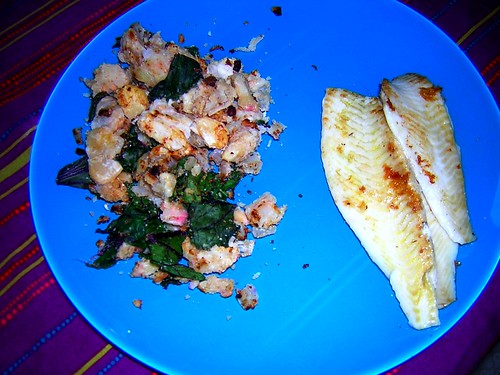
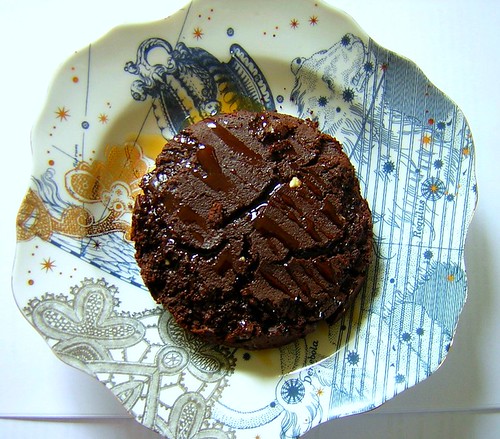
I put off the craving as long as possible but today I gave in and looked into the ridiculous possibility of vegan cheese.   I'll try anything once so I gave it a shot with what was touted as the "world's best recipe for vegan cheese" on many a food blog.  Turns out making vegan cheese is a time consuming, soul killing, messy process with a very strange end result.  The sauce I made was cheddar cheese colored and tasty but it was not at all cheese like or cheese flavored but I continued on hoping that once it mingled with my gluten free pasta and breadcrumbs and got toasty it would be amazing.

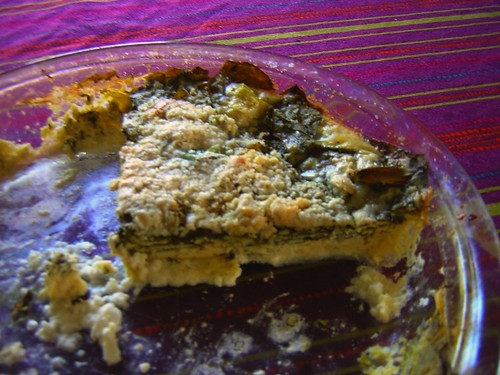
It was not meant to be so.  After being baked, what little moisture was in sauce had disappeared, I'm assuming because I omitted the potato from the original recipe and was having a hard time reading the original recipe due to it being in an oddly ordered and so put in the wrong amount of margarine.  However for a dry distinctly uncheesy pasta dish it is really good and I'm not just saying that.  If someone presented it as yummy noodles I would be very happy eating it.  It was only my strong desire for mac and cheese that made it not a totally satisfying experience.  Out of the context of cheese it's tasty.

So I rearranged the recipe for (I hope) ease of preparation in the hopes someone else will try this with better results to let me know if I should try to make it again.  If  you want to give it a go with the potato from the original recipe then take out one cup of the carrots and use a small red potato then let me know what happens.

Vegan Mac and Cheese

NOODLES

4 quarts water
1 tablespoon sea salt
8 ounces macaroni

Just in case you don't know how to make pasta:  In a large pot, bring the water and salt to a boil. Add macaroni and cook until al dente. In a colander, drain pasta and rinse with cold water. Return to pot and set aside.

BREADCRUMBS

4 slices of bread, torn into large pieces
2 tablespoons non-hydrogenated margarine (I used Shedd's soy margarine)

In a food processor, make breadcrumbs by pulverizing the bread and 2 tablespoons margarine to a medium-fine texture. Put in a bowl and set aside.

“CHEESE" SAUCE

1 medium shallots, peeled and chopped
1 and 1/4 cup carrots, peeled and chopped  (about 3 medium carrots)
1/2 of a small onion, peeled and chopped
1 cup water

1 small clove garlic, minced
1/4 cup raw cashews
2 teaspoons sea salt
1/4 teaspoon black pepper
1/4 teaspoon paprika
1/8 teaspoon cayenne
1/4 teaspoon Dijon mustard
1/3 cup non-hydrogenated margarine
1 tablespoon lemon juice

Preheat oven to 350 degrees. In a saucepan, add shallots, carrots, onion, and water, and bring to a boil. Cover the pan and simmer for 15 minutes, or until vegetables are very soft.

In a food processor, blend the garlic, cashews, salt, black pepper, paprika, cayenne, mustard, margarine, and  lemon juice. Add softened vegetables and cooking water to the blender and process until perfectly smooth.

Pour “cheese” mixture onto the pasta and toss together until pasta is completely coated. Spread mixture into a 9 x 12 casserole dish, sprinkle with prepared breadcrumbs, and dust with paprika. Bake for 30 minutes or until the cheese sauce is bubbling and the top has turned golden brown.

Original recipe from Veg News food blog.

Wednesday, March 17, 2010

Vegetarian Crockpot Chili

It's been a busy week so there has been a lot of crockpot action going on in my kitchen.  Yesterday the fella threw this chili together for about the millionth time and I couldn't believe I hadn't written about it yet.  It's tasty and a great low fat/high protein meal. 

Aside from the basic seasoning and the inclusion of beans you could add whatever you have in the kitchen to this recipe to create whatever chili you're in the mood for that particular day.  It's a very forgiving recipe and beans hold up great in the crockpot so you really can't go wrong.  If you don't like spice you could skip the chipotles or go for a milder jalapeno.  Feel free to use whatever combination of beans you have around.  We used kidney and cannellini beans since we had a bunch left over from the pottage earlier in the week (I'm terrible at estimating how many dry beans to cook in order to get the amount of beans I need for a recipe.)   But we're also fond of a combination of black beans and chickpeas.

I like to top this with a little sour cream or yogurt and cilantro to add a little something extra to it while still sticking to the vaguely southwestern theme.  But if you wanted to be naughty some melted cheddar cheese on top would be amazing.  So go crazy and treat yourself to a meal  that cooks while you're at work.


Vegetarian Crockpot Chili

2 tablespoons oil
4 cloves garlic, minced
1 onion, chopped
1 teaspoon crushed red pepper flakes
1 teaspoon cumin 
2 tablespoon chili powder 

2 teaspoons oregano
2 tablespoons soy sauce 
1 28-ounce can tomatoes (or about 1 pound fresh tomatoes chopped) 
2 cups vegetable broth
1 6-ounce can tomato paste 
2 chipotles with some of their sauce, chopped
2 14-ounce cans black beans, drained
2 14-ounce cans red kidney beans, drained
salt and  pepper, to taste 

sour cream or yogurt, as topping
cilantro, as topping

    Sautee the onion, garlic and red pepper flakes until the onion is soft, about 3 to 5 minutes. Add the chili powder and cumin and cook for two more minutes. 

    Place the onions along with all the remaining ingredients, except sour cream and cilantro in the crock pot, stirring to combine.  Cover and cook on low for 6 to 8 hours.

    Top with sour cream and cilantro just before serving.

    Recipe made much more interesting from boring original over at  About.com

    Monday, March 8, 2010

    Ten Minute Tasty Asparagus and Brown Rice

    Sure Rachel Ray can make a slew of 30 Minute meals when all of her ingredients are pre-chopped and pre-measured.  That's not that big a deal really, we could all do that if we had a posse of people behind the scenes to prep our food for us too.  Worst of all her recipes are seldom very healthful.  Sometimes tasty and interesting but with enough fat and spice most things are.  

    Heidi Swanson over at the beloved blog 101 Cookbooks does what Rachel Ray only wishes she could.  Some of my favorite recipes from her are ones that are done in a matter of moments by using up the left over bits from the fridge and best of all she's a master at making delicious but healthy food.  The trick to these recipes like the one for Asparagus and Brown Rice below is to have everything prepped and ready to go before hand.  It might seem like a long list of ingrediants but all the work they require is chopping and cooking briefly.

    Aside from being a snap to make if you skip the almonds this dish is also excellent for those low fat/high carb nights on this diet that can get so tedious to try to cook for.  It has all sorts of benificial fiber from the brown rice and garbanzos, crisp green asparagus and the tahini dressing adds worlds of flavor wihtout tons of fat. This is one of my favorite go to meals for when I have left over brown rice and garbanzos, those are the important bit you could sub in any veggie you had on hand for the asparagus with similar results.


    Ten Minute Tasty Asparagus and Brown Rice

    Tahini Dressing:
    1 garlic clove, chopped
    1/4 cup tahini
    zest of one lemon
    scant 1/4 cup freshly squeezed lemon juice
    2 tablespoons extra-virgin olive oil
    2 tablespoons hot water
    scant 1/2 teaspoon fine grain sea salt


    3 tablespoons extra-virgin olive oil
    1 or 2 14-ounce cans of chickpeas, drained

    2 cloves garlic, minced
    1 medium yellow onion, chopped

    1 bunch asparagus, cut into 1-inch segments

    3 cups cooked brown rice
    1 cup almond slivers, toasted
    fine grain sea salt

    Make the dressing by whisking together the garlic, tahini, lemon zest and juice, and olive oil. Add the hot water to thin a bit and then the salt. Set aside.

    Add roughly 3 tablespoons of olive oil to a big skillet over medium-high heat. Swirl the oil around to coat the pan, then add the chickpeas and sprinkling of salt. Let the beans saute there for a couple minutes.

    Add the garlic and onions. Stir for a minute. Stir in the asparagus with another pinch or two of salt, cover with a lid for a minute or two to steam - just until the asparagus brightens and softens up just a bit. Uncover and stir in the rice and almond slivers, reserving a few almonds for garnish. Taste and add more salt if needed . Serve in a big bowl drizzled with a few tablespoons of the tahini dressing, let each person add more dressing to their tastes.

    Original recipe from 101 Cookbooks blog.

    Sunday, February 28, 2010

    Gluten Free Sugar Free Gingerbread Cookies


    These little lovelies are proof that you don't have to give up amazing flavor to eat gluten free and sugar free.  I took them to two different parties this weekend and everyone loved them.  Total sugar and wheat addicts were passing over sinful store bought chocolate covered treats in favor of these simple little cookies.  Now that is saying something when sugar eaters go for your cookies instead of Peeps.  I was even able to provide a vegan party goer with a tasty treat since these cookies happen to be egg less as well.

    I first made these for Christmas, using half the dough.  The rest of the dough I discovered recently and it was just as great as it was when it was first made.  So yes the recipe makes a huge number of cookies but it's worth it to save half of them for latter.  I love leaving surprising myself by hiding random things in the freezer that will make me happy when I find it later.  It's one of the small pleasures of life.

    The frosting issue is still a problem however.  I've tried twice now to make sugar free frosting without some unwelcome ingredient like cream cheese or boxed pudding mix and neither worked out well at all.  I tried this recipe on Saturday and ended up with a pot of sticky brown goo, I'm still not sure what I did wrong but it didn't work out for me.  So I will keep trying.  If you have a good sugar free frosting recipe please do send it my way.

    Really these cookies are so good they don't need frosting though.  They are just spicy enough from the cinnamon and amaranth flour that the agave and molasses even it out for a perfect gingerbread flavor.  They are totally addictive so beware.

    Gluten Free Sugar Free Gingerbread Cookies

    2 1/3 cups brown rice flour
    1 1/2 cups amaranth flour
    1 1/2 cups arrowroot powder
    2 tablespoons baking powder
    2 teaspoons baking soda
    1 tablespoon ground cinnamon
    1 teaspoon ground ginger
    1/2 teaspoon ground nutmeg
    1/2 teaspoon ground cloves
    1 teaspoon sea salt

    1 cup agave nectar
    1/4 cup molasses
    1/4 unsweetened applesauce
    1/3 canola oil
    2 tablespoons vanilla extract

    Preheat the oven to 350.  Line 2 baking sheets with parchment paper.

    In a large bowl, stir together the rice flour, amaranth flour, arrowroot powder, baking powder, baking soda, cinnamon, ginger, nutmeg, cloves, and salt. 

    In a separate bowl, combine the agave nectar, molasses, applesauce, canola oil, vanilla.  Mix well and pour over the dry ingredients.  Stir until the 2 mixtures are thoroughly combined.  Cover and chill the dough 2 hours or more.

    Sprinkle your work surface with arrowroot powder.  Divide the chilled dough into 4 equal parts.  Return 3 parts to the refrigerator to keep chilled.  Roll out the dough 1/4 inch thick.  Cut out gingerbread with cookie cutters and place them on the prepared baking sheets.  Bake for 6 to 7 minutes.

    The cookies will be slightly soft when they are removed from the oven.  Allow to cool for 5 to 10 minutes then move to cooling racks to cool completely.  These freeze very well in plastic freezer bags.  Makes approximately 5 dozen cookies.

    From Baking with Agave Nectar  by Ania Catalano.