Thursday, December 31, 2009

Pear, Brandy and Walnut Cranberry Sauce


I remember the first holiday my family switched over from the canned “cranberry” abomination to making our own.  It was my third year in college when I spent a lot of time watching the Food Network instead of writing papers.  Which is not to say I didn't write the papers just that I did the writing at literally the very last second before they were due, editing and printing the papers minutes before catching the bus to class.  All the while frantically praying to the goddess of procrastination,  my long time muse.  I did well in all my classes I was just much more interested my new passions born out of living alone for the first time in a big city; cooking, coffee, and beatnik poetry. 

Unfortunately my last minute writing technique was so successful that it's the only way I know how to write to this day.  Which is why I often neglect this blog unless someone in my life writes me an email that basically amounts to “blog today or else...”  So if I've been promising to write about something fabulous I fed you or told you about or a recipe you sent me to try and it isn't blogged about yet, you need to write me a kind but pressing email telling me to hurry up and write about whatever it is.  It works, promise.

Anyway somewhere along the line in the plethora of cooking shows I was watching I got the itch to make real cranberries since my brother was and still is ion love with all versions of cranberry sauce.  So I bought cranberries and enlisted my little brother to help me make them.  We just cooked the simple version off the back of the bag.  Equal parts sugar and water, the bag of cranberries and boil until the berries burst. 

We were fascinated watching the berries burst all over the pot which my mother heard from the other room and probably imagined as something much more dangerous than what was actually happening because she came to watch too.  It really is the simple pleasures in life because we had more fun making those berries than most of the rest of dinner and they were delicious, we never went back to buying the canned stuff

As the holidays went on we got creative and started adding orange zest or cinnamon and comparing them hot versus how good they were cold.  Soon my brother and I were making 3 or 4 batches of cranberries to feast on  while home for the holidays.  It became an obsession and is still a holiday tradition to make too many cranberries.  I certainly wasn't going to shun the tradition this year but since I'm making a habit of making new and interesting food I knew I would have to up the ante on the creativity of the cranberries this year.

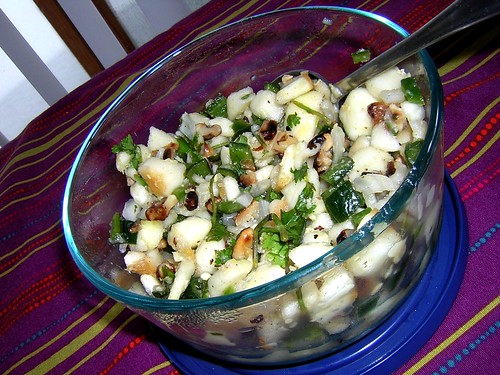
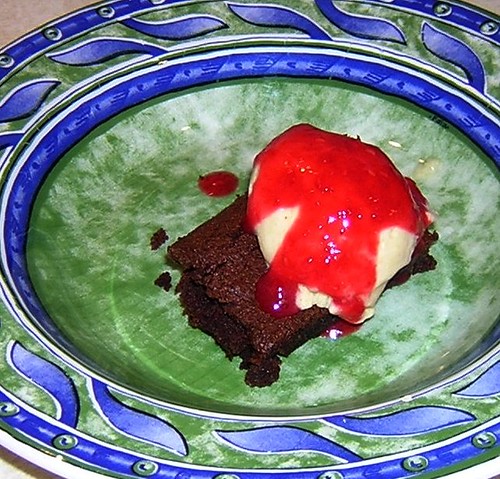
The fella and I made these for Thanksgiving and fell in love.  They are the best cranberries ever.  With brandy, pears, and walnuts how could you possibly go wrong.  Though they take a little effort they are very much worth it and will wow everyone at the table.  My family, the fella, the chef and I made these disappear very quickly.  We ate them with dinner, then a little bit after dinner, then for dessert, then on top of dessert.  They are great alone but on top of coconut ice cream they are divine.  Dip in a gluten free Christmas cookie and you may never leave the table.  Or you may become so drunk on cranberries you end up playing hours of ridiculous card games.  Either way you will be very happy.

Funny to think my cooking obsession started with cranberries and has led me to French cooking and a food blog.  From playing with food with my little brother to my brother being old enough to drink and me cooking with these two crazy lovable guys.  From living for a year in Iowa with no kitchen to making gourmet meals every night. 

Okay enough end of the year nostalgia.  It's been an amazing journey 2009 but its time to move on to frog legs and shirataki noodles.  In other words, you  haven't seen anything yet.

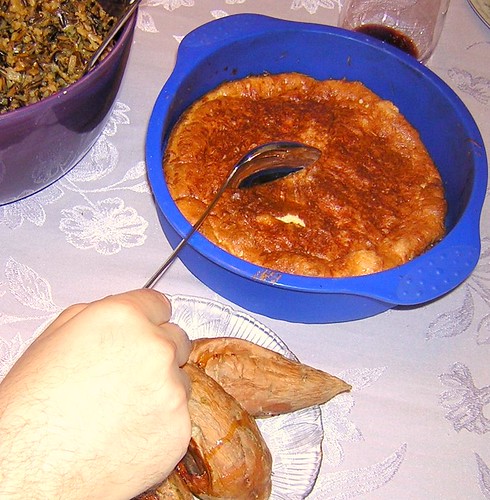
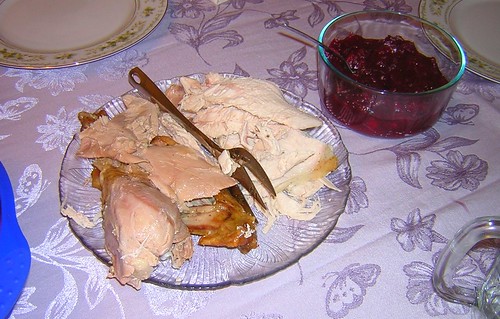
Oh and will someone convince Jacob to share with the rest of the world what he did to the turkey?  It was the best turkey I've ever tasted and I wasn't around to watch his secret ninja cooking techniques to find out what he did.


Pear, Brandy and Walnut Cranberry Sauce

1/3 cup, plus 2-3 tablespoon brandy, divided use
water

2 cinnamon sticks, each broken in half
8 black peppercorns

12 ounces fresh cranberries, picked over
1/2 cup agave nectar
2 medium firm but ripe bartlett pears, peeled

1/2 cup chopped walnuts, toasted

 Pour 1/3 cup brandy into liquid measuring cup; add enough water to reach 1/2 cup liquid total. Set aside. Place broken cinnamon sticks and peppercorns in center of small piece of cheesecloth or large tea bag and tie closed using kitchen twine.

In medium saucepot, combine cranberries, agave nectar and cinnamon-pepper bundle. Using large holes on a box grater, grate pears into saucepot. Stir in brandy-water mixture.

Over high heat, bring cranberry mixture to a boil; reduce heat to medium and cook 10-12 minutes, or until cranberries have burst and the mixture has combined, stirring occasionally. Remove from heat.

Stir in remaining 2 to 3 tablespoons brandy. Let cool. Remove and discard cinnamon bundle. Stir in 7 tablespoons toasted walnuts. Transfer mixture to small serving bowl; sprinkle with remaining walnuts.

Original recipe from Food 52.


Wednesday, December 30, 2009

Failed But Yummy Souffle


I've had a lot of fun cooking this year.  I ate a lot of things I never thought I would, cooked things I've never attempted before and learned a completely new way of eating.  There are just two cooking goals I had for myself before the year ended that I didn't get around to: mastering a soufflé and making a gelatin dessert that set properly.  So on Christmas day with the chef to egg me on I thought I would try a simple (or so I thought) soufflé so I could get that obstacle out of the way. Like so many things in life it didn't turn out the way I thought it would but it was still fun and delicious.

A lot of little things went wrong while I was trying to soufflé  I forgot to sift my flour.  The whisk wasn't perfectly dry.  My safety net disappeared to attend to a cat feeding before the snow got too bad emergency just as I was starting the part of the process I was unsure about.  I was flustered from being at an annoying job for the 6 hours before dinner.  And my family was walking in the door just as I got to the step where I couldn't walk away from my ingredients without them falling.  It wasn't an ideal situation to begin with so I wasn't too surprised when my soufflé didn't poof.  Fearing just this out come I had given the fella strict instructions on which bottle of wine to open for me in my fallen soufflé sadness and just the right tone to say “there there bunny” to me.

I pouted over the sad looking soufflé but since everything else on the table looked so fabulous I never managed to look any where near as pathetic as my fluffy obviously starving to death princess did. 


Besides I had every one I loved around a big purple table with amazing food, even a soufflé failure couldn't get me down.  And the surprising thing was that the soufflé, as unattractive as it looked tasted really great.  A creamy cheesy warm treat.  It nicely filled the gap in the dinner left by the crispy rolls or focaccia  we usually have at holiday dinners. 

So the good news was the soufflé despite its ugliness was tasty enough to warrant the effort which means I'll be motivated to try it again on a day with less stress when I can better focus.  And Julia Child has an entire section devoted to soufflés in Mastering the Art of French Cooking that I apparently need to read over a couple more times.  I will make a puffy wonderful soufflé happen.  Most people have resolutions about losing weight, I have them about cooking somewhat complicated food stuffs.  I'll let you know when I succeed.


Cheese Soufflé

1 teaspoon butter
1 tablespoon Parmesan

1 cup milk
3 tablespoons butter
3 tablespoons sifted rice flour
1/2 teaspoon salt
1/8 teaspoon pepper
1/8 teaspoon cayenne pepper
1/8 teaspoon nutmeg

4 egg yolks

5 egg whites
1/8 teaspoon salt
1 cup coarsely grated swiss or Parmesan cheese

Before you start:  place your eggs on the counter so they will be room temperature when you need them, measure out all your ingredients and have them close at hand, and make sure all the bowls, whisks and mold are very clean.

Preheat oven to 400 degrees.

Butter inside of soufflé mold and sprinkle with cheese.  Set aside for later.

In a small pot put the milk on a medium heat to begin boiling.

Melt the butter in a medium saucepan.  Stir in the flour with a wooden spatula and cook over moderate heat until foamy, about 2 minutes.  Remove from heat.  When mixture is no longer bubbling pour in the boiling milk.  Beat vigorously with a whisk until well blended.  Beat in the seasonings.

Return to medium high heat and boil, stirring with the whisk for about 1 minutes.  Sauce will be very thick when you're finished.  Remove from heat and set aside while you separate eggs.

Drop the four egg yolks one at a time into the hot sauce pan, reserving the whites in a metal or ceramic bowl for later in the recipe.  With the whisk beat the yolks individually into the sauce.  Continue with each yolk until well incorporated.  Keep the mixture at a tepid temperature while preparing the egg white mixture.

Beat the five egg whites and salt with a whisk or in a stand mixer until stiff by starting at a low speed, gradually increasing it as the eggs become foamy.  Take about a minute to raise mixer speed from low to high, constantly using a spatula to push the eggs off the sides of bowl and into the beaters.  Stop when the beaters leaves slightly shiny peaks in the surface of the mixture.

Stir a big spoonful of the egg whites into the warm sauce.  Stir in all but one tablespoon of the grated cheese.  Delicately fold in the rest of the egg whites being careful not to over fold and break the fuffly consistency.

Put the incorporated soufflé mixture into the prepared mold.  It should be about 3/4 of the way full.  Tap bottom of mold on counter to smooth the surface of the soufflé  Sprinkle with the remaining cheese.

Set rack in middle of the oven and immediately turn heat down to 375.  Do not open the door for the next 20 minutes.  In 25 to 30 minutes the soufflé will have puffed a couple inches over the rim of the mold and the top will be nicely browned.   Serve at once.

Gluten free version of recipe from Julia Child's Mastering the Art of French Cooking.

Monday, December 28, 2009

Wild Rice Stuffing and Kale Chips


 This year was my first hosting Christmas dinner and trying to do it gluten free in a way that everyone would still make everyone happy.  Which was exciting and nerve wracking all by itself.  The problem was I had to work for 6 hours Christmas afternoon which left me no time to actually cook much of the meal itself.  Luckily I have two very talented men on hand in my kitchen.  The fella and the chef were kind enough to do most of the cooking and did a fabulous job. 

There were a couple moments while I was stuck at my desk taking relay calls listening to other people talk about their meals and wondering what was going on in my kitchen.  It was torture to be at work, on Christmas nonetheless, while the chef and the fella handled everything back home.  I wanted to play food, not eavesdrop on other people's phone calls, darn it.  And it was driving me crazy wondering what exactly would happen to the recipes I had handed off to the men that morning.  Would I come home to alien brain frittered stuffing or a bacon wrapped smoked turkey with an octopus stuffed in it?  The anxiety was for naught, the boys did amazing.  The only food that didn't quite turn out were the things I cooked oddly enough, but that's a story for another day.

It was lovely having my family over.  I think they even enjoyed the not so traditional food and the lack of gluten.  My parents even surprised us by bringing their adorable little present opening food hound who laid under the table to whole meal totally offended that no one was dropping any food on her and that she wasn't the center of attention.  You can see how neglected and abused she is cuddled up amongst the various feet that aren't currently petting her.

The dogs weren't the only ones giving me cute sad eyes though.  I probably nearly broke the chef by forcing him to use a recipe and one that didn't call for any fun ingredients even.  He obviously isn't too torn up over the stifled creativity however as I witnessed him stuffing cannelloni beans and chicken thighs in tiny pots last night so he's recovered. 

And after having the mushroom wild rice stuffing from a recipe in Bon Appetit I can safely say it would have been improved by a little creativity or perhaps just some nuts to give it a little texture.  It was tasty stuffing and the mushroom with wild rice combination really works, it just needed a little something extra to make it pop.  The cranberry wild rice stuffing with toasted hazelnuts I made for Thanksgiving was much more exciting and will probably be what I make for stuffing related situations in the future.

One of my brief contributions to the meal was to make a couple different varieties of kale chips to snack on while waiting for the meal to finish.  My mother sent me the idea for kale chips during the summer when I was lamenting yet another CSA box full of greens. Now I wanted to make them for her to see what they were like. 

Kale chips are super easy and tasty way to use up left over kale or any other hearty green you aren't usually a fan of.  All you need is salt, pepper and the seasoning of your choice and you have a healthy simple snack.  These always disappear right away at my parties.  It isn't until afterwards I let people know they just willingly devoured leafy green veggies.  They have the same taste and texture of regular chips but are so much better for you.  I can't recommend them  enough.  Just don't get into an in depth conversation about cephalopods while making them and manage to salt the tray of kale 3 or 4 times because that's just too much salt and even your supportive mother will not eat many of the chips at that level of sodium.  Not that this has ever happened to me or course,  totally hypothetical. 


Kale Chips

1 bunch kale
oil, for drizzling
salt and pepper, to taste
1 pinch, cayenne pepper
seasoning of your choice, to taste

Preheat oven to 350 degrees.

Rip the kale leaves into bite sized pieces, making sure to remove all the hard stems.  Run the pieces of kale through a salad spinner until dry or wash them thoroughly and then pat dry.  Place the kale across a large cookie sheet without overcrowding it. 

Spray or drizzle kale with oil, then toss until just oiled on all sides, using an oil sprayer makes this process super easy if you have one.  Sprinkle the kale with salt and pepper to taste. Sprinkle with a pinch of cayenne pepper and the seasoning of your choice--Montreal steak seasoning or 5 spice powder work really well—or extra cayenne is delicious if you want something really basic. 

Arrange the kale pieces evenly over the pan so that they don't over lap much, do several batches if you have to.  Place in oven for about 10 minutes then check on them.  The kale should be crispy but not brittle or blackened.  If it is still moist in places, agitate the kale and place back in the oven for about 5 minutes, watching it closely so that it doesn't burn.

Wait for kale chips to cool.  Remove from pan with spatula and serve.


Thursday, December 17, 2009

Curry Glazed Chicken Legs and Walnut Apple Salsa

By now we all know I'll use any excuse to put curry on anything so curried poultry with a side of apple salsa screamed “make me now” and “oh my god perfect cold weather meal” all at the same time.  The original recipe called for duck legs which I'm sure would have been delicious but I'm simple and cheap so substituted in less fatty and far less pricey chicken parts with just as amazing results. 

And as the fella, the chef, and I found out before our wacky wine party last weekend this is the perfect recipe to make just before a get together because it is the gift that keeps giving.  The fella and I ate the chicken and a bit of the salsa for dinner the night before, the three of us ate the left overs, there was a gloriously large amount of salsa left over to serve the guests with some blue corn chips, and the curried chicken fat that we poured off the meat got added to a polenta the chef threw together.  Which isn't even to yet mention how amazing all of the parts of this meal were. 

The spicy tender lightly curried chicken is crispy and delicious.  The salsa is mind boggling in it's greatness.  It's just spicy enough and the crisp apples mixed with the crunchy walnuts is something we all loved so much we were slapping our foreheads at not thinking of it before.  Walnut and apple salsa may be my new favorite condiment.  I can't recommend it enough.  And that polenta the spicy chicken fat went into was amazing not to mention purple.  I highly approve of all things purple.  But that's for Jacob to blog about (the polenta not my fetish for purple objects.)

 Curry Glazed Chicken Legs

4 to 6 chicken legs
3 cloves garlic
2 minced jalapeños
2 teaspoons curry powder
2 tablespoons minced ginger
1 orange, zested
Salt and pepper to taste
Extra-virgin olive oil

1/2 cup orange juice
1/2 cup lime juice (from about 4 limes)
1 cup chicken stock.

Preheat the oven to 400 degrees. Rinse and pat the chicken legs dry with paper towels.

Using a food processor blend the garlic, jalapeños, curry, ginger, zest and a large pinch of salt and pepper. Stir in enough olive oil to make a paste, 2 to 3 tablespoons.

Rub the paste into the chicken legs, season with salt and pepper and place in a large roasting pan. Roast for 1 hour to render the fat. Lower the oven temperature to 325 degrees. Pour off the fat and reserve for another use (such as creating a spicy chicken and blue corn polenta.)

Pour the orange juice, lime juice and chicken stock over and around the duck pieces and cover the pan loosely with parchment paper or foil. Return to the oven for 45 minutes to tenderize the meat.

Transfer the chicken legs to a platter. Scrape the edges of the pan with a spoon to incorporate the caramelized bits into the juices. Strain. Taste the pan juices and adjust the seasoning with salt and pepper as needed. Keep warm. Just before serving, crisp the duck in a hot oven for 15 minutes. Spoon the pan juices over the duck legs and serve with walnut apple salsa.


Walnut Apple Salsa

1/4 cup lime juice (from about 2 limes)
2 tart apples, peeled and cored
1 small onion, finely diced
A handful of cilantro, roughly chopped
1 jalapeño pepper, seeded and minced, seeds reserved
1 poblano pepper, seeded and minced
2 tablespoons grated ginger
1 tablespoon agave nectar
Salt
1/2 cup chopped walnuts, toasted.

Pour the lime juice into a medium bowl. Finely dice the apples and toss with the onion in the juice.

Add the cilantro, peppers, ginger and agave nectar, tossing until well combined. Season with salt to taste. Add back some of the reserved jalapeño seeds to adjust heat of salsa.

Just before serving, add the walnuts.
Original recipe from New York Times Magazine.

Wednesday, December 16, 2009

Technical Difficulties and a Rant

I've just found out that I'm not actually sitting over here talking to myself in cyberspace for the last couple of months, its that there is just some weird glitch that has been hiding all your lovely comments from me. So if you've commented and I haven't gotten back to you it's because technology has failed us and I didn't see any of them. I appreciate all your comments and feedback a lot so keep them coming, you just might get a belated response. If you want a more immediate response feel free to e-mail me.

Also I didn't think I had to mention this but it was brought to my attention last night that I apparently do. All the pictures I post here are my personal pictures that I took and host and are copyrighted to me. I don't put water marks on them because I want you to see the yummy food not my name sprayed across them. So feel free to cook anything I post here and link back to my pictures just don't steal my pictures and my original recipes without even giving me credit.

Food bloggers are a community. I see yummy things on other people's sites and cook them, modifying them for my gluten free and sugar free diet for the benefit of others on the same journey I am on. But when I post these recipes to share I always link them back to the person I found the idea from. I am 100% honest about the fact that many of these recipes are not mine I'm posting my experience about cooking what they created and telling you where to find more of their ideas.

People worked hard on these recipes and posting them so other people could enjoy them, I would never steal their creative spirit by passing them off as mine. So it's not very neighborly when the few recipes I did create are being posted without being credited back to me in any way. If you like what you found here give me some credit when you repost it. You wouldn't steal the braised cucumbers out of my kitchen so why steal my photos and recipes.

How rude. Now lets all go have a gluten free brownie and play nice.

Tuesday, December 15, 2009

Flax Seed Foccacia


Someday soon when I have a couple seconds to breath I will tell you all about the fabulous weird wine and bizarre food party I hosted on Sunday. It was fabulous and oh so much fun. I adore my wine loving friends and spending the day in the kitchen dreaming up tasty culinary oddities with Jacob is my new favorite hobby. We did a lot of playing off each other to co-create yummies for this party. It was a lot of fun and it was all highly amusing.

This focaccia is what I made as a place to spread the very spicy and complex mustards that Jacob brought along homemade the night before. He posted the recipes for those on his blog (which you should be reading) and so here is the bread to go along with it.

They worked out really well together. The bread was just moist and hearty enough to be a perfect base for the mustard. I was surprised that it was so good for such an embarrassingly easy recipe, this is rarely the case for gluten free bread after all. This bread was also a nice place to spread cheese. Next time I may even try spreading it in a cookie sheet to make a thinner crisper bread that's more crostini like.

The wheat eaters at the party had no idea this was sans gluten and the plate of focaccia disappeared faster than you could say “mustard seed.” I'd say that counts as successful party food.


Flax Seed Foccacia

2 cups flax meal
1 teaspoon baking soda
½ teaspoon cream of tartar
1 teaspoon sea salt

1 tablespoon agave nectar
5 eggs, whisked
1/2 cup water
1/3 cup olive oil

In a large bowl combine flax meal, baking soda, cream of tartar and salt.

In a smaller bowl, mix together agave, eggs, water and olive oil.

Stir wet ingredients into dry, mixing well, then allow to stand for 2-3 minutes so that batter thickens. Pour batter into a greased 11 by 7 or larger glass baking dish. Bake at 350° for 20 minutes or so until a knife comes out clean

Cool. Cut into squares. Slather in extremely spicy and delicious mustard a la Jacob.

Original recipe from Elana's Pantry.

Thursday, December 10, 2009

Gooey Gluten Free Hazelnut Brownies


I was having one of those nights where the fella was out of town so there was no one to talk me out of my overwhelming urge for a brownie. A big ooey gooey chocolaty mess of a brownie. Rich and fudgy and melting off the fork before it even gets to your mouth kind of brownie. You know the kind I'm talking about.

None of these adjectives however tend to apply to any gluten free brownie I've ever seen. All of the recipes I could find online looked disappointing or down right scary. I was not to be deterred from my brownie craving so easily so I took Mark Bittman up on his promise to know How to Cook Everything. Sure enough he had a brownie recipe that I was fairly sure I could modify with some sort of nut flour and come up with something tasty.

When the hazelnuts fell out of the cupboard I took that as a sign. I toasted them and ran them through my little coffee grinder and made fine ground hazelnut flour, pouring it in until I had the gooey consistency I was hoping for. But it was still missing something, looking at the liquor shelf I realized what it was...booze! So I threw in some brandy just to be super decadent.

Now I crossed my fingers that this experiment would result in the best brownies ever as I was in no mood to be denied chocolate. I figured that if worse came to worse this would be a very yummy boozy batter to lick raw from the pan if it for some reason refused to cook. Luckily it didn't come to that because 20 minutes later I had the best brownies in the world in my kitchen. Better even than any gluteny brownie. These literally were the best brownies I had ever tasted.

The chef, the roomie, and her friends all happened to be witness to my fabulous creation so I sat them down and “forced” them to taste test my brownies. I didn't stop at the brownies however. I had made Carmel Pear Ice Cream from David Lebovitz's book The Perfect Scoop the day before and so put a tiny scoop of that on the warm melty brownies. The ice cream which was almost too sweet on it's own was the perfect contrast to the dark chocolate. Everyone agreed these were the best brownies in creation. We made so many yummy noises the house was probably vibrating.

Then the chef had to go and say something about how the only way these could be any better was with raspberry sauce on top of the ice cream. So of course the next afternoon I bought some raspberries and made it so. He was right the chocolate, pear, raspberry creation is out of this world. As you can imagine this tray of brownies barely lasted two days. And I'm still dreaming of them, trying to resist the urge to make more, trying to wait at least a couple more days before giving in and baking them again.

I was so focused on getting these brownies to turn out that I didn't experiment this time around with substituting in agave nectar. When I give in and bake them again I will update the recipe. Until then I put in parenthesis the modifications to the ingredients I think would make using agave instead of sugar work. If someone wants to give it a try please let me know what happens.


Gooey Gluten Free Hazelnut Brownies

8 tablespoons butter (reduce to 6 tablespoons)
3 ounces dark unsweetened baking chocolate

1 cup sugar (replace with 3/4 cup agave nectar)
2 eggs (replace with 1 egg plus 1 egg white)
1 cup hazelnut flour

pinch of salt
1/ 2 teaspoon vanilla (omit this)
1/ 4 cup brandy (reduce to 3 tablespoons)

Heat oven to 350 degrees (325 if cooking with agave nectar.) Grease an 8 or 9 inch square baking pan with butter.

Combine the butter and chocolate in a small saucepan over very low heat, stirring occasionally. When chocolate is just about melted, remove from the heat and continue to stir until smooth.

Transfer to a mixing bowl and stir in sugar (or agave.) Then beat in the eggs one at a time. Gently stir in the hazelnut flour (make your own by toasting, removing the skin from and grinding the nuts in a coffee/spice grinder until very fine), salt, vanilla, and brandy. Pour into the prepared pan and bake until just barely set in the middle, about 20 minutes. If in doubt under cook them slightly rather than over cooking them.

Top with Caramel Pear Ice Cream and Raspberry Topping for the ultimate dessert.

The sugar free gluten free version of this recipe can be found here.

Wednesday, December 9, 2009

Pureed Pea Soup with Truffle Oil

This is revenge soup and boy was it tasty.

See a year or so ago I worked at a not great Mexican...er oh so sorry, my bad...South Western restaurant here in Madison. The menu at the place hasn't changed in over 10 years and the cafe part of the place grossed about 20 bucks a week, if that gives you a hint of the culinary bleakness of this supposed dining establishment. Since there were no customers to speak of and I wasn't allowed to help with tables in any way shape or form I had a lot of time to eaves drop and chat with co workers.

So though the menu was unpalatable and often the cause of gastroenterological distress the owner managed to have a seriously bloated ego about his cooking skills. One day he had the whole staff ooing and ahing at some canapés he had made out of the French Laundry Cookbook as he pointed back and forth to the picture in the book and his creation. Much brown nosing occurred in the form of “it looks better than the picture” and so on and so forth.

After an 8 hour shift of making one latte and then repeatedly cleaning every square inch of the espresso machine to stay busy I was less than impressed. I did however peak at the book once he was gone. It's a beautiful book with very very fussy recipes which I suppose for a lot of people is a big thing. When he came back to claim the book and stared at me with the disapproval reserved for the lone employee than refuses to be a sycophant I was looking at a recipe for some fancy chocolate cake. I blurted out something about wanting to give it a try.

“Well dinner there costs hundreds of dollars there you know. My wife and I ate there on our honeymoon.” These and many other details I was supposed to be impressed by sailed over my head to which I replied, “No I mean it would be fun to cook.” He looked at me like I had peed in his crème Anglaise, scoffed while snatching away the book and walking away saying something about that being doubtful under his breath.

The end of my tenure at this particular restaurant was as needlessly dramatic as this man's food was horrible so I've held a bit of a grudge. And you can ask the fella I hold grudges for life. I'm still mad at a boy who tried to pull my pants down on the playground in kindergarten for example. So when I was looking at cookbooks at the library and found the French Laundry book I knew I had to cook something out of it just to prove my old boss wrong by cooking something fabulous from it. Not that he would ever know of course nor would he care but I wanted to put that energy into the universe and end this grudge I've been holding. A perfect “I told you so” moment that would end in me and the fella eating something nice for dinner.

Looking through the book now that I know how to cook and spend time with a chef I was able to see that the French Laundry isn't even that special. I eat better most nights of the week albeit sans caviar and foie gras. Not to mention none of those desserts were going to gluten free friendly even after heavy modification. So instead I went in search of a hoity toity recipe that would put to use some of this bottle of truffle oil I have and worry about spoiling while it sits in the back of my cupboard. In the process I found a recipe for pea and truffle oil soup. And since I was on a soup kick it seemed perfect.

It is sadly however not spring so finding English peas to shell and cook to perfection following all Thomas Keller's fussy instructions was not going to happen. So I bought frozen peas and carried on from there. It turned out to be a genius move seeing as his complicated instructions end in flash freezing the peas and then pureeing them so I just thawed the peas and went on with the recipe from there.

It was a lot of work and not really worth the effort for the end result. Forcing pea puree through a sieve has got to be up there with child birth on the scale of long difficult and painful life experiences. It did however make for a very creamy soup. And a very beautiful green soup as you can see from the picture that hasn't been color edited. Plus it was a good excuse to make Parmesan crisps which are as fun to make as they are tasty and I really enjoyed my truffle tinted green soup sipped from a mug with a crispy thin bit of cheese.

So there you have it, revenge soup. In your face snotty restaurant owner man.


Pureed Pea Soup with Truffle Oil

2 pound bag of good quality frozen peas
1/4 cup agave nectar (approximate)
salt to taste
1/2 vegetable stock
1/4 cup water (approximate)
white truffle oil
Parmesan crisps (recipe below)

Place frozen peas in colander and run cool water over them just until they are no longer frozen but not until they are mushy. Run thawed peas through food processor until smooth. Pour about a cup at a time of pureed peas in a mesh sieve Force the pea puree through the sieve into a large bowl, this will take a lot of time and elbow grease so be prepared. You should have bright green very smooth puree in the bowl and the dry tougher outer portion of the peas left in the sieve Discard the pea hulls (or save to toss in risotto or pasta later) and run the remaining cups of pea puree through the sieve

When you have pushed all the peas through the sieve add the puree back into the food processor. Add agave nectar (I used about 1/4 cup) and salt to the puree to your particular taste and process to combine. Check peas for taste and adjust seasoning as you like.

Add vegetable stock and water (enough to make the soup the consistency you like) to food processor and processor briefly again until combined. If serving cold pour into mugs or small bowl with narrow tops. If serving warm, gently heat soup over low heat and pour in mugs. Just before serving drizzle a bit of truffle oil in each mug of soup and top with a Parmesan crisp “lid.”


Parmesan Crisps

1/ 2 finely grated Parmesan
silicon baking mat

Preheat oven to 325 degrees.

Sprinkle about 2 teaspoons of cheese near one corner of the silicon mat and using your fingers spread the cheese into a thin 2 inch circle. Repeat with the remaining cheese, leaving a 1/2 inch of space between the cheese circles.

Bake for about 8 to 10 minutes or until they are golden brown. Use a small metal or heat safe spatula to very gently dislodge them from the mat and transfer to a plate to cool. They will be soft while removing from mat but will harden as they cool. Use to top pea soup as a decorative lid.


Modified and made slightly less complicated from a Thomas Keller recipe in The French Laundry Cookbook.

Gluten Free Double Chocolate Scones


While getting ready to host a wine tasting party this upcoming weekend I've been shuffling through all the bookmarked recipe ideas I have saved to see what weird and wonderful snacks to make. In the process I've been finding recipes I've been remiss in not yet posting.

I made these scones months ago for our house warming party. They were delicious. So delicious in fact no one even noticed they were gluten free which is a compliment when you can trick wheat eaters into making yummy noises over something sans flour. But shame on me for taking so long to tell you about them. They were easy, had a nice chewy consistency and took care of the scone craving I had at the time. Now that I rediscovered this recipe I might have to make them again tonight.

Gluten Free Double Chocolate Scones

2 1/2 cups almond flour
1/2 teaspoon sea salt
1/2 teaspoon baking soda
1/3 cup coconut oil
1/4 cup agave nectar
2 large eggs
3/4 cup cocoa powder
1/4 chopped dark chocolate

Preheat oven to 350 degrees.

In a medium bowl mix almond flour, salt, and baking soda together. In a separate medium bowl mix the coconut oil, agave nectar, and eggs together until blended. Add cocoa powder to wet ingredients. Pour dry ingredients into wet ingredients and mix well. Briefly stir in dark chocolate.

Place 1/4 cup of batter onto parchment paper lined baking sheet or silicone baking mat. Repeat for each scone and space about one inch apart. Bake 12 to 17 minutes or until scones pass the clean toothpick test.

Original recipe from Celiac Chicks blog.