Showing posts with label basics. Show all posts

Wednesday, June 16, 2010

Greens and Beans

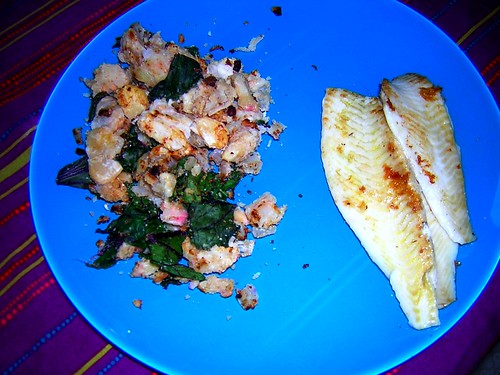
They might not be pretty but these beans have sole.

This is my go-to for when there are random greens wilting in the crisper and random beans threatening to turn evil because I made too many for another recipe earlier in the week.  I can't believe it's taken me this along to post about this considering I eat some variation of it once a week at least.  But here it finally is ready for you to bask in the awesomeness that is it's ease of preparation and it's ability to use up those pesky left over ingredients in a tasty way.

The great part of this recipe is you can change it up with whatever combo of greens and beans you have on hand.  White beans are best: garbanzo, fava, navy, cannellini, or giant white lima beans are all beans I've used with success.  Then mix and match your beans with spinach, kale, rainbow chard, beet greens, or pretty much any other dark leafy green you happen to have around.  Lima beans with beet greens and a drizzle of lemon juice or garbanzos with kale and some fresh rosemary are my favorite combination but feel free to mix and match and let me know what you come up with.

Greens and Beans

1/2 pound of dried beans (or about 2 cups left over, cooked beans)

3 tablespoons oil
2 cloves garlic, diced
rosemary, lemon juice, or other seasoning (optional)
salt and pepper, to taste
handful of greens

If you're starting out with dried beans prepare them according to package directions.  Once you have your beans prepped, in a large (preferably non stick) pan, heat the oil over medium high heat.  When the oil is hot, toss in the beans and cook them, agitating them every so often so that they don't burn, for about 15 minutes or until they are browned on all sides.  If your beans are sticking to the pan or drying out too quickly, pour in a little more oil to moisten things up. 

Once the beans are toasted, lower the heat a bit and add the garlic, any other seasoning you would like and sprinkle with salt and pepper.  Cook for another couple minutes or until garlic is to your preferred level of doneness.  Now add some greens and allow the warm beans to wilt down the greens.  Once your greens are wilted you're ready to eat.

Monday, June 14, 2010

Chickpea Crepes With Smoked Salmon

Apparently I'm on a bit of a crepe kick. Probably because they are the only vaguely bread like food I can have on this elimination diet. 

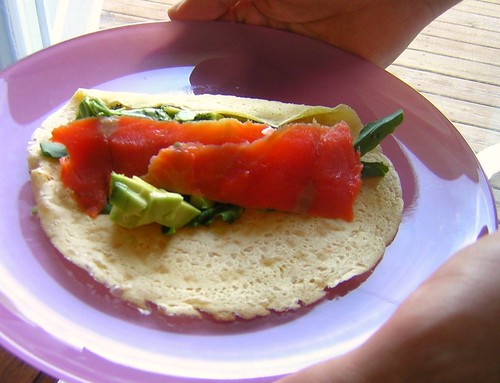
This time I went savory with chickpea flour crepes, pesto, and smoked salmon.  The fella and I were both really surprised by how delicious I was able to make these while still keeping them hypoallergenic.  The crepes themselves were ridiculously easy and a nice compliment to the salmon.  The pesto which I used pumpkin seeds in instead of pine nuts rounded out the flavors nicely.  Best of all this recipe is totally weight loss phase friendly for the French Diet.  Since it involves bean flour you can put whatever you're in the mood for in these.  So go crazy!

Since I'm only cooking really simple foods that don't usually require any sort of recipe I'm going to try to stop neglecting this blog so badly and just post pictures of my food to prove that I really am eating well while on such a restrictive diet.  We'll see how long I can keep up that promise.


Chickpea Crepes 

1 cups chickpea flour (easily found in Indian groceries)
1 1/4 cups water
dash of salt
2 tablespoons olive oil

Whisk together all ingredients.  Heat a large non stick pan over medium heat.  When hot, spray with cooking spray and drop 1/4 cup of the crepe mix into the pan, quickly sliding around  the pan to spread out the crepe as thin as possible.  Cook for 30 seconds.  Flip and cook for 90 seconds on the other side.  Repeat with the rest of the crepe batter.

I topped my chickpea crepes with a handful of spinach, a slice of avocado, some sprouts, a drizzle of pesto, and a couple pieces of smoked salmon.  This would also be amazing with cream cheese or creme fraiche, smoked salmon, watercress, and cucumber.  (Someone eat that version and tell me all about it since I will never be able to.)

Monday, May 3, 2010

Sorrel Quiche

It's CSA season again.  That means its spring (yay no more snow!)  And it also means weekly confrontations with vegetables you have never seen before.  Sorrel? Ramps? Nettles? Say what?  I find it extremely exciting to hunt down recipes for these new vegetables, its like a treasure hunt than ends in a great meal.

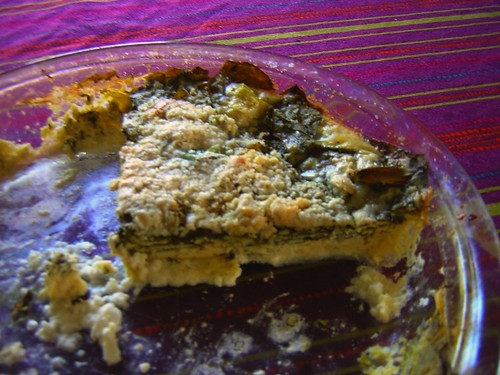
This year the fella and I weren't able to go for a CSA since we'll very likely be moving out of state in the next couple of months and didn't want to abandon our box of veggies halfway through the season.  Instead the fella has been enjoying going to the farmer's market each Saturday and playing a little game called "stump Emily with wacky produce."  The star of the first episode of this little adventure was sorrel.  It's in a lot of French recipes but what do you do with it when you have a grocery bagful?  That's a very good question to which I answer; quiche!

But if you're on my site you're either on a low carb diet or just enjoy my typo ridden recipes and I'm gluten free so how do you make a tasty crustless quiche?  In this case covering the bottom of the pie plate with goat cheese worked out nicely as a crust substitute.  In fact this recipe was just all around fabulous and easy.  If you don't have sorrel go for spinach.  And if you're avoiding cow milk cheeses here is a fun tip: ground raw cashews taste very similar to Parmesan so it's a great thing to sprinkle on quiche or pasta without the unpleasant lactosey side effects.

Sorrel and Goat Cheese Quiche

5 ounces chevre
3 cups sorrel, coarsely chopped
1 handful scallions, chopped
4 eggs
1 1/2 cups soy milk
1/4 teaspoon salt
1 handful ground cashews (or Parmesan cheese)

Preheat oven to 375 degrees. Spread goat cheese (or any strong flavored cheese) in the bottom of a well greased pie plate.  Cover with chopped sorrel and scallions. Beat eggs, salt and milk together. Pour over greens. Sprinkle with ground cashews. Bake for 35 to 40 minutes or until top is golden brown.

Tuesday, April 20, 2010

Coconut Flour Bread

This is literally the easiest bread recipe in existence.  The hardest part about it is finding the coconut flour to cook it with.  Coconut flour I must warn you is not cheap.  I think a pound was $12 at my local grocery store.  But it is worth it for the experience and to try a totally new flour.  Coconut flour is ridiculously high in fiber and about a 45 on the glycemic index so it is perfect for this diet.  I really enjoyed having a bread that was different than anything else I've ever baked, it's naturally sweet and has a crisp outside and tender chewy middle that makes it have the mouth feel of toast without actually requiring a toaster.

Actually a word of warning on that issue, unless you have a very narrow toaster, because this makes such a tiny loaf the bread, it will just fall in the toaster never to be heard from again.   So if you want it warm just stick it in a warm frying pan for a minute or so to get warm.  Another thing, grinding up unsweetened coconut you already have at home will not make coconut flour no matter how finely you grind it.  Believe me I've tried and I haven't figured out how to fake it with out lumpy horrible results so this is one case where I'm going to have to advise you to suck it up an pay full price at the store for it.  You won't be sorry you did. 


Coconut Flour Bread

6 eggs
1/2 cup melted coconut oil 
1 tablespoons agave nectar
1/2 teaspoon sea salt
3/4 cup coconut flour 

Mix all ingredients together and pour into a small buttered loaf pan. Bake at 350 degrees for 40 minutes. 

Wednesday, March 17, 2010

Vegetarian Crockpot Chili

It's been a busy week so there has been a lot of crockpot action going on in my kitchen.  Yesterday the fella threw this chili together for about the millionth time and I couldn't believe I hadn't written about it yet.  It's tasty and a great low fat/high protein meal. 

Aside from the basic seasoning and the inclusion of beans you could add whatever you have in the kitchen to this recipe to create whatever chili you're in the mood for that particular day.  It's a very forgiving recipe and beans hold up great in the crockpot so you really can't go wrong.  If you don't like spice you could skip the chipotles or go for a milder jalapeno.  Feel free to use whatever combination of beans you have around.  We used kidney and cannellini beans since we had a bunch left over from the pottage earlier in the week (I'm terrible at estimating how many dry beans to cook in order to get the amount of beans I need for a recipe.)   But we're also fond of a combination of black beans and chickpeas.

I like to top this with a little sour cream or yogurt and cilantro to add a little something extra to it while still sticking to the vaguely southwestern theme.  But if you wanted to be naughty some melted cheddar cheese on top would be amazing.  So go crazy and treat yourself to a meal  that cooks while you're at work.


Vegetarian Crockpot Chili

2 tablespoons oil
4 cloves garlic, minced
1 onion, chopped
1 teaspoon crushed red pepper flakes
1 teaspoon cumin 
2 tablespoon chili powder 

2 teaspoons oregano
2 tablespoons soy sauce 
1 28-ounce can tomatoes (or about 1 pound fresh tomatoes chopped) 
2 cups vegetable broth
1 6-ounce can tomato paste 
2 chipotles with some of their sauce, chopped
2 14-ounce cans black beans, drained
2 14-ounce cans red kidney beans, drained
salt and  pepper, to taste 

sour cream or yogurt, as topping
cilantro, as topping

    Sautee the onion, garlic and red pepper flakes until the onion is soft, about 3 to 5 minutes. Add the chili powder and cumin and cook for two more minutes. 

    Place the onions along with all the remaining ingredients, except sour cream and cilantro in the crock pot, stirring to combine.  Cover and cook on low for 6 to 8 hours.

    Top with sour cream and cilantro just before serving.

    Recipe made much more interesting from boring original over at  About.com

    Tuesday, March 9, 2010

    Homemade Rice Milk

    Now that I figured out how to make it myself I can't believe I've spent so much money on buying not so tasty rice milk in the store all these years.  To get an aseptic container of gluten free sugar free rice milk I was paying $2 or more a week.  Which isn't too bad considering how much a similar sized bit of organic hormone free dairy milk would be.  But I have left over rice at home all of the time and I'm obsessed with making everything myself so I figured there had to be a more cost effective way to enjoy rice milk.  Turns out there is and  it couldn't be easier.

    Surprise surprise all rice milk is made of is rice and water and a bit of vanilla makes things more palatable.  So why continue spending money on non-dairy milk products in the store that will lead to you throwing away extra cardboard containers in the land fill when you can do it yourself?   If you have five minutes and a blender you have no excuse to not do it.  It's ridiculously easy.


    Homemade Rice Milk

    1 cup warm brown rice
    4 cups warm water
    1 teaspoon vanilla

    In order to get milk and not rice sludge it is important that the water and rice are warm, not boiling but heated through.  Place all the ingredients in the blender.  Just in case the water is too warm, place the lid of the blender on an angle so air can escape when you start the blender, then cover the top of the blender with a towel in case anything splatters. 

    Start the blender on a medium speed and allow it to whir for 5 minutes.  You may have to run your blender for a minute at a time, agitating the mixture periodically.  When you have a uniform constancy in the blender pour the mixture through a fine mesh sieve into a storage container (I keep mine in left over yogurt containers.)  There will be pulp from the brown rice in the sieve, try to force as much liquid out of it as possible.


    This is what you want the pulp of your rice milk mixture to look like coming out of the blender after the liquid has all been forced out.  If it's any courser than this put it back in the blender for another minute or so.

    Allow mixture to cool then store it in a well sealed container in the fridge for up to a week.  Make sure to shake the milk before each use as the contents settle.

    Sunday, January 10, 2010

    Fakey Rice Using Shirataki

    There are very few times on this diet where I've actually felt deprived of anything.  Admittedly there was a huge learning curve when the fella and I first started and we spent a lot of time mourning the lost of things we could no longer eat.  After a year of eating this way however we've figured out substitutes for most of the things we could possibly want.  Almond flour has been a blessing, allowing us to make decent faux versions of things like naan and pizza crust that we would otherwise have gone crazy without. 

    The one problem almond flour couldn't solve however was the rice issue.  Brown rice is fine on low fat/high carb days.  But what is a girl to do when she has just made a spectacular rich spicy curry with delicious cubes of perfectly marinated meat and veggies floating in it?  To eat it alone like a odd creamy soup seems like a waste of the subtleties of flavor I just spent an hour creating.  Or it might need some sort of carbohydrate to even out the spice level.  And a splendid stir fry is just dull without something hearty to fill out the meal and absorb the sweet but sour sauce dripping off the veggies.

    This problem has stymied me until just recently.  I had  been keeping my stir fries and curries on the low fat end of the scale so I could have them with rice but that's no solution for an enterprising foodie like myself.  Enter Shirataki noodles!


    A fellow food geek told me about these at a party I was at recently. She said they were her favorite no carb no fat noodle for her gluten free cooking clients. Surely I thought she was exaggerating, not thinking it possible that a food so perfect for the Montignac diet could actually exist. The fella and I went in search of them the next day and found them for around $1 for an 8 ounce bag of them in the refrigerated section of the local Asian grocery stores near the tofu. We leapt for joy, came home and ate them with a stir fry. It was amazing and everything I had been missing about not having rice on fat/no carb days.

    Now that I know about Shirataki I've been seeing them everywhere.  The traditional genuinely carb free noodles from Japan I've only found in Asian markets.  They are almost completely flavorless and contain only water and water soluble dietary fiber as they are made from the konjac plant and then suspended in lime resulting in no carbs whatsoever.  (One of my science inclined friends can feel free to chime in to explain how this works, I'm talking about you Stephanie.)  They have a better consistency and hold up to being heated better than the other easier to find variety. 

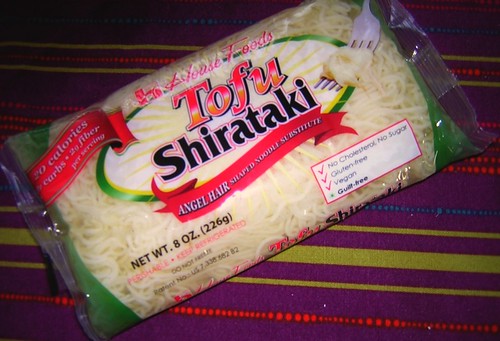
    The other variety, the one I stopped long enough to take a picture of for you is in the tofu section of places like Whole Foods or even in the organic health food section of the produce in chain grocery stores.  These are tofu based and so aren't totally carb free.  They also have a slightly off putting Jello like consistency and are more expensive.

    It all depends on what you can find but, both versions are nice options for times when you'd like to be eating rice but they take a little getting used to.  The noodles come floating in a fishy smelling liquid to preserve them which was enough to totally turn off the fella who is no  lover of raw fish or “salted trout flakes” as he so lovingly refers to nori.  They just need some rinsing under cool water to rid them of the fishy smell.  Next I would suggest boiling them for literally one minute, just long enough to heat them through and cook off any remaining fish smell.  Drain them again and toss them with a little toasted sesame oil or hoisin sauce and you're ready to go.  You can even use kitchen scissors to cut the noodles into smaller pieces so  they are more rice like.

    Shirtaki has now become my new favorite low carb obsession.  Look at it steamy and coating hoisin sauce though and can you blame me?  No carbs no guilt and tasty.  What's not to love?

    Tuesday, December 15, 2009

    Flax Seed Foccacia


    Someday soon when I have a couple seconds to breath I will tell you all about the fabulous weird wine and bizarre food party I hosted on Sunday. It was fabulous and oh so much fun. I adore my wine loving friends and spending the day in the kitchen dreaming up tasty culinary oddities with Jacob is my new favorite hobby. We did a lot of playing off each other to co-create yummies for this party. It was a lot of fun and it was all highly amusing.

    This focaccia is what I made as a place to spread the very spicy and complex mustards that Jacob brought along homemade the night before. He posted the recipes for those on his blog (which you should be reading) and so here is the bread to go along with it.

    They worked out really well together. The bread was just moist and hearty enough to be a perfect base for the mustard. I was surprised that it was so good for such an embarrassingly easy recipe, this is rarely the case for gluten free bread after all. This bread was also a nice place to spread cheese. Next time I may even try spreading it in a cookie sheet to make a thinner crisper bread that's more crostini like.

    The wheat eaters at the party had no idea this was sans gluten and the plate of focaccia disappeared faster than you could say “mustard seed.” I'd say that counts as successful party food.


    Flax Seed Foccacia

    2 cups flax meal
    1 teaspoon baking soda
    ½ teaspoon cream of tartar
    1 teaspoon sea salt

    1 tablespoon agave nectar
    5 eggs, whisked
    1/2 cup water
    1/3 cup olive oil

    In a large bowl combine flax meal, baking soda, cream of tartar and salt.

    In a smaller bowl, mix together agave, eggs, water and olive oil.

    Stir wet ingredients into dry, mixing well, then allow to stand for 2-3 minutes so that batter thickens. Pour batter into a greased 11 by 7 or larger glass baking dish. Bake at 350° for 20 minutes or so until a knife comes out clean

    Cool. Cut into squares. Slather in extremely spicy and delicious mustard a la Jacob.

    Original recipe from Elana's Pantry.

    Tuesday, November 10, 2009

    Leek and Fennel Coulis

    This simple but flavorful sauce is a great addition to just about anything. Fish, chicken, veggies or pasta with the addition of a little Parmesan. When I'm having a lazy menu making week I whip up a full recipe of this and use it to top a low maintenance piece of meat and then later in the week when I have zero time to cook I toss it over some pasta. Recipes like this keep me sane when I'm working too much because the only thing worse than working two jobs is not eating well and trying to make it through the day.


    Leek and Fennel Coulis

    1/4 cup olive oil
    2 leeks, white part and two inches of green part, chopped
    1 fennel bulb, finely chopped

    1 tablespoon fresh thyme, finely chopped
    3 cups baby spinach, roughly chopped

    1 cup coconut milk
    1/4 cup olive oil

    Heat olive oil in a large skillet. Saute leeks and fennel for 6-8 minutes until soft. Stir in thyme and spinach and cover skillet for 2-3 minutes until spinach is thoroughly wilted. Remove pan from heat and stir coconut milk into mixture

    Transfer mixture to a food processor and puree on highest speed until smooth. While food processor is running on medium speed, slowly drizzle in olive oil.

    Original recipe from Elana's Pantry blog.

    Thursday, November 5, 2009

    Cinnamon Pumpkin Seeds

    The end of CSA season meant I've had seemingly one of every kind of squash in existence sitting in my kitchen waiting for me to be inspired to do something with them. Then the chef brought over a couple more squash just to mock me the other day. At that point there was no point in delaying it any longer, I took a knife to every squash in the kitchen and roasted them. This will force me to find something to do with their various roasted flesh as every time I open the fridge there they are tempting me. Tonight I simply warmed the acorn squash in some butter in a frying pan and was very happy with it.

    However I'm very much my mother's daughter (no worries, I mean it in a good way mom) and the thought of all those squash seeds going to waste was unthinkable, I had to do something with them. I've never made roasted squash seeds before so it was fun to grab the first spice that came to me out of the spice cupboard. Cinnamon with salt sounded divine and it was. I was very pleasantly surprised with the results and made this same combination twice since then.

    Even better than the cinnamony seeds themselves is that they are awesome in a salad. I've been hooked on throwing them in mixed greens and spinach with feta cheese and a vinaigrette of olive oil and fig vinegar. It's tastes way too good to be that simple.


    Cinnamon Pumpkin Seeds

    pumpkin seeds
    olive oil
    salt
    cinnamon

    Reserve however many seeds you get from pumpkins and other random squashes you have around for cooking. Toss the slimy pits from around the seeds. Rinse the seeds then spread them over a baking sheet.

    Heat oven to 350. Put just enough oil over the seeds so that they are coated. Sprinkle with salt and cinnamon to suit your taste.

    Bake for 20 minutes or until well toasted.

    Monday, August 17, 2009

    What Can I Eat On This Diet Anyway?

    At the moment my kitchen is covered in what very well could be alien baby vomit. Or you would be forgiven for believing so. It's actually the makings of blueberry ice cream that went wildly wrong, my largest most colorful cooking disaster to date.

    It's in the refrigerator thinking about what it's done for now. If I put it in the ice cream maker and it turns out delicious I will forgive Dorie Greenspan and this evil recipe and tell you all about it later. If it doesn't turn out I may not be speaking to my purple stained kitchen for a bit we both may need a couple days to think about what we want out of our relationship after this argument.

    So rather than typing up a recipe and instructions and boring you with another salad, I'm going to instead keep it basic. Lets talk about the two hardest things to get used to when eating the Montignac way: sugar and carb substitutes. A little primer of what you should and shouldn't eat and how to substitute in things like almond flour or agave nectar in your favorite recipes that call for plain old flour and sugar. This will also be something you can point your friends and family towards when they ask for the millionth time “well, what can you eat?” if they are kind enough to try to want to cook for you while you're on this adventure.

    Sweet stuff first. What sugar substitutes can I eat on the Montignac Method?

    The only two sugar substitutes that won't spike your blood sugar and freak out your pancreas into storing fat are fructose and agave nectar. Montignac insists on fructose only but he's an old French fuddy duddy that doesn't believe in dessert so we're going to mostly ignore him on this issue and concentrate on what actually works.

    Fructose is what happens when you split a sugar molecule in half and isn't to be confused with high fructose corn syrup which is bad, bad, bad. It's a good substitute for when you're baking things like quick bread or cookies where you don't want to mess with the ratio of liquids or when you just need a pinch of sweetness in savory dish or sauce. One warning though, it doesn't act like sugar so it won't make yeast bread or soufflé and torte type things rise.

    Agave nectar comes from the same plant that tequila does so it has some of the same tart fruitiness of a good tequila that adds richness to your cooking. There is some research that points towards it negatively affecting triglyceride levels however so if you're dealing with cholesterol issues you will want to take it easy with the agave nectar. It's best to use as a honey, brown sugar, or molasses substitute and will work in pretty well in anything else if you make sure to lessen some of the other liquids in the recipe.

    Brown rice syrup also technically works in a pinch. I've never cooked with it personally as the price makes it not something I'm likely to experiment with. However it is relatively kind on the blood sugar so when it shows up in pre-made sweets or a sweetener in organic type cough drops and such it is alright on occasion.

    How do you use these in recipes?

    1 cup of sugar = 1/3 cup fructose
    1 cup honey or molasses = 1 scant cup agave nectar
    1 cup brown or raw sugar = 1 scant cup agave nectar and a couple tablespoons extra dry ingredients

    Carbs get a little more complicated.

    Except for the very high fiber whole grain bread you have for breakfast there is absolutely wheat or gluten free substitute flour (sorghum, teff, rice, tapioca) allowed. There is also no corn meal allowed. Nut and bean flours are your only options. This involves researching a lot of flourless recipes to find substitutes as there is no easy way to just swap out almond flour for white flour in a recipe and end up with anything you want to eat.

    Gluten free, raw food, vegan, Specific Carbohydrate Diet, and Anti-Candida recipes are your friend. These are all people that are often in the same boat carb and sweetener wise and have worked out clever substitutes for your favorite foods. When you're missing something like naan or pancakes use your google-fu to find someone else who missed enough to make up a flourless or low carb recipe. There''s usually a way to make it work so that the urge to eat something you miss doesn't make you tempted to break the diet.

    Straight to Bed, Diet Desserts and Dogs and 101 Cookbooks are all good blogs to start your search for carb friendly goodies in. To make life even easier on you here is a list of recipes I've written about that are healthy substitutes for something not allowed on the diet.

    Put simply what is allowed? What carbs or carb substitutes can I eat on the Montignac Method?

    Almond and most other nut flours (naan, pancakes, pizza crust, fruit crumble)
    Ground flax seed (peanut butter cookies)
    Bean flours (savory appetizer base)
    Canned beans (black bean brownies, chick pea brownies)
    Brown and wild rice (vegetable burgers to be eaten only in low fat/high carb recipes)
    Xanthan gum and arrowroot (lower GI thickeners to use only if absolutely necessary)
    Baking soda and cream of tarter (alternative to baking powder)
    Cauliflower (faux potatoes)
    Pistachios or hazelnuts (use to encrust meats instead of flour)
    Shredded squash (flourless breads, pancakes, or faux pasta)
    Raw squash (a base for things like bruschetta you would usually put on baguettes)
    Raw Vegetables (for dipping in tapenades and dips instead of bread and chips)
    Whole wheat pasta (only in very low fat/high carb recipes)
    Dried beans and lentils
    Quinoa (oatmeal alternative, couscous substitute)
    Oatmeal
    Soy Vermicelli (only in low fat/high carb recipes)
    Sugarfree chocolate (cocoa powder or baking chocolate in cakes and other flourless desserts)
    Whole Grain or Rye Bread (for breakfast only)

    That should give you a good idea at least. If there is something you're desperate for leave me a comment and I'll try to point you towards a substitute you can eat.

    Sunday, August 9, 2009

    Braised Cucumbers


    Today a movie changed my life.

    It's terrible and cliché but true just this once. But it gets worse. It was a Nora Ephron movie. And I cried at it. A lot. Like a shameful I shouldn't even be telling you this amount. Who is this person I have become that gives into trends and likes things that “everyone” else is talking about? Oh who cares.

    Yes I went to see Julie and Julia and it was freaking fantastic. Not just because all the actors are amazing and perfectly cast. Not because it's about food and writers and being lost and finding your passion and the person that fits you best in the world. And not even because it's about a couple living through a crazy cooking project that felt exactly like my life. Though the movie is great for all those reasons. You should probably sit down before I tell you the best thing about the movie. Ready?

    Braised cucumber.

    No that isn't code for something. Cucumbers cooked in butter are orgasmic. I'm a convert. Never will I relegate cucumbers to salads and sushi, as nothing but an interesting texture. I may have found my new favorite vegetable. Hear that artichoke? You better shape up or you'll be replaced.

    I've read about this recipe about a million times. First in the Julie and Julia Project that inspired the movie and I was quite skeptical. Then it kept coming up and I still didn't believe it even after many of my favorite food writers talked about cooked cucumbers. Meryl Streep however I couldn't ignore, I was too curious. So being the crazy foodie I am I came home from the movie, let the dog out, took the gianormous cucumber out of the fridge and braised that sucker.

    Oh my good god! Ten minutes later I was wandering around in circles in the kitchen muttering to myself. It's really really good.

    Obviously butter makes everything amazing but it was more than that. Somehow the heat completely changed the flavor profile of the crunchy tangy cucumber into a buttery slightly soft salty creation. It reminded me of one of those rare buttery chewy mouth filling Russian River Valley Chardonnays that you would gladly pay $30 a bottle for. And I say this as someone who usually abhors Chardonnay and only buys $10 wine. Braising cucumbers transforms something tolerable into something delicious. It doesn't seem possible.

    Julia Child I can't believe I've ignored you this long. I'm getting Mastering the Art of French Cooking and going on an insane cooking binge. The fella wants to bone a duck and try an aspic. To which I say who is coming over to help me eat these insane creations? I'll make you braised cucumbers if you can talk me through a terrine.


    Braised Cucumber

    1 huge cucumber (or 2 regular sized)
    1 tablespoon butter
    1 dash salt
    1 teaspoon lemon juice
    1 pinch dried mint

    Peel cucumber. Cut into quarters and remove seeds. Cut into 1 inch pieces.

    Melt butter in a pan and add cucumber. Cover and cook about 5 minutes on medium heat.

    Stir in salt, lemon, and mint. Cover and cook another 2 minutes.

    Enjoy eating heaven on a plate.


    Wednesday, June 17, 2009

    Antipasto Pasta


    Let's talk carbs. Specifically pasta.

    Yes the whole point of this diet is to cut out a lot of carbs and all sugar but you can still have carbs there are just a lot of rules. First you can only have carbs one meal out of the day, preferably for lunch when your metabolism is working harder. That means one carb/low fat meal and one protein meal a day. Secondly only whole grain carbs are allowed, brown rice and whole wheat pasta for example. Lastly the carbs have to be eaten with as little fat as possible so that your body doesn't absorb a load of fat along with the carbs.

    So what does this leave for you to eat for low fat/carb meals? Plenty you just have to get creative, give up the idea of ever having cheese on your pasta, and look really hard for the couple grocery story products that you can eat. Lucky for you I've already done the last step, the intensely annoying and soul draining part for you. Seriously I was torn between breaking into tears or throwing sauces on the floor the first couple times I tried to shop and found how little there was to eat that was sugar free and diet friendly.

    The other rule with pasta is that it has to be very thin angel hair pasta made with hard wheat. Montignac claims the pasta dough being forced through the thin metal pasta extruder during production causes a reaction in the wheat that makes it harder to break down into bad carbs while being digested. A lot of his quasi science leaves me scratching my head so I just take his word for it and any of my scientist readers can let me know if this is total crap.

    There are three pasta brands I've found in stores in Madison that fit all these quantifiers. Bella Terra Organic Capellini Angel Hair, Whole Foods 365 Everyday Value Angel Hair, and Ezekiel 4:9 Organic Sprouted Grain Angel Hair. In regular grocery stores these brands hide in the organic section rather than in with the regular pasta.

    Pasta sauces get a little more complicated depending on how strict you want to take the low fat rule. I've found some good sauces with less than 2 grams of fat per serving from Barilla and Classico. The roasted red pepper and tomato basil in both brands were especially tasty. I was very surprised that the least expensive brands more consistently were sugar free.

    In the past I've been posting pasta recipes with penne and lasagna noodles going off the French version of the diet that didn't specify the angel hair only rule. Apparently the American diet needed more rules to keep us fat lazy poor eaters under control. Substituting angel hair in for my earlier recipes will make them perfectly legal for the diet however.

    For now I'll post a very tasty and very easy recipe that will work for the weight maintenance stage of the diet when you can add a little more fat into carb meals without any dire consequence. This is when you aren't losing weight but are following most of the same rules to keep your weight steady. It works, I haven't lost or gained a single pound while eating this way. Next week the fella and I are going hard core on the weight loss phase again to see how much more weight we can get rid of, though the vacation from counting GI levels has been nice. I highly recommend taking a month off from the strict eating after a couple months just so the low GI doesn't break your will to live too much.

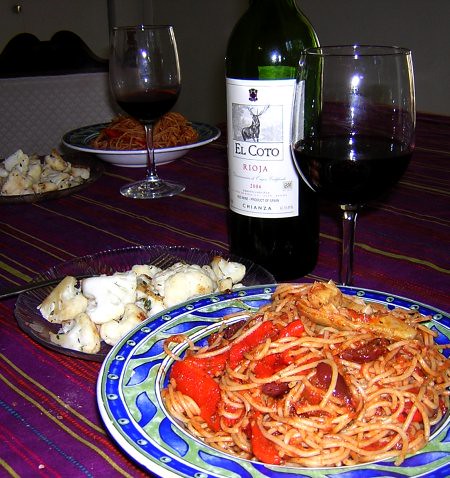
    This recipe just involves tossing some marinated veggies into store bought pasta sauce to make it a little more special and give it a home made feel. It was delicious. We had pan roasted cauliflower with thyme and lemon juice as a side and El Coto Rioja which I believe I may have already raved about once before. It really is a wonderful spicy Spanish wine in the under $10 price range. With wine this good for that price I see no reason to spend more. Plus I'm a sucker for quirky labels.


    Antipasto Pasta

    1 16-ounce package whole wheat angel hair pasta
    1 28-ounce jar sugar free pasta sauce
    1 4-ounce jar marinated artichokes, drained, halved
    1 10 to 12-ounce jar roasted red bell peppers, drained, cut into strips
    1/4 cup pitted kalamata olives
    1 packed cup fresh basil leaves, sliced or chopped

    Cook pasta in a large saucepan of boiling, salted water, following package directions, until tender. Drain, reserving 1/2 cup pasta water.

    Meanwhile, place the marinara sauce, artichokes, peppers, and olives in a medium saucepan. Bring to the boil over medium high heat. Reduce heat to low. Simmer for 5 minutes or until sauce thickens.

    Add sauce to pasta. Stir to combine. If desired, add some of the cooking water if too thick. Top with basil. Serve.

    Original recipe from one of my favorite cooking blogs Enlightened Cooking.

    Sunday, May 24, 2009

    Hoisin Sauce

    One of the hardest parts of trying to cook Asian food in this diet is that many of the recipes call for some pretty esoteric sauces for flavor. The good thing is that living in a place like Madison there are enough Asian markets that it's pretty easy to find any sauce you could ever dream of. Sadly almost all of them involve a lot of sugar. Things like plum and hoisin sauce have high fructose corn syrup and sugar in the top three ingredients. That just won't do. But I wasn't willing to give up stir fries.

    The fella found a decent recipe for homemade hoisin sauce online that we've used a couple times. Yesterday I took that overpoweringly sweet sauce and added some vinegar and upped the hot sauce to make a sauce I like better. Now I have a container of it in the condiments of the fridge to use next time the urge to stir fry comes over me. It was as easy as measuring out the ingredients and I have a delicious sauce that I know what went into. No mystery ingrediants or the dreaded "natural flavors" that pops up on so many labels.


    Homemade Hoisin Sauce


    5 tablespoons soy sauce
    3 tablespoons of peanut butter
    1 teaspoon agave nectar
    2 teasp00ns sesame oil
    2 teaspoons vinegar
    3 teaspoons hot sauce
    1/4 teaspoon garlic powder
    a dash of pepper

    Whisk together thoroughly or place in tupperware container with tight seal and shake well. Will keep in refrigerator for about 2 weeks.

    Tuesday, May 12, 2009

    Chipotles in Adobo Sauce

    In case you thought I was kidding when I keep saying everything has sugar in it here's another thing to add to the list: chipotles in adobo sauce. They're a standard ingredient in our kitchen especially to add a nice kick to Tuesday crockpot meals. However after a month of searching we couldn't find a single grocery store can of them that wasn't full of brown sugar not even at Whole Foods. Not willing to live without them and not liking any of the smoky pepper sauce alternatives we tried the fella searched out a recipe. Gotta love him.

    So on Sunday when I was out drinking beer with another man he stayed home and made adobo sauce. I came home and the house smelled like a smoky spicy heaven. Apparently it was one of the easiest things ever to make as it's a toss it in the pan and forget it for hours type thing. And the final product was better than any canned adobo we've ever had. The fella tossed them in the crockpot chili he made today and my lips are still burning hours later.

    Take that sugar we've once again found a way around you. Next stop: bacon.


    Chipotles in Adobo Sauce

    10-whole chipotle peppers
    1/3 cup onion, diced
    5 tablespoons cider vinegar
    2 cloves garlic, sliced
    4 tablespoons sugar free ketchup (found in the organic aisle)
    3 cups water
    1/4 teaspoon cumin
    1/2 teaspoon oregano
    1/2 teaspoon salt

    Combine all ingredients in a sauce pan.

    Cook over a very low heat for 1 to 2 hours until the chilies are very soft and the liquid has been reduced to about 1-cup. Put in blender and process for a thicker sauce.

    Will keep for a week in an air tight container when refrigerated.

    Sunday, May 3, 2009

    Flourless Pizza Crust


    The fella has been missing pizza just a teeny bit.

    It used to be his Tuesday night ritual to buy the cheapest most unspeakable frozen pizza to eat while doing the geeky things he does on Tuesdays with his friends while I work. Apparently it's called gaming or something. Everyone has their flaws so I try to pretend this one doesn't exist by refusing to understand it.

    Some people juggle geese. Some people sit around pretending to be demons and necromancers while playing with tiny painted figures. Some people decide to cook highly complicated meals 7 days a week and then freak out at random intervals about it being too difficult. If the person is worth it you grin and bear their silly hobbies and soldier on. Really I'm more concerned about his ability to have eaten those cardboard pizzas for so long.

    After several months of being unable to slather gluttony rounds of dough with mounds of cheese he's been getting punchy. We drive by pizza places and he starts to drool. At night he would mumble the name of his lost mistress, pizza. Any mention of the word would cause him to go wide in the eyes and tap his veins begging for a fix.

    Okay so it wasn't quite that bad. There were times that he looked at me however and I couldn't tell whether he was imaging that I was a pizza he was about to eat or if he was wondering how he could back out of this diet before losing his cheese loving mind. It was time to find a way to make this man a pizza.

    Enter almond flour and all the wonderful things that can be made out of it. We've been on a bit of a kick with it lately, satisfying cravings all over the place by using it. So it was only natural that about this time I stumbled upon a nut flour pizza crust recipe. And lo the heavens opened and the fella said “woo flipping hoo” when I sent him the link letting him know pizza was imminent.

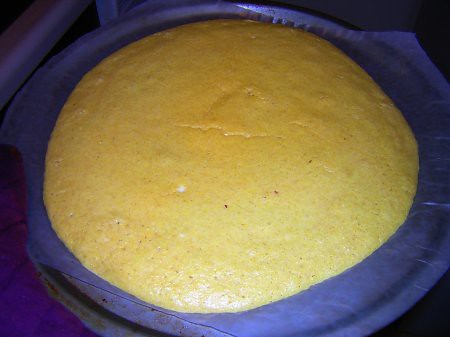
    When the faithful night of pizza making arrived we were both bouncing with excitement. Then we started making the crust mixture and got a bit concerned. It was really runny and didn't look like any crust I'd ever made before. It didn't seem like it was thick enough to not run all over the pan. And how was this wet mess going to solidify enough to put toppings on it in just 5 minutes of baking? We were seconds away from thawing something from the freezer as we watched the crust do a whole lot of nothing in the oven.


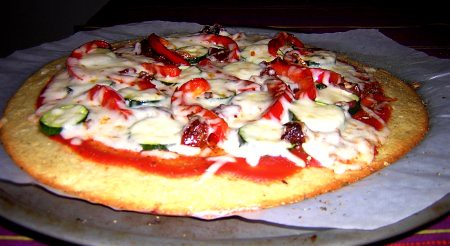
    Miraculously I pulled it from the oven and it was a nice firm crust like texture. We let it cool to firm up a bit more and started throwing toppings on it. It withstood being covered in sauce and veggies so things were looking good. I pre-sauted the vegetables assuming the vegetables wouldn't have enough time to cook on such a delicate crust and was right. Unless you like raw veggies on your pizza, cook them to your preferred level of doneness before this goes back in for round two. Topped with some sundried tomatoes and Havarti and we were drooling as hard as the dog does while we cook.

    This was fabulous! It looked and smelled and had the texture of pizza. It doesn't taste like the real thing exactly but its a great fake out. The only problem is you really need to oil whatever surface you're baking this on or it will never let go of the pan. We spent a lot of time dislodging our pizza before being able to eat it.

    I'm sure this will become a regular fixture on our menus. That sound you hear is the fella sighing with relief. His favorite food is a possibility again.

    Flourless Pizza Crust

    3 eggs
    3 tablespoons yogurt
    1 tablespoon oil
    1/ 2 teaspoon baking soda
    1/ 2 salt
    6 ounces ground almonds
    1 teaspoon vinegar

    Preheat the oven to 360. Line a round pizza pan with baking parchment, make on a silcone tray or oil your pan VERY well. This crust will stick like crazy.

    Whisk the first five ingredients together in a bowl until frothy and starting to thicken slightly.

    Beat in the ground nuts and vinegar and spread onto the baking parchment in an even, thin layer. It will be like thick batter, not a sticky dough. It doesn't look anything like pizza crust at this point but don't worry.

    Bake for 5 minutes until just firm but not colored. Leave crust to cool a little before spreading your chosen toppings on and re-baking until the edge of the pizza base is golden brown and the cheese melted. You'll want to pre-cook any vegetables you plan on putting on this pizza in order to soften them, they won't have much time to cook before the crust is ready to be removed from the oven.

    Original recipe from Straight Into Bed Cakefree and Dried blog.

    Sunday, April 26, 2009

    Flourless Naan


    It has been one whirlwind of a weekend. A distributors tasting at the wine store I work in on Friday. Then a wine get together with some friends on Saturday. We call our group Wasted and we lived up to our name, drinking some nice Australian and New Zealand wines. Then selling wine on Sunday. For the moment I'm ready to take some time off from wine, I say, as I make plans to drag friends to yet another tasting this Friday.

    With all of that I fell a bit behind in my cooking. I was missing some things to make one recipe. After thawing the meat for another meal the fella brought to my attention that it required being marinated over night. Crap. It was already 6 and we were a little punchy from spending the entire afternoon cleaning so there was no time or brain cells left to pull together a make shift meal. We got out the Indian take out menu instead.

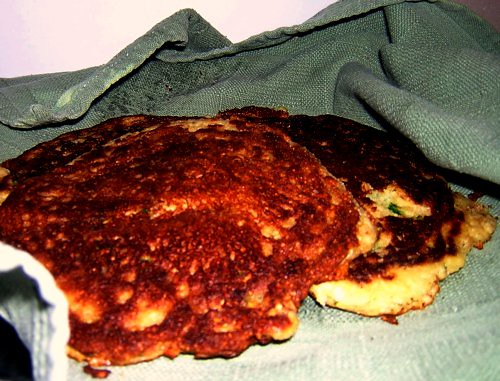
    Mixed grill, spinach chicken, and a black lentil daal, it was the comfort food we needed at the moment. While the fella was out picking up the food I threw together some flourless naan. It is not low fat and it it is not cheap. Almond flour will set you back about $10 a pound unless you have the patience and time to grind up your own. And between the nut flour and coconut oil, you are looking at a calorie monster. As a treat to fill the breadless void however it is perfect and oh so easy.

    The trick is to whisk it up at the very last second, get the pan the right temperature and brown them to the right level on each side. My first couple naan came out well, the last one did not as my pan was too cold and the almond flour had sucked up all the liquid so the consistency was wrong. They really need to be fried up quick to get the right effect.

    These are amazing. The coconut oil makes them taste a lot like the real thing and they are nice for sopping up all the delicious Indian sauces from your plate. And they smell dreamy, like a fresh baked bear claw. It sated my pastry lust for at least another week. Seriously I was at Lazy Jane's, the best bakery/coffee place in town, this morning having brunch with friends, and I didn't even give the world's greatest scones a second look. When I was a sugar addict I would have sold the dog for one of those fruity scones, flaky and topped with just the right amount of tart lemon glaze. Thanks to the power of almond flour I was able to just say no.

    Flourless Naan

    1 egg
    1/2 teaspoon baking soda
    1/3 cup coconut milk
    (or 2 tablespoons soy/almond milk and 3 heaping tablespoons of plain yogurt)
    1 1/2 teaspoon oil
    1 cup almond meal/flour
    1/2 teaspoon sea salt
    coconut oil for frying (about 2 tablespoons)

    In a small bowl, whisk together the egg, baking soda, coconut milk, and oil until frothy.

    Melt about 1/2 tablespoon of coconut oil in a skillet over medium heat. Just before you are ready to fry the naan, mix the almond flour and salt into the wet mixture. Pour onto hot skillet in portions the size of a small pancake. Fry until bottom is browned, flip and fry other side until brown and crisped through.

    Add another 1/2 tablespoon oil to pan and allow to come back to temperature before cooking the next bit of naan. The mixture will suck up all the oil and cake onto the pan otherwise. Repeat with the remaining naan mixture adding more oil each time as needed.

    Original recipe from Oreganicthrifty blog.

    Monday, April 6, 2009

    Cauliflower "Potatoes"


    The lack of certain very basic food has become a problem for the fella and I lately. While out for dinner with friends the other night we were developing elaborate plots to steal the delicious smelling fish and chips from a girl at the table next to us. It was only after chanting “22 pounds, 22 pounds, 22 pounds” over and over again that I was able to stop myself from doing so. Looking at every greasy yummy fry as a chance to gain back a pound of carb weight made the forbidden food much less appetizing but it didn't take away the potato urge all together.

    For me figuring out legal substitutes for things like potatoes and bread is a fun adventure. Gluten free, vegan, and raw food diets have already figured out a lot of things its just a matter of finding recipes and modifying them with ingredients I can eat. These innovative foodies had not only figured out cauliflower “potatoes” but also cauliflower “rice” which I'm also going to have to try.

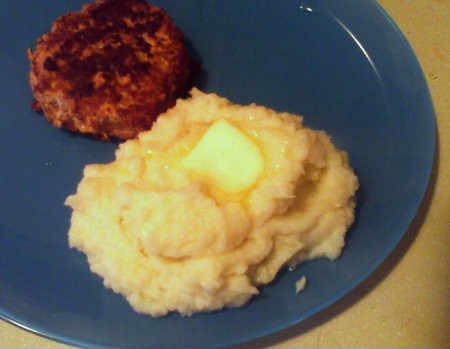
    Even the fella who doesn't regularly love cauliflower thought the faux potatoes were a nice substitute, they were similar enough to the real thing that it took away the urge to pounce on the food of strangers at least. My potato lust has been satisfied for now, I would defiantly make them again. They went with ground chicken “hamburgers” and the unsweetened organic ketchup we found perfectly and gave us an evening of eating where we felt briefly like we were cooking as if we had never started this crazy diet.

    The important thing in making these is to make sure to blend them a lot to get the right consistency. There were a few hunks of cauliflower in ours and it really took away from the potato illusion. Seasonings help as well, with some good steak seasoning from a McCormick grinder and a pat of butter I really believed they were potatoes. This was our dry run on fake potatoes to see if they were edible. Next we will try them on my family when they come over for Easter dinner and see what people who haven't gone low carb think of them. No Mom, this isn't enough of a reason to not come to dinner, you can bring normal potatoes too.

    Cauliflower “Potatoes”

    2 1/2 cups water
    1/2 cup vegetable broth
    1 head cauliflower, cut into florets
    3 garlic cloves
    1 tablespoon low fat Greek yogurt (or sour cream)
    1/4 cup grated Parmesan
    1 pat of unsalted butter (optional)
    your favorite seasoning mix as topping

    Put water, vegetable stock, garlic cloves and cauliflower florets into large pot and bring to a boil. Cover, lower heat and simmer for ten minutes. Remove the lid and let the cauliflower simmer energetically for a few more minutes, letting the broth reduce. When you’re certain the cauliflower is soft, take off burner, and drain cauliflower. Throw away one or two of the garlic cloves, but keep one, depending on how garlicky you want your “potatoes.”

    Combine garlic, cauliflower, yogurt, and Parmesan in your food processor and process until smooth. Add seasonings before or after blending, taste and adjust seasonings. Top with one pat of butter, any extra seasonings and chopped green onions or chives.

    Original Recipe from the Book of Yum Gluten Free Cooking Blog.


    Thursday, March 12, 2009

    The Fella's Vegetable Stock

    In honor of the fella who I am missing at the moment as he has been kidnapped for the evening into a sleep study, I'm going to share the one thing I will never attempt, it's totally his thing. He has the patience and the practice to make it come out yummy everytime.

    I'm talking about stock; chicken, or veggie it doesn't matter, he is the master of making broth. We share cooking duties and neither of us are slouches in the meal department but I'm leaving this and bacon exclusively in his very capable hands. I'm happy with obsessive chopping and measuring being my forte.

    He's going to be making a lot of stock during this diet seeing as Madison has not one sugarless broth to be had in any of the various grocery stores. That's okay, his broth tastes better and it means once a week I come home to a roasted chicken. Then later in the week I come home to delicious smelling broth and the dog laying in the kitchen with puddles of drool under her.

    Here she is dreaming of a world where tennis balls are chicken stock flavored.


    The Fella's Vegetable Stock


    Save the stems and inedible bits of all the vegetables you cook with that week and put them on a big bag in the freezer. The green bits of leeks and scallions, wilting spinach and celery, the stems of broccoli and mushrooms, that half an onion that's sitting in the fridge. Chop the vegetable bits to they will fit in the biggest pot you have and toss it all in.


    Then find any fresh herbs you have lying around and toss some of those in. If you don't have any fresh use dried rosemary, thyme, and parsley to add some flavor. The only flavors that seem to be musts for a successful broth are onion, garlic, salt and pepper. Everything else is left up to what you like and have around.


    Now pour enough water to cover all the vegetables and herbs. This will probably be about a gallon of liquid to start with and as it evaporates and boils off you will have to keep adding more to keep the vegetables moist.


    Bring the stock to a boil and then lower the heat to a simmer. You want to keep heating things through and leaching the flavors out of the vegetables but you don't want to burn or scorch things so keep an eye on it. Now let it simmer for about 6 hours, adding water when needed. It doesn't need close baby sitting as long as you poke at it every so often.


    When the broth has a nice brown hue and the vegetables are all limp it's time to start cooling it off. Taste the stock to see if it needs more salt or pepper and add it until you're happy with the flavor. When it is about room temperature you may want to send it through a couple layers of cheese cloth to remove the herbs and such that gather at the bottom of homemade broth. Next portion it out in containers the size you will need for cooking, we do 1 and 2 cup containers so we can thaw small bits as we need them.


    To make chicken stock just add a chicken carcass at the beginning and spend a lot of time skimming fat off the top of the cooling broth, that's the only difference. The fella doesn't get all scientific about things, he just does what he knows we'll like but if you want more technical directions check out Alton Brown's episode of Good Eats on the subject and be very very amused. Or use that crock pot you have sitting around to make an even lower maintenance stock.

    Thursday, March 5, 2009

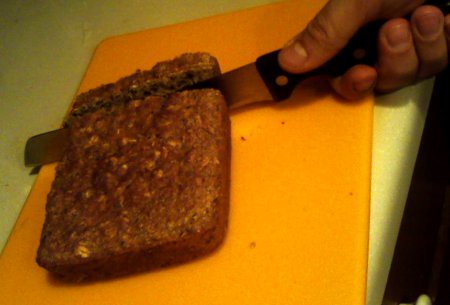
    Montignac Bread

    Tomorrow night I'm having some friends over to share in the joy that is my obsessive cooking habit. Should be a great time. And to make sure I get to enjoy it I planned ahead and roasted the vegetables and garlic tonight so I'm not slaving away in the kitchen all evening tomorrow while everyone else gets into the wine. Added plus I even had good company to keep me from going crazy trying to figure out the recipes. I do enjoy some girl talk to pass the time so thanks for that you know who you are.

    While the oven was on I also finally got around to making some acceptable bread for breakfast. We've been eating Kashi and soy milk all week because I just haven't had a spare moment to bake. And that's been about as delicious as chowing on whole grain wheat crumbs first thing after waking up.

    Breakfast is the only meal of the day where bread is allowed so I'm planning on enjoying it from here on out. Hopefully this bread is as tasty as it smells unfortunately I can't tell you just yet because I would break all the rules eating bread at near midnight.

    I can tell you it looks very yummy and is quite dense. So if nothing else it will do a very good job at filling us up until lunch comes around. And almost anything tastes fabulous with sugar free jam on it so I'm optimistic.


    Montignac Bread

    3 cups of stoneground wholegrain wheat flour
    1 cup of rolled wholegrain wheat or oat flakes
    1 cup of crushed oat kernels (I used flax seed)
    3 teaspoons of baking powder (I substituted 3/4 tsp baking soda and 1 1/2 tsp cream of tarter)
    1 teaspoon of salt
    3 cups of milk (I used one cup plain yogurt and 2 of milk)

    Preheat the oven for 390. Stir the dry ingredients thoroughly together in a large bowl. Add the milk and mix well. The dough should be moist. Pour the batter into a large bread pan and let it bake for about 55 minutes. This makes a very dense bread that will not rise much at all.

    Original recipe from a message board I've since managed to lose.