Showing posts with label dessert. Show all posts

Monday, July 5, 2010

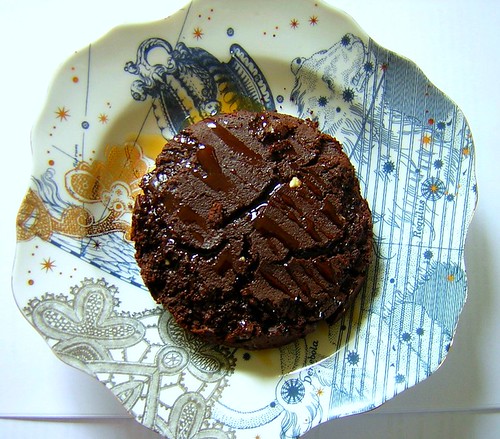
Peanut Butter Brownies with Chocolate Chips


This is my attempt at modifying another recipe from the Lisa's Kitchen blog to make it gluten and sugar free.  I was hoping to make it 100% Montignac friendly as well but I couldn't justify putting almond flour in something with a cup of peanut butter in it so I used brown rice flour instead.  That means this is a decent treat for dessert on the maintenance phase since it just has a hint of carby goodness in it instead of a refined flour.

My version isn't perfect as its a little dry so feel free to play around with the ingrediants and let me know if you could up with a different flour ratio.  Besides slightly dry baked goods are an excuse to have ice cream along side it and ice cream makes everything better.  And we all know how well peanut butter and chocolate go together so there really isn't anything else I should have to say to sell you on these yummy bars.


Peanut Butter Brownies with Chocolate Chips

7 tablespoons of melted vegan shortening (I used Earth Balance butter flavor spread)
1/2 cup plus 2 tablespoons agave nectar
1 cup crunchy peanut butter (divided use)
1 large egg
1 teaspoon vanilla
scant 3/4 cup chickpea flour
scant 1/2 cup brown rice flour
2 tablespoons arrowroot powder
1/4 teaspoon baking soda
3/4 teaspoon cream of tartar
2 ounces unsweetened baking chocolate finely chopped (or 1/2 cup chocolate chips)

Grease an 8 inch square pan with shortening. Line with parchment paper, leaving some overlap. Grease the paper in the bottom of the pan with more shortening.

In a large bowl, combine the melted shortening, agave nectar and 1/2 cup of the peanut butter until smooth. Beat in the egg and vanilla. Gently beat in the flours, arrowroot, baking soda and cream of tartar. Stir in the chocolate and remaining peanut butter.

Spread evenly into the prepared pan and bake at 350 degrees for 15 to 20 minutes or until it passes the tooth pick test.

Thursday, July 1, 2010

Cherry Chutney


Is it dessert or is it a condiment?  After thoroughly enjoying it a little at a time over the last couple of days I'm still not sure.  What I am positive about however is that it was easy to throw together, its tasty and very very interesting.

 Though I'm not sure what the original recipe has in mind I'm going to go along with the idea that this is mostly likely a dessert because I've liked it a lot after dinner with a scoop of whiskey flavored ice cream on top.  The ice cream was an experiment that went wrong in the texture department as it froze but is still tasty enough on top of other things.  The sweetness of the ice cream gives the cherry and vinegar combination enough kick in the dessert direction.  Originally this recipe calls for some tangy cheese as a topping which sounds intriguing and would probably bring this back over into the condiment/side dish category.

Which ever way you do it this is a very unique treat.  I was lazy and used frozen cherries rather than pitting endless cherries for this recipe and I can't taste any downside to the laziness.  I'm also cheap so rather than using a fresh vanilla bean I fished one out of my homemade vanilla and used part of that boozy goodness to make the chutney which I recommend.  But then I condone adding alcohol to most things. 

Cherry Chutney

3 cups (or 400 grams) red cherries, pits removed
3 cloves
1 tablespoon agave nectar
1 dried Szechuan pepper, crushed up a bit
3 tablespoons fruit vinegar (I used raspberry and fig vinegars from Vom Fass)
1 vanilla bean, scraped

In a medium size pot over medium heat mix cherries, cloves, agave nectar, Szechuan pepper.  Cover and let cook for 5-10 minutes or  until the cherries start to soften and turn into a jam like consistency. Add vinegar and reduce liquid for an additional 5-7 minutes. When the cherries are soft and look like a jam remove mixture from the heat, let it cool and serve in small bowls.  Serve topped with ice cream, whipped cream or some tart crumbly cheese.

Recipe adapted from one at the Citron and Vanille Blog.

Friday, June 25, 2010

Pear and Caramel Ice Cream with Rasperry Topping

I've loved ice cream for as long as I can remember.  So it was only natural when I started cooking everything myself that I would eventually start making fabulous ice creams as well.  My fella was even awesome enough to buy me the best ice cream making book ever, David Lebovitz's The Perfect Scoop, for my birthday last year.  I started playing around with making some of the recipes with agave and fructose for the French Diet but never got around to posting about them because I was too busy licking the ice cream maker clean after each experiment.

More recently this same book has been just left sad and lonely sitting on my shelf as I did the elimination diet and found out how truly ill dairy in all forms makes me.  My body can try to deny me many things but the only thing I will not give up is ice cream.  Even if I have to buy $6 pints of coconut milk ice cream sweetened with agave nectar at Whole Foods I will neglect myself other things to afford that ice cream.  So I decided to go back to my favorite ice cream book and start cooking dairy free sugar free versions of some of David Lebovitz's recipes. 

I will not give up ice cream and I will not leave my favorite dessert cookbook to get dusty on the shelf.  So in between moving and looking for a new job in a new city across the country I'm going to treat myself to homemade dairy free ice cream.  This will be the summer that I dare to make dairy free ice cream amazing.

My first experiment was with the Pear Caramel Ice Cream I'd made a couple of times before with heavy cream and really enjoyed.  It's a simple recipe so I didn't have to make a lot of substitutions to make it work as a dairy free recipe.  The toughest part was playing with caramelizing agave nectar.  It is possible but it doesn't quite give the thick, dark, and slightly scorched flavor of caramelized sugar however.  But like many things in sugar free or gluten free cooking if you stop thinking about what you're missing and focus on the new flavor you're discovering its still super delicious.

Pushing the pears through a sieve is a pain in the butt, I know but it is worth it for the creamy texture the process gives you.  If you don't care then by all means eat the grainy slightly chunky mixture as it is or give it a go round in your food processor to break it up a bit.

This ice cream is even better with some raspberry topping to add a tartness to the almost overpoweringly sweet caramel ice cream.  And if you're really feeling out going this all goes great on my Gooey Hazelnut Flour Brownies.  These three things together make the ultimate dessert. But worry not the highly decadent ice cream holds up very well on it's own.   I end up eating the whole batch before I even have time to turn on the oven.


When your agave nectar starts to look like this you've achieved caramel.


Pear Caramel Ice Cream

3 medium-sized ripe pears, peeled, cored and diced
1/2 scant cup of agave nectar
2 cups full fat coconut milk
1/8 teaspoon salt
a few drops lemon juice

Pour the agave nectar into a heavy saucepan, cooking over medium high heat while watching it very carefully.  When it darkens and starts to look like the picture above (this will take awhile, 10 to 15 minutes) begin pushing the liquid around with a heat proof spatula so the middle doesn't burn.

When the agave is a uniformly dark color and syrupy thick stir in the diced pear.  The caramel might become hard or make scary hissing noise but don't be afraid keep adding the pears and stirring the mixture for about 10 minutes or until the pears are cooked through.

Remove the pot from the heat and add about 1/2 cup of the coconut milk and stir.  Now add in the rest of the coconut milk and a couple drops of lemon juice.  

Let this mixture cool to almost room temperature then puree in the food processor until smooth.  Press this mixture though a mesh strainer or sieve with your flexible spatula.  This will remove the tough fibers of the pear.

Chill this mixture then run it through your ice cream maker.


Recipe adapted to be dairy and sugar free from a David Lebovitz recipe in the Perfect Scoop.


Raspberry Topping

handful of fresh or frozen raspberries
drizzle of agave nectar
water, as needed

Drop the raspberries and a generous drizzle of agave nectar into the food processor and blend.  If it is too thick add a small amount of water until you get the consistency you like.  Use to top the Pear Caramel Ice Cream.  This also is a nice topping for your oatmeal in the morning.


Friday, June 4, 2010

Rice Flour Crepes with Blueberries and Coconut Whipped Cream

I haven't been posting much lately because I haven't been eating much of interest.  

See the ridiculous thing is I'm a foodie with serious food sensitivities.  Figuring out that gluten was causing me problems helped out my digestive issues a lot.  Getting rid of dairy made me feel a lot better too.  However there were still things that seemed to be causing me problems and even after keeping a food diary, seeing a nutritionist, an allergist and a gastroentrologist I still couldn't figure out what was making me ill.  Unwilling to "just live with it" as all but one of my doctors advised I decided to take the next step and go on an elimintation diet.

The people over at Whole Life Nutrition Kitchen had one that seemed reasonable so I'm giving it a try.  Eating nothing but green smoothies for a couple days, giving up chocolate, coffee and alcohol and eating only the simplest of unseasoned foods has not been easy.  But after my body got over the initial shock I felt better than I ever had before.  If eating green salads and brown rice with lentils and nothing else was going to get rid of my unending digestive woes I was willing to do it.

At this point I've added in a few foods without any issues so I do have some variety in my diet.  So far I have sadly discovered citrus, cinnamon and parsnips are all problem foods for me.  So as this goes on I'll be healthier and feel great but my diet is getting more and more restricted.  In order to not let thoughts like that get me down I spent the afternoon plotting out a dessert that I could eat on this diet.  Something other than me peeling a mango and eating it like the crazy sweet-food starved person I am.  

Out of that I came up with this recipe for these vegan hypoallergenic rice crepes that fit with the strict parameters of the first phase of the elimination diet.  They are so amazing you would never guess they are missing things like eggs, dairy, wheat or sugar.  I went crazy and made some dairy free whipped cream as well since I was craving it but the crepes though simple are great without anything but your choice of fruit.  The fella and I enjoyed ours with blue berries while sitting out on the porch and enjoying the warm sunny evening.


Vegan Rice Flour Crepes 

1 tablespoon ground flax seed
2 tablespoons hot water

1/2 cup brown rice flour
1/4 teaspoon salt
1/4 teaspoon agave nectar

In a very small bowl mix the ground flax seeds with the hot water and mix well.  Allow mixture to sit undisturbed until it becomes very sticky.

In a medium bowl mix together the remaining ingredients until well incorporated then add in the flax seed mixture.. Your mixture will be very a little runny and gritty. 

Heat a nonstick frying pan over medium heat and gently grease it with cooking spray. When the pan is at temperature add 1/4 a cup of the crepe mixture to the pan and agitate the pan to roll the mixture around the bottom making it as thin as possible. Cook the crepe for one minute then flip and cook for a 1 1/2 on the other side.

Repeat with the remaining mixture, being sure to stir the crepe batter before putting it in the pan as the heavy rice flour will quickly sink to the bottom of the bowl in the time it has taken you to make the preceding crepe.


Blueberry Filling

1 cup frozen blueberries
1 teaspoon agave nectar

Place both ingredients in a small sauce pan over medium heat and allow to simmer until the melting berries turn into a thin syrupy mixture.


Coconut Whipped Cream

1 14-can full fat coconut cream (the kind that separates out)
1 tablespoon melted coconut oil
1 teaspoon agave nectar

Place a metal bowl and the beaters for your electric mixer in the freezer.  Open the can of coconut milk and place in the refrigerator until the solid part of the coconut milk solidifies a bit more and is easier to skim out of the can.

After about 10 minutes remove the coconut milk from the fridge and place the solid mass floating on the top of the can in the frosty bowl that was in the freezer, leaving behind the liquid part of the coconut milk to use for other purposes.  Add the coconut oil and agave nectar to the coconut milk and return the bowl to the freezer until the mixture becomes mostly solid but not frozen through.  This will take awhile, probably between 30 to 90 minutes.  Check it often.

When the coconut mixture is stiff, begin beating the mixture with the cold electric beaters.  You will get both some soft peaks and some cold ice creamy textured bits during this process.  It won't exactly be "real" whipped cream but its so delicious it won't really matter.

Tuesday, May 25, 2010

Chocolate Lava Cake

The only thing sexier than this beautiful little molten pile of chocolate is the woman who wrote the recipe.  

Suzanne Pirret is what would happen if Nigella Lawson and a sultry sex writer got together and decided to write a book.  She's my food writing hero.  She is hot and funny and totally engaging.  Not usually words one uses when describing a cookbook but this one is all those things and more.  Then again I suppose hotness its to be expected from someone wearing a form fitting white dress and 6 inch Louis Vuittons on the cover of a book called The Pleasure is All Mine.  Get your head out of the gutter, it's a book full of fancy but easy recipes for one because eating alone is no reason not to treat yourself well.

Seeing as I've been obsessed with this book as of late I've already shared her recipes for TomYum Kung Soup and Lemongrass Steamed Fish.  But I wouldn't be able to live with myself if I didn't write about the best recipe in the entire book.  It of course involves chocolate and is insanely decadent.  That didn't stop me from making this luscious melty mouth filling treat over a dozen times last week in order to experiment with getting the sugar free version of the recipe perfect.  It was tough but I made it through.  This is the type of rigorous testing I suffer through just for my loyal blog readers.     

In the end I came up with a gluten and sugar free recipe that is so good I couldn't tell the difference between the one that had sugar and the one that didn't.  I have to warn you though Suzanne Pirret says this is a single serving treat, unless you're immune to high doses of sexy chocolate induced caffeination you might want to find someone to share it with.  Or not who am I kidding it's too good to resist eating the whole damn thing.  

If you want to make the sugary version or need help figuring out how making this cake works check out this video for the recipe and watch Suzanne Pirret work her magic.  Someday I'll be the type of person coordinated enough to wear a designer dress and high heels while working with chocolate.  Or at least I can dream.


Chocolate Lave Cake

3 ounces unsweetened dark chocolate

1 tablespoon butter (soy butter also works nicely)
3 teaspoons fructose
1 egg

 1 tablespoon almond flour
1 dash sea salt

unsweetened cocoa powder
drizzle of agave nectar

Preheat the oven to 360 degrees.

In a small sauce pan over low heat very slowly melt the chocolate.  When chocolate starts to melt, briefly remove pot from heat and stir, then place back on heat to further melt.  Repeat the process until chocolate is completely melted and set aside to cool a bit.

Melt the butter in a small mixing bowl then whisk in fructose and egg until well combined.  Slowly begin to drizzle in the melted chocolate, whisking as you pour.  You want to add the warm chocolate a little at a time so it doesn't cook the raw egg.  The mixture should be very stiff and thick at this point, too dense to stir easily and that is the perfect texture.

Add in the flour and salt and stir once again briefly. 

Grease a small ramekin then sprinkle the inside with cocoa powder.   Tap the sides of the ramekin to remove any excess powder then pour the batter into it.  Bake for 9 minutes.  Don't over cook!  

When the cake is done cooking it should be firm on the outside but liquid on the inside.  If you tip the cake over a plate and it slides out it's done.  Drizzle with agave nectar or top with ice cream to take an edge off the bitterness of the chocolate.

Modified to be sugar and gluten free from a Suzanne Pirret recipe in The Pleasure Is All Mine.

Monday, May 10, 2010

Gluten Free Banana Cardamom Bread

Photo by Steve Apps of The State Journal.


I had no idea when the article was going to be printed so I didn't get a chance to warn people to keep an eye out for it.  So in the ennui filled late hours of the afternoon when they were both probably hiding from work in separate break rooms both the fella and my friend Tim texted me nearly the same sarcastic message.  "There's a great article on going gluten free in the paper you should look at."  

And there I was in the paper.  Well not technically me, more like my bread.  Even Lindsay who wrote the article isn't sure why there are three pictures of bread and no pictures of me in  the print article.  I guess the bread was just more photogenic than me.  Le sigh.  Given how great the pictures of my baking came out I'm thrilled they got all that attention though.

This loaf doesn't technically fit in with the French Diet considering the higher GI flours and the bananas but for the weight maintenance phase it would be a nice breakfast bread.  The diet aside, this bread is surprisingly good,  I made it and even I was blown away.  

The fella had this great recipe for a banana cardamon loaf he used to make when we were first dating so when I needed an idea for another bread recipe I decided to use that recipe to reverse engineer it into a gluten free version.  And it worked out really nice.  Gluten free it isn't quite as fluffy but since it's a desserty bread it doesn't interfere with the enjoyment of it at all.  Smeared with a little honey the fella and I really enjoyed nibbling on it with Lindsay and her fella literally seconds after the photographer got done with it.  It smelled that good we couldn't resist any longer.

Gluten Free Banana Cardamom Bread

2/3 cup warm water (temperature around 110 is best)
1 teaspoon yeast
1 generous pinch of sugar

3 cups Bob Red Mill Baking and Biscuit Flour blend
1/2 cup ground flax seed
1 tablespoon ground cardamom
1 teaspoon salt

2 tablespoons honey or agave nectar
2 very ripe bananas well mashed

arrowroot or tapioca starch to flour work surfaces
1 teaspoon sesame seeds

Put the warm water in a small bowl.  Whisk in the yeast and sugar and let stand about 10 minutes or until it turns bubbly.  If the water doesn't become frothy it means the yeast isn't active and you need new yeast or the water was too hot or cold to activate it so try again.

Stir together the dry ingredients in a mixing bowl.  When well combined add in the yeasty water, honey, and bananas.  Gradually incorporate the mix into a soft dough with a wooden spoon and your fingers, adding a little more water if necessary to get a dough like consistency that isn't too dry and crumbly. 
Dust a cutting board or very clean counter with arrowroot or tapioca starch (you don't want to add anymore flour to the dough, you want to use a sticky starch that won't dry out the bread for this purpose).  Knead the dough for a minute or so until it is sticky and well combined.  Return it to the bowl and cover with a damp dish towel to allow to rise for about 2 hours or until the dough has doubled in size.

After it has risen, remove the dough from the bowl back to the dusted work surface and divide into three equal pieces.  Roll each piece into a short fat oblong shape and braid the three together.  Place the dough on a greased baking sheet and loosely cover with plastic wrap.  Let stand until it rises a little bit again.

Preheat oven to 425 degrees.  Brush the dough with a bit of water and then sprinkle with sesame seeds.  Bake for 10 minutes then lower temperature of oven to 400 degrees.  Cook for a further 15 minutes or until the loaf is browned and sounds hollow when tapped.

This will be a very dense dessert like loaf of bread and is best served with a little honey or raspberry jam.  Store in a tightly sealed container in the refrigerator. 

Monday, April 12, 2010

Double Chocolate Flourless Torte

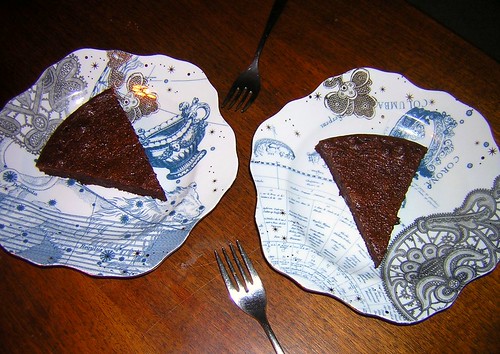
It has been a hell of a day over here in my world so I'm going to just let this fabulous chocolate treat speak for itself.  Long story short; it's amazing and easy and I wish I had not already eaten it all so I could have some right now in my time of need.  Also please feel free to oo and aw over my new dessert plates.  That's all.


Double Chocolate Flourless Torte

1 cup dark chocolate (4 one-ounce squares)
1/2 cup almond flour
1/4 cup cocoa powder
1/2 teaspoon salt
3 eggs
1/3 cup agave nectar
1/2 cup oil

Preheat oven to 350 degrees.

Break up the squares of dark chocolate a little bit (I used unsweetened baking chocolate and still thought the recipe was too sweet) then place in food processor and pulse until coarsely ground.  Remove 1/2 of the ground chocolate for later. 

Add in almond flour, cocoa powder, and salt and combine for a couple more seconds in food processor.  Add eggs to food processor and pulse again, then add in agave, oil and orange zest.  Combine until smooth.  Add the remaining 1/2 cup of chocolate pieces back to the mixture and stir briefly.

Transfer batter into a well greased 10 to 12 inch round pan.  Bake for 20 to 25 minutes or until it passes the tooth pick test.

Adapted from a recipe on Elana's Pantry.

Tuesday, March 23, 2010

Gluten Free Sugar Free Hazelnut Brownies

Just recently I finally had the chance to go back and cook the outstanding hazelnut brownies I made over the winter, this time adjusting the ingredients for baking with agave nectar.  I didn't think it was possible but they were made even better this time around.  Cooking without sugar made them richer and moister, not to mention much less likely to be crumbly and fall apart.  It was a pleasant surprise.  The only problem with this recipe really is to try not to eat them all in one sitting.  They are very much worth the effort of making hazelnut flour which I will admit is no small task.  And even sugar free they still pair amazingly well with my vegan variation on David Lebovitz's Pear and Caramel Ice Cream with Raspberry Topping.


Gluten Free Sugar Free Hazelnut Brownies
6 tablespoons butter
3 ounces dark unsweetened baking chocolate
3/4 scant cup agave nectar
1 whole egg plus 1 egg white
1 and 1/4 cup hazelnut flour


pinch of salt
3 tablespoons brandy


Heat oven to 325 degrees. Grease an 8 or 9 inch square baking pan with butter.


Combine the butter and chocolate in a small saucepan over very low heat, stirring occasionally. When chocolate is just about melted, remove from the heat and continue to stir until smooth.


Transfer to a mixing bowl and stir in agave. Then beat in the egg and egg white one at a time. Gently stir in the hazelnut flour (make your own by toasting, removing the skin from and grinding the nuts in a coffee/spice grinder until very fine), salt, and brandy. Pour into the prepared pan and bake until just barely set in the middle, about 20 minutes. If in doubt under cook them slightly rather than over cooking them.

Sunday, February 28, 2010

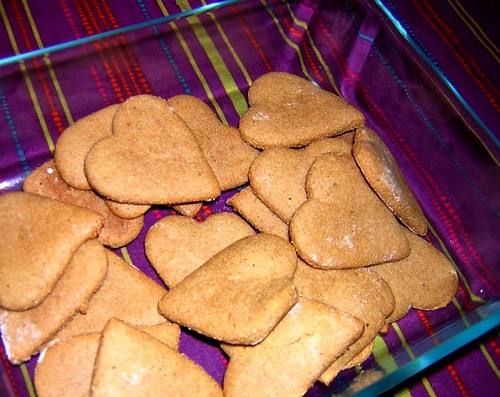
Gluten Free Sugar Free Gingerbread Cookies


These little lovelies are proof that you don't have to give up amazing flavor to eat gluten free and sugar free.  I took them to two different parties this weekend and everyone loved them.  Total sugar and wheat addicts were passing over sinful store bought chocolate covered treats in favor of these simple little cookies.  Now that is saying something when sugar eaters go for your cookies instead of Peeps.  I was even able to provide a vegan party goer with a tasty treat since these cookies happen to be egg less as well.

I first made these for Christmas, using half the dough.  The rest of the dough I discovered recently and it was just as great as it was when it was first made.  So yes the recipe makes a huge number of cookies but it's worth it to save half of them for latter.  I love leaving surprising myself by hiding random things in the freezer that will make me happy when I find it later.  It's one of the small pleasures of life.

The frosting issue is still a problem however.  I've tried twice now to make sugar free frosting without some unwelcome ingredient like cream cheese or boxed pudding mix and neither worked out well at all.  I tried this recipe on Saturday and ended up with a pot of sticky brown goo, I'm still not sure what I did wrong but it didn't work out for me.  So I will keep trying.  If you have a good sugar free frosting recipe please do send it my way.

Really these cookies are so good they don't need frosting though.  They are just spicy enough from the cinnamon and amaranth flour that the agave and molasses even it out for a perfect gingerbread flavor.  They are totally addictive so beware.

Gluten Free Sugar Free Gingerbread Cookies

2 1/3 cups brown rice flour
1 1/2 cups amaranth flour
1 1/2 cups arrowroot powder
2 tablespoons baking powder
2 teaspoons baking soda
1 tablespoon ground cinnamon
1 teaspoon ground ginger
1/2 teaspoon ground nutmeg
1/2 teaspoon ground cloves
1 teaspoon sea salt

1 cup agave nectar
1/4 cup molasses
1/4 unsweetened applesauce
1/3 canola oil
2 tablespoons vanilla extract

Preheat the oven to 350.  Line 2 baking sheets with parchment paper.

In a large bowl, stir together the rice flour, amaranth flour, arrowroot powder, baking powder, baking soda, cinnamon, ginger, nutmeg, cloves, and salt. 

In a separate bowl, combine the agave nectar, molasses, applesauce, canola oil, vanilla.  Mix well and pour over the dry ingredients.  Stir until the 2 mixtures are thoroughly combined.  Cover and chill the dough 2 hours or more.

Sprinkle your work surface with arrowroot powder.  Divide the chilled dough into 4 equal parts.  Return 3 parts to the refrigerator to keep chilled.  Roll out the dough 1/4 inch thick.  Cut out gingerbread with cookie cutters and place them on the prepared baking sheets.  Bake for 6 to 7 minutes.

The cookies will be slightly soft when they are removed from the oven.  Allow to cool for 5 to 10 minutes then move to cooling racks to cool completely.  These freeze very well in plastic freezer bags.  Makes approximately 5 dozen cookies.

From Baking with Agave Nectar  by Ania Catalano.

Sunday, February 21, 2010

Crockpot Beef Tagine


You know how you make Moroccan food even simpler?  Cook it in the crockpot.  It's basically the more technologically advanced version of a tagine anyway and you can cook while you sleep. 

I love my crockpot especially for cooking something in large portions like this before a party.  It is done the day before and all I have to do is warm it up before the guests arrive.  This planning ahead made this the least stressful party I've ever had.  All I did was warm everything up and throw it on plates for my guests.  I could get used to that.

There maybe a long list of ingredients but believe me there is no work involved and in the end you are rewarded with tender, sweet and slightly savory beef covered in a gooey decadent sauce.  On a plate with those salty stuffed tomatoes and some red quinoa with roasted vegetables that my friend Jess contributed to dinner, and this was an excellent meal.  It was almost as good as actually going to Morocco...okay maybe not but it was fun pretending.

We had some Cakebread Pinot Noir with the beef and it was stunning.  Pinot was the right choice for sweet, spicy beef because it had enough fruit to compliment the red meat but was light enough to not over power the spices.  I was really pleased with dinner and even more so that everyone invited loved dinner and had managed to somehow all bring the right wines to go with dinner even though none of us knew what wines to pair with Moroccan food. 

Then for dessert I went a step farther and knocked every one into an ecstatic food coma with warm fresh rice crepes and some almond and argan oil paste called, amlou.  With an ice wine we were all insanely happy and yes just tipsy enough to really start having a good time.  

Also included in this meal:

Red Quinoa with Roasted Vegetables

Crockpot Beef Tagine

2 tablespoon oil, divided use
4 large onions, chopped
6 cloves garlic, finely chopped

3 pounds beef, trimmed of fat and cubed

1 cup stock (beef preferably)
2 teaspoons cumin powder
2 teaspoons coriander powder
1 teaspoon turmeric
1 inch piece ginger, grated
salt and pepper, to taste
2 tablespoons agave nectar
1 cinnamon stick

5 carrots, peeled and cut into chucks
1 9-ounce can tomatoes (or 5 large tomatoes, diced)
4 ounces dates, pitted
6 ounces prunes, pitted

1/ 4 cup toasted almonds, sliced
1/ 4 cup cilantro, chopped


In a large frying pan, heat 1 tablespoon of oil over medium high heat and brown the onion and garlic until well caramelized.  Place into crockpot.

Heat the remaining oil in the same pan over medium heat  Pat dry the cubes of beef (you'll get a better sear on the meat if it isn't wet), then in small batches brown the beef on all sides.  Don't cook the meat all the way through!  You're just searing the outside of the meat so it will stay tender while cooking on low heat for a long time in the crockpot.  As you brown the meat place it in the crockpot.

Place beef broth in measuring cup or small mixing bowl and whisk the spices and agave nectar into it.  Put spiced broth and whole cinnamon stick into crockpot.

Toss the carrots, tomatoes, dates and prunes into the crockpot.  Mix all the ingredients in the crockpot up so it is well combined and coated in spices.

You may need to add more stock or some water to the crockpot at this point.  You want the meat mostly covered in moisture so it won't dry out.

Cook on high in crockpot for 6 to 8 hours or until beef is tender and falling apart.

Serve over quinoa(if you're gluten free) or couscous(if wheat isn't an issue).  Top with the almonds and cilantro.

Modified from a recipe by the French Tart at Recipezaar.com

Sunday, January 24, 2010

Gluten Free Pistachio Cake


Another day another failed soufflé  I shouldn't be surprised but I still am every time.  And yet I've been lucky enough that of my four recent unfluffy unimpressive soufflés they have all been at least tasty, making up in flavor for what they lack in beauty.  And this one worked out exactly that same way.  Le sigh.

Pistachio cake with rose water syrup sounded like a recipe too good to pass up.  And the fella is a freak for pistachios so I knew I would get points for making a dessert he would go crazy for.  Perhaps next time I cook something that requires him wash every dish in the kitchen twice he won't curse me so much.  When I told him what I was making it also got me help shelling about a pound of nuts which otherwise could have taken me hours going at it alone.

The rest of the baking didn't go so smoothly.  It was nearly impossible to fold fluffy egg whites into a sugary pistachio paste.  I'm still not quite sure how that was supposed to work out but I did the best I could and ended up with a cake that alternately had chunks of nuts or areas of egg white when it was cooked.  Which sounds kind of unattractive but you'd be surprised how good it is when covered in rose water syrup.

Also I didn't realize fructose would react so differently than sugar to being baked.  The original recipe called for baking the cake for 45 minutes but after about 20 minutes mine started smelling burnt.  So I had to do the biggest soufflé no no and open my horrible windowless oven and see what was going on in there.  Turns out I had a very very brown cake that had fallen from  fluffiness long ago.  I'm not sure what I should have done differently to prevent this failure but it tasted just fine so I'll take the hit for the sugarless team and let the world know that fructose in a soufflé is not a good idea.  If you figure out how to make this work let me know.

Regardless of what it looked like the fella and I had no problem eating this sweet, gooey creation all last week.  It was worth the work.

Pistachio Cake

SYRUP:
1/2 cup fructose (or 1 1/ 2 cups sugar)
3/4 cup water
1 tablespoon lemon juice
2 tablespoons rose water

CAKE:
5 eggs, separated
1/3 cup fructose (or 1 cup powdered sugar)
1 1/2 cups pistachios, finely ground
1/3 cup pistachios, chopped coarsely

Make the syrup first.  Bring fructose, water and lemon juice to a boil and simmer just until fructose is dissolved.  The syrup will be very thin and will not reduce.  Remove from heat and stir in rose water.  Let syrup cool to room temperature and then put in refrigerator to chill.

Preheat oven to 350 degrees.  Grease and flour a 9 or 10 inch diameter nonstick round cake pan.

In a large bowl beat the egg yolks and the fructose until it is a pale creamy texture.  Add the finely ground pistachios and mix very well.  Beat the egg whites until stiff in a small bowl using a standing mixer(read Julia Child's advice in Mastering the Art of French Cooking on egg whites for more in depth tips on how to make it work) and then fold them gently into the pistachio mixture.

Pour the mixture into the prepared cake pan, sprinkling with the course chopped pistachios and cook for about 25 minutes (45 if using sugar.)  The cake will poof up slightly like a soufflé and will pass the toothpick test when finish.  Immediately turn the cake over onto a deep serving dish.  Using a tooth pick make holes over the top of the cake then pour the syrup over it.  The cake will taste best after 2 hours when the syrup has had time to soak into the cake.

Made Montignac friendly from a recipe by Claudia Roden in Arabesque.

Wednesday, January 6, 2010

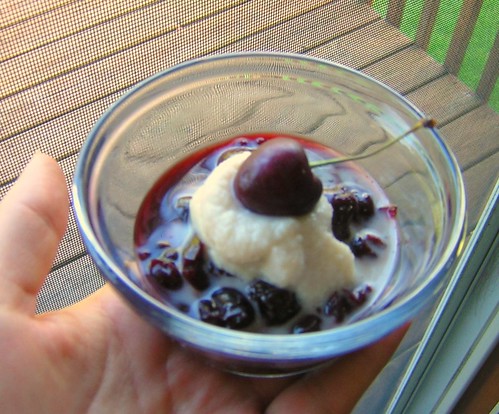
Vegan Panna Cotta with Stewed Cherries


It's only a week into the new year and I've already fulfilled one of my new years goals.  I'd say that bodes pretty well for the rest of the year.

Throughout my life there have been countless attempts at very unsuccessful gelatin desserts with the panna cotta dinner party disaster almost a year ago being the latest in a long line of less than delicious runny creations.  I decided to shun gelatin all together wondering if perhaps we just weren't destined to get along and moved onto the vegan friendly variety, agar agar, a seaweed concoction so great you have to say it twice. 

I've know about this gelatinous variation for a while now, hearing that it's more user friendly and nearly impossible to screw up but the price tag was keeping me from experimenting with it.  The tiny bags of it are around $15 dollars at Whole Foods.   Which was more of a commitment than I was willing to go into for something I might only use once especially considering I just spent the same amount on xanthan gum recently to forge my way into gluten free baking.  Then on a trip through every Asian grocery store in Madison I saw huge bricks of it for less than a dollar and bought some.

So the other night when I needed a fairly quick dessert I pulled out a vegan panna cotta recipe from the goddess of those creamy little desserts and hoped for the best.  Given that it was coconut milk and agave nectar I knew it would still be tasty if it didn't set so it wouldn't be a total bust but I was really hoping for lovely little white custards to top with the left over cherry sauce from a David Lebovitz I had in the refrigerator (which is easy and works just fine with frozen cherries.) 

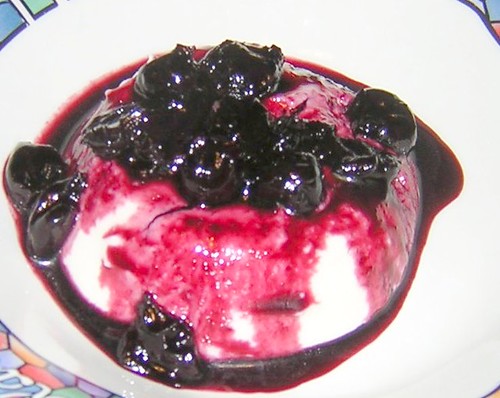
And that was exactly what I ended up with!  They were gorgeous.  Perfect little cups of sweet coconut custard with a creamy mouth filling texture.  They weren't too cloyingly sweet and so were divine with the stewed cherries.  I was so pleased with them and how delicious they were I had to, there wasn't a person on earth that could have kept me from the bliss that was putting coconut pan cotta in my mouth for the second time after so many failures.

So happy 2010 to me I've conquered gelatin, kind of sort of.  Now I guess I'll have to give the real thing another go.   Seeing as I could gladly eat panna cotta in all of it's variations every day this won't be a problem.

Vegan Panna Cotta

1 and 1/4 cups coconut milk
1 tablespoon agave nectar
1/2 block, crumbled or 2 teaspoons agar agar powder
1 cup soy yogurt(regular yogurt will work fine but make for a thinner consistency)

1 teaspoon vanilla

In a medium saucepan combine the coconut milk, agave nectar and agar agar. Let stand 5 minutes. Bring to a simmer. Reduce heat to low. Simmer, uncovered, 8 minutes, or until agar has mostly dissolved (there will be some flecks of translucent agar in mixture), stirring occasionally. Remove from heat.

Strain mixture through fine-mesh sieve into small pitcher or measuring cup. Whisk in yogurt and vanilla until smooth. Pour into 4 individual ramekins/custard cups.  Transfer to refrigerator. Cover and refrigerate 1 hour until set.

To serve, immerse bottom half of ramekin or custard cup in hot water about 15 seconds. Run a clean small knife around edge to loosen. Invert onto dessert plate.  Serve with David Lebovitz's amazing stewed cherries.


Original recipe from Enlightened cooking blog.

Thursday, December 31, 2009

Pear, Brandy and Walnut Cranberry Sauce


I remember the first holiday my family switched over from the canned “cranberry” abomination to making our own.  It was my third year in college when I spent a lot of time watching the Food Network instead of writing papers.  Which is not to say I didn't write the papers just that I did the writing at literally the very last second before they were due, editing and printing the papers minutes before catching the bus to class.  All the while frantically praying to the goddess of procrastination,  my long time muse.  I did well in all my classes I was just much more interested my new passions born out of living alone for the first time in a big city; cooking, coffee, and beatnik poetry. 

Unfortunately my last minute writing technique was so successful that it's the only way I know how to write to this day.  Which is why I often neglect this blog unless someone in my life writes me an email that basically amounts to “blog today or else...”  So if I've been promising to write about something fabulous I fed you or told you about or a recipe you sent me to try and it isn't blogged about yet, you need to write me a kind but pressing email telling me to hurry up and write about whatever it is.  It works, promise.

Anyway somewhere along the line in the plethora of cooking shows I was watching I got the itch to make real cranberries since my brother was and still is ion love with all versions of cranberry sauce.  So I bought cranberries and enlisted my little brother to help me make them.  We just cooked the simple version off the back of the bag.  Equal parts sugar and water, the bag of cranberries and boil until the berries burst. 

We were fascinated watching the berries burst all over the pot which my mother heard from the other room and probably imagined as something much more dangerous than what was actually happening because she came to watch too.  It really is the simple pleasures in life because we had more fun making those berries than most of the rest of dinner and they were delicious, we never went back to buying the canned stuff

As the holidays went on we got creative and started adding orange zest or cinnamon and comparing them hot versus how good they were cold.  Soon my brother and I were making 3 or 4 batches of cranberries to feast on  while home for the holidays.  It became an obsession and is still a holiday tradition to make too many cranberries.  I certainly wasn't going to shun the tradition this year but since I'm making a habit of making new and interesting food I knew I would have to up the ante on the creativity of the cranberries this year.

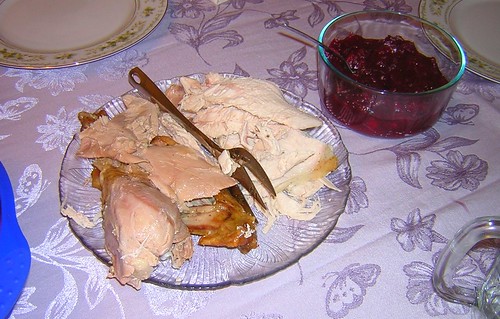
The fella and I made these for Thanksgiving and fell in love.  They are the best cranberries ever.  With brandy, pears, and walnuts how could you possibly go wrong.  Though they take a little effort they are very much worth it and will wow everyone at the table.  My family, the fella, the chef and I made these disappear very quickly.  We ate them with dinner, then a little bit after dinner, then for dessert, then on top of dessert.  They are great alone but on top of coconut ice cream they are divine.  Dip in a gluten free Christmas cookie and you may never leave the table.  Or you may become so drunk on cranberries you end up playing hours of ridiculous card games.  Either way you will be very happy.

Funny to think my cooking obsession started with cranberries and has led me to French cooking and a food blog.  From playing with food with my little brother to my brother being old enough to drink and me cooking with these two crazy lovable guys.  From living for a year in Iowa with no kitchen to making gourmet meals every night. 

Okay enough end of the year nostalgia.  It's been an amazing journey 2009 but its time to move on to frog legs and shirataki noodles.  In other words, you  haven't seen anything yet.

Oh and will someone convince Jacob to share with the rest of the world what he did to the turkey?  It was the best turkey I've ever tasted and I wasn't around to watch his secret ninja cooking techniques to find out what he did.


Pear, Brandy and Walnut Cranberry Sauce

1/3 cup, plus 2-3 tablespoon brandy, divided use
water

2 cinnamon sticks, each broken in half
8 black peppercorns

12 ounces fresh cranberries, picked over
1/2 cup agave nectar
2 medium firm but ripe bartlett pears, peeled

1/2 cup chopped walnuts, toasted

 Pour 1/3 cup brandy into liquid measuring cup; add enough water to reach 1/2 cup liquid total. Set aside. Place broken cinnamon sticks and peppercorns in center of small piece of cheesecloth or large tea bag and tie closed using kitchen twine.

In medium saucepot, combine cranberries, agave nectar and cinnamon-pepper bundle. Using large holes on a box grater, grate pears into saucepot. Stir in brandy-water mixture.

Over high heat, bring cranberry mixture to a boil; reduce heat to medium and cook 10-12 minutes, or until cranberries have burst and the mixture has combined, stirring occasionally. Remove from heat.

Stir in remaining 2 to 3 tablespoons brandy. Let cool. Remove and discard cinnamon bundle. Stir in 7 tablespoons toasted walnuts. Transfer mixture to small serving bowl; sprinkle with remaining walnuts.

Original recipe from Food 52.


Thursday, December 10, 2009

Gooey Gluten Free Hazelnut Brownies


I was having one of those nights where the fella was out of town so there was no one to talk me out of my overwhelming urge for a brownie. A big ooey gooey chocolaty mess of a brownie. Rich and fudgy and melting off the fork before it even gets to your mouth kind of brownie. You know the kind I'm talking about.

None of these adjectives however tend to apply to any gluten free brownie I've ever seen. All of the recipes I could find online looked disappointing or down right scary. I was not to be deterred from my brownie craving so easily so I took Mark Bittman up on his promise to know How to Cook Everything. Sure enough he had a brownie recipe that I was fairly sure I could modify with some sort of nut flour and come up with something tasty.

When the hazelnuts fell out of the cupboard I took that as a sign. I toasted them and ran them through my little coffee grinder and made fine ground hazelnut flour, pouring it in until I had the gooey consistency I was hoping for. But it was still missing something, looking at the liquor shelf I realized what it was...booze! So I threw in some brandy just to be super decadent.

Now I crossed my fingers that this experiment would result in the best brownies ever as I was in no mood to be denied chocolate. I figured that if worse came to worse this would be a very yummy boozy batter to lick raw from the pan if it for some reason refused to cook. Luckily it didn't come to that because 20 minutes later I had the best brownies in the world in my kitchen. Better even than any gluteny brownie. These literally were the best brownies I had ever tasted.

The chef, the roomie, and her friends all happened to be witness to my fabulous creation so I sat them down and “forced” them to taste test my brownies. I didn't stop at the brownies however. I had made Carmel Pear Ice Cream from David Lebovitz's book The Perfect Scoop the day before and so put a tiny scoop of that on the warm melty brownies. The ice cream which was almost too sweet on it's own was the perfect contrast to the dark chocolate. Everyone agreed these were the best brownies in creation. We made so many yummy noises the house was probably vibrating.

Then the chef had to go and say something about how the only way these could be any better was with raspberry sauce on top of the ice cream. So of course the next afternoon I bought some raspberries and made it so. He was right the chocolate, pear, raspberry creation is out of this world. As you can imagine this tray of brownies barely lasted two days. And I'm still dreaming of them, trying to resist the urge to make more, trying to wait at least a couple more days before giving in and baking them again.

I was so focused on getting these brownies to turn out that I didn't experiment this time around with substituting in agave nectar. When I give in and bake them again I will update the recipe. Until then I put in parenthesis the modifications to the ingredients I think would make using agave instead of sugar work. If someone wants to give it a try please let me know what happens.


Gooey Gluten Free Hazelnut Brownies

8 tablespoons butter (reduce to 6 tablespoons)
3 ounces dark unsweetened baking chocolate

1 cup sugar (replace with 3/4 cup agave nectar)
2 eggs (replace with 1 egg plus 1 egg white)
1 cup hazelnut flour

pinch of salt
1/ 2 teaspoon vanilla (omit this)
1/ 4 cup brandy (reduce to 3 tablespoons)

Heat oven to 350 degrees (325 if cooking with agave nectar.) Grease an 8 or 9 inch square baking pan with butter.

Combine the butter and chocolate in a small saucepan over very low heat, stirring occasionally. When chocolate is just about melted, remove from the heat and continue to stir until smooth.

Transfer to a mixing bowl and stir in sugar (or agave.) Then beat in the eggs one at a time. Gently stir in the hazelnut flour (make your own by toasting, removing the skin from and grinding the nuts in a coffee/spice grinder until very fine), salt, vanilla, and brandy. Pour into the prepared pan and bake until just barely set in the middle, about 20 minutes. If in doubt under cook them slightly rather than over cooking them.

Top with Caramel Pear Ice Cream and Raspberry Topping for the ultimate dessert.

The sugar free gluten free version of this recipe can be found here.

Wednesday, December 9, 2009

Gluten Free Double Chocolate Scones


While getting ready to host a wine tasting party this upcoming weekend I've been shuffling through all the bookmarked recipe ideas I have saved to see what weird and wonderful snacks to make. In the process I've been finding recipes I've been remiss in not yet posting.

I made these scones months ago for our house warming party. They were delicious. So delicious in fact no one even noticed they were gluten free which is a compliment when you can trick wheat eaters into making yummy noises over something sans flour. But shame on me for taking so long to tell you about them. They were easy, had a nice chewy consistency and took care of the scone craving I had at the time. Now that I rediscovered this recipe I might have to make them again tonight.

Gluten Free Double Chocolate Scones

2 1/2 cups almond flour
1/2 teaspoon sea salt
1/2 teaspoon baking soda
1/3 cup coconut oil
1/4 cup agave nectar
2 large eggs
3/4 cup cocoa powder
1/4 chopped dark chocolate

Preheat oven to 350 degrees.

In a medium bowl mix almond flour, salt, and baking soda together. In a separate medium bowl mix the coconut oil, agave nectar, and eggs together until blended. Add cocoa powder to wet ingredients. Pour dry ingredients into wet ingredients and mix well. Briefly stir in dark chocolate.

Place 1/4 cup of batter onto parchment paper lined baking sheet or silicone baking mat. Repeat for each scone and space about one inch apart. Bake 12 to 17 minutes or until scones pass the clean toothpick test.

Original recipe from Celiac Chicks blog.

Sunday, November 8, 2009

Absinthe Ice Cream

I've been waiting for an excuse to make this ice cream for a while now. Every great cake needs a complimentary and equally exciting ice cream at it's side so the fella's birthday was the perfect time to try it out. Especially since I happened to have a dozen egg yolks left over from making the angel food cake which was the exact number of yolks needed to double the ice cream recipe I had my eye on.

No matter how fussy they sometimes might be David Lebovitz's recipes are always spot, I go to his ice cream recipes in The Perfect Scoop again and again because they all work and turn out great even. The bonus is all the ones I've tried so far tolerate substituting in agave nectar for sugar without changing up the recipe portions. So all the hard work of ice baths, tempering eggs, and perfectly heated cream was worth it. Okay the hardest part of the whole experience of cooking for the fella's birthday was to not start drinking the absinthe without him at 3 in the afternoon. The Libertine absinthe at Vom Fass (I'll talk about this addictive store more later) is excellent and worked perfectly in the custard base.

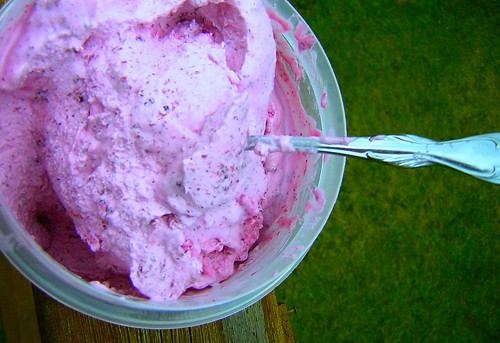
This made the tastiest ice cream ever. Even people who aren't all that into the licoricey absinthe flavor loved the ice cream. It was a huge success if the loud chorus of yummy noises and calls for second helpings were any indication when I served the cake and ice cream. And now I have an excuse to nibble on absinthe flavored ice cream periodically whenever I need a bite of something sweet.


Absinthe Ice Cream

1 cup whole milk
A pinch of salt
2/3 cup sugar

2 cups heavy cream

5 large egg yolks

3 tablespoons absinthe
1 1/2 cups chopped chocolate truffles or chocolate chips


Heat the milk, salt, and sugar in a medium saucepan over medium low heat.

Set up an ice bath by placing a 2-quart bowl in a larger bowl partially filled with ice and water. Pour the cream into the smaller bowl set a strainer over the top for straining the egg mixture later.

In a small separate bowl, whisk together the egg yolks. Gradually pour some of the milk into the yolks, whisking constantly as you pour. Scrape the warmed yolks and milk back into the saucepan. Cook over low heat, stirring constantly and scraping the bottom with a heat-resistant spatula, until the custard thickens enough to coat the spatula.

Strain the custard into the cream. Stir in the bowl over the ice bath until cool, then refrigerate to chill thoroughly. Preferably overnight. Stir in 3 tablespoons of absinthe. Taste, and add another one if desired.

Freeze the custard in your ice cream maker according to the manufacturer's instructions. During the last couple minutes of churning and in the chopped chocolate bits.

Original recipe from David Lebovitz's blog.

Saturday, November 7, 2009

Rice Flour Angel Food Cake


The fella has only one requirement for his birthday: there must be an angel food cake with blue frosting. I love him more than air but in case you've never tried angel food cake making is a pain in the behind. There is also the fact that boxed cake mixes are my Achilles heel of baking. I can make a three layer hummingbird cake with cream cheese frosting from scratch without breaking a sweat but show me a boxed cake and I can almost guarantee it will not turn out.

The first two years the fella and I were together I made the mistake of thinking a boxed angel food cake would be the way to go because even though baked goods in boxes are my nemesis it had to be simpler than doing it from scratch. Right? Both times I spent an afternoon in the kitchen glaring at the box and swearing at the electric mixer. No matter how much I beat the mix it wouldn't fluff up. Convenience food? Ha. After much pacing of the kitchen and many choice words I did end up with a mostly in tact cake placed on the table and frosted and me with a smile on my face, trying not to let on to the fella the amount of crazy I had just re-harnessed behind my beaming faux house wife facade before he got home.

There were a couple moments while making those cakes when all the angel food cakes I would make for the rest of my life flashed before my eyes and I wanted to give up. Was a deep meaningful relationship with a man I love dearly and connect with on almost every level worth making angel food every year? It turns out it is but I still dislike angel food.

This year a box mix wasn't even an option. If I was making this cake I was making a gluten free cake I could eat and if I was going to go through that much effort I was going to make the best freaking angel food cake ever. This would be the year I made piece with angel food.

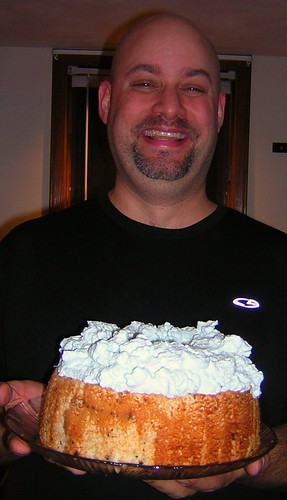
It worked. I took the super simple recipe for basic angel food cake in The Joy of Cooking and switched rice flour in for the cake flour and stirred in some chocolate flakes to make it more interesting. It was a long 35 minutes waiting for that cake to finish. There is no window in my oven door and opening to peak in would have ruined anything so for 35 long minutes I was sure that I had just wasted a dozen eggs and my afternoon for nothing. When the timer went off and a perfectly risen fluffy gluten free made from scratch angel food cake came out of the oven I couldn't help but do a little dance and congratulate myself. The fella was thrilled and belly laughed at me for my lack of modesty.

Now there was the issue of blue frosting. I thought of all sorts of creative and crazy ideas for flavors or ways to make it blue without food coloring but in the end I went simple. Homemade whipped cream with blue food coloring heaped on the top of the angel food cake so that it looks like a fluffy blue cloud of yum. As you can see the fella was excited by this prospect and I'm excited that I finally made a yummy birthday cake for him.

Turns out angel food cake isn't that difficult after all. The trick is reading the recipe a million times before starting and making sure absolutely all the tools you'll need for all the steps are within arms reach because once you turn that mixer on for the first time you are not leaving that corner of the kitchen for a good 10 minutes but the result is worth it.

So happy birthday to the fella, hope you've had the best birthday week ever.


Rice Flour Angel Food Cake

1 cup brown rice flour
2/3 cup sugar
1/2 teaspoon salt

1/ 4 cup dark chocolate pieces or chips

12 cold egg whites
1 tablespoon water
1 tablespoon lemon juice
1 teaspoon cream of tartar
1 teaspoon vanilla

2/3 cup sugar

Preheat oven to 350. Have ready an un-greased 10 inch tube pan.

Sift together the flour, sugar and salt three times into a medium bowl.

Pulverize the chocolate chunks in a food processor until finely chopped. Set aside.

In a large bowl beat together on low speed with an electric mixer for 1 minute the egg whites, water, lemon juice, cream of tartar, and lemon. Increase mixer speed to medium and continue beating until the mixture increases in volume about 5 times and resembles a slightly translucent soft foam. This should take around 2 to 3 minutes. The foam will hold soft moist peaks when beaters are lifted.

One tablespoon at a time slowly beat in the remaining 2/3 cup of sugar. Do this process over the course of 2 minutes. When the sugar is added the foam will be a creamy white and hold soft glossy peaks that bend over at the points. Do not beat until stiff.

A 1/4 cup at a time sift a fine layer of the flour mixture evenly over the surface of the batter and fold gently with a rubber spatula just until the flour is nearly incorporated. Repeat 7 more times with the rest of flour mix until no traces of flour are visible. During the last addition of flour mixture add the chocolate pieces.

Pour the batter into the pan and spread to level the top. Bake until a toothpick inserted in the center comes out clean, about 35 minutes. Let cool upside down for at least 2 hours, setting the tube over a bottleneck or resting the pan on 4 glasses.

Original recipe from Irma S. Rombauer, Marion Rombauer Becker and Ethan Becker's The Joy of Cooking.

Monday, November 2, 2009

Chocolate Bacon Cake


This cake is what happens when you spend time drinking with a chef and say crazy things like “how would one go about making a gluten free cake with port, bacon and chocolate?” And said cooking expert is just wacky enough to take the question as a challenge, not only making it happen in a very tasty way but never once cocking an eye brow at the weird idea. So together Jacob, the chef with multiple “most unique” cooking titles and I threw together this chocolate bacon cake for the birthday party of our celiac friend Q. It was a big hit and a lot of fun to make. Two packages of bacon were cooked in the making of this delicious dessert.

The only problem with this cake is that it will conquer even the greatest sweet tooth. I highly recommend making it next time you need the most creative baked good possible, just remember to eat truffle sized amounts of it and have large amounts of chocolate and bacon loving friends around to help you conquer the cake. It's that rich and evilly tasty. Somehow the sweet flourless cake combines perfectly with the bittersweet salty bacon frosting. The powdered sugar makes it nearly perfect.

Oh did I mention this cake is out of this world but absolutely not something that follows the French diet at all? Yeah whoops. It was just so good I had to write about it anyway. It was a big hit.


FOR CAKE:

1/4 cup red wine reduction
1 pound semisweet chocolate, chopped
1 cup (2 sticks) unsalted butter
1 teaspoon vanilla extract

7 large eggs, room temperature
1 cup sugar

Preheat oven to 350°F. Butter 9-inch-diameter springform pan with 2 3/4-inch-high sides. Line bottom of pan with parchment paper. Or invest in a 9-inch silicon pan which requires no greasing or lining.

To make a wine reduction pour most of a bottle of a decent red wine (something bold like tempranillo or syrah) into a saucepan over medium low heat. Keep on a gentle simmer until the liquid has reduced to a thick syrupy consistency.

Stir chocolate (I used half bittersweet and half semisweet), butter, wine reduction, and vanilla in heavy large saucepan over low heat until melted and smooth. Cool to lukewarm.

Using electric mixer, beat eggs and 1 cup sugar in large bowl until thick and pale, and slowly dissolving ribbon forms when beaters are lifted, about 6 minutes. Fold 1/3 of egg mixture into lukewarm chocolate mixture. Fold remaining egg mixture into chocolate mixture.

Place prepared pan on baking sheet. Transfer batter to prepared pan. Bake until tester inserted into center comes out with moist crumbs attached, about 55 minutes. Cool completely in pan. Run knife around pan sides to loosen cake. Remove sides of pan; transfer cake to platter. Remove parchment paper.

Original recipe from Epicurious.com with creative embellishments from Jacob.

FOR FROSTING:

4 ounces bacon fat (rendered from 1 package good quality bacon)
4 ounces 100% cacao dark chocolate
2 tablespoons heavy cream
powdered sugar for decoration

Use your preferred method for cooking bacon, setting aside rendered fat. While fat is warm run it through a sieve to strain out the ugly left over bacon pieces. Reserve cooked bacon for decorating the cake later.

In a small double boiler gently melt together 4 ounces of the bacon fat and 4 ounces of dark chocolate. When melted add heavy cream and stir to combine until homogeneous.. Allow mixture to return to almost room temperature at which point it will thicken enough to smooth over the cooled cake. Place in refrigerator until frosting is firm, about 20 minutes.

To make your own powdered sugar place about a 1/2 cup regular granulated sugar into the blender. It seems crazy but it works, don't try try to substitute the food processor for this it won't accomplish anything. You might need to agitate the sugar occasionally to get a uniform powder consistency.

I then used a damask stencil, placed it over the firmed frosting and sprinkled powder sugar over it. Using the left over bacon, chopped into small pieces I a framed the stencil decoration.

Tuesday, August 18, 2009

Sour Blueberry Ice Cream


From looking at the final product you would think this was just any other bowl of delicious and totally innocent ice cream. Don't believe what you see. It is delicious and refreshing. However it wasn't so benign when it had splattered everywhere in the kitchen. Top and bottom cupboards, puddles on the counter, dripping down the front of my pants, staining the kitchen rug, the dog trying to lick at the heap of blueberry syrup on the floor. There was a lot of very creative swearing.

See I pictured this whole thing happening in my head as I was dumping the blueberry mixture into the blender and cringing, waiting for the worst possible thing to happen. Then it did. While I was tightening the blender pieces and making sure everything was put together properly to avoid disaster, it never occurred to me that the rubber disk that creates a seal in the bottom of the bowl could slip to the side and create a gap for evil purple liquid to escape from.

As soon as I poured the blueberries in the blender the chaos started. In the crevice where the glass bit of the blender meets the plastic base the liquid started spurting out. Not just drizzling or trickling. It was shooting out on the underside of the cupboard and on my arms. About a third of my precious blueberry mixture ended up on the counter. I tried to tighten the pieces hoping for the best. Crossing my fingers the whole time I blended and made a beautiful purple liquid with no other major issues.

I wrapped the blender in dish towels and added the heavy and sour cream prayed for no more spurting. And all was well until I went to pour the mixture into a bowl at which point the precarious rule of physics that was keeping the liquid from seeping everywhere left me. Half of the ice cream mixture ended up in the bowl, the other half on the floor. That any of it made it in the bowl was more than I had expected. Things were already a mess so I continued with this highly mistaken course of action, emptying the blender, putting what made it into the bowl into the refrigerator, out of my sight to cool off and began the laborious task of de-purpling the kitchen.

It didn't put up nearly as big a fight going into the ice cream maker but the whole time it was churning I was thinking “boy this better be good.” This was going to have to be awfully good ice cream to make up for the disaster.

In the end all I can say for it however is that it's interesting. Blueberries work really well with the tartness of the sour cream and it creates a nice rich velvety texture. Amidst all the drama I did manage to put in too much lemon juice (which I had to substitute since I had no lime) and most of my precious berries were in a puddle on the counter so it wasn't as delicious and sweet as it probably should have been. It's quite sour which isn't a bad thing it just isn't very dessert like.

I'd only recommend making this if you have much better luck than I do with blenderfuls of malevolent purple liquid. I've learned my lesson and will be keeping my blueberry obsession to very simple recipes from now on. Which mostly means if you need me I'll be standing in front of the refrigerator gorging myself on berries straight from the container. It's safer that way.


Sour Blueberry Ice Cream

1 cup blueberries (fresh or frozen, if frozen, thaw and drain)
1/3 cup agave nectar
Pinch of salt
Grated zest of one lime
Juice of 1/2 a lime, or more juice to taste
3/4 cup heavy cream
3/4 cup sour cream

In a medium saucepan cook blueberries, sugar, salt, lime zest and juice over medium heat, stirring, until mixture boils and the berries pop and soften, about 4 minutes.

Pour the berry mixture into a blender and whirl until pureed, the mixture will not be completely smooth. Add the heavy cream and sour cream and pulse to blend. Taste and add a bit more lime juice or agave nectar if you choose.

Pour the blend into a bowl and refrigerate until it is chilled before churning into ice cream.

Original recipe from Noble Pig Blog.

Monday, June 15, 2009

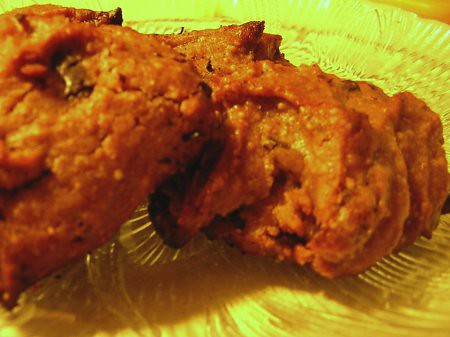
Flourless Peanut Butter Cookies

After the third or fourth night in a row of having vivid Salvador Dali-esque dreams about baking cookies I knew something needed to be done. I ceded to my subconscious and scoured the internet for a cookie recipe, any cookie recipe I could eat. No flour, very little starch and no sugar puts most recipes out of the running. After looking through enough gluten free vegan blogs I found cookies I could make with what I had on hand without much trouble and gleefully went about doing so.

The great thing about these cookies is that since they are vegan and therefore egg less there is really no reason to cook them. You could very easily mix this up and eat it raw to satisfy a cookie dough craving. With my new found ice cream obsession I'm thinking of making this batter again and tossing it raw into vanilla custard. The decadence of such a thing is grin worthy and obviously something I will try very soon.

For the first time around however I resisted the urge to eat all the dough raw (though a couple spoonfuls were sacrificed before the oven got turned on) to see how these would turn out. Substituting in the agave nectar caused a strange reaction in the oven, browning the bottom of the cookies heavily without burning them. There was a bit of smoke in the kitchen and the cookies weren't very pretty but otherwise they were great little treats.

Believe the recipe when it says that super creamy more expensive peanut butter is best. I used the cheap natural peanut butter I had on hand and ended up with gritty cookies. If taste is more important to you than texture use whatever nut butter you have, your cookies will just look odd.

Also the original recipe involved sugar and corn starch so switching that out for agave nectar and arrowroot caused interesting problems. You may have to play with amounts of sweetness and starch to get a good consistency. I would suggest putting in too little agave and then adding the arrowroot bit by bit until you get the dough to firm up. I made the mistake of tossing in all the agave and then adding too much arrowroot to compensate. If you've never tasted raw arrowroot I wouldn't suggest it as it isn't pleasant. Almost like a gritty fermented yam or something along those lines. Not something you want your cookies to taste like. So use the arrowroot sparingly.

I've yet to find sugar free chocolate chips so I used a meat hammer to break up baking chocolate. This was extremely satisfying and worked out well. The uneven bits of bitter chocolate worked out well in my overly gritty cookies

Apparently these cookies did a good job imitating real cookies because I haven't had cookie lust dreams since making them.


Flourless Peanut Butter Cookies

1 1/2 tablespoons flax seed meal
3 tablespoons water

1 c. creamy peanut butter (the kind that does not separate into oil and nuts is best)
scant 3/4 cup agave nectar

1 tablespoon arrow root
1/2 cup chocolate chips

In a small bowl or ramekin, use a fork to whisk together the flax meal and water. Allow to sit 3-4 minutes or until it gels.

In a mixing bowl, combine the peanut butter and agave nectar. When the flax seed egg replacer has gelled, add it to the mix. Add the arrowroot and mix well. The mixture should be pretty stiff. Add more arrowroot if the mixture is too soft to hold peaks when you lift the spoon out of it.

Stir in the chocolate chips as gently as you can.

Refrigerate the cookie dough for 15-30 minutes. Turn the oven to 350 degrees to preheat during this time.

Scoop the chilled cookie dough into small balls using a normal eating-sized spoon. Place the cookie dough balls onto a baking sheet about 2 inches apart from each other.

Bake cookies at 350 degrees for around 15 minutes. You want to take them out once the tops are getting brown. The cookies may still seem soft at this point, but they will harden as they cool.

Original recipe from the Aprovechar healthy cooking blog.