Wednesday, March 31, 2010

Extremely Spicy Bean Curry

The fella and I love spicy food especially of the Indian variety but this recipe was something else.  He was actually pretty okay with it but I made the mistake of trying it for the first time while I was at work.  I wasn't expecting it to be that overly spicy because I'm no wimp.  Boy was I wrong.  Gladly the lunch room was empty that day because this curry was so hot I was crying.  In a very good and happy way its just I don't exactly make a habit of sitting alone in public at work weeping over my food.  It gives people the wrong impression I guess.

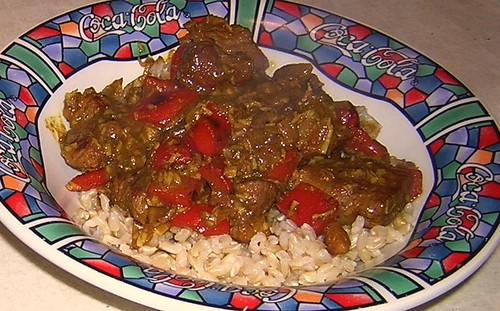
This curry is so good it manages to both be very very hot and tasty at the same time.  So if you're not big on spice I would suggest making it with the least amount of chilies suggested in the recipe and it should have a nice bit of kick to it.  If you really want to challenge yourself go ahead and add all the chilies and be prepared to have a pleasant fire in your mouth. 

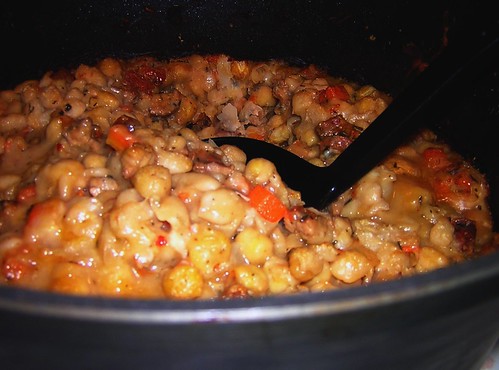
And don't be put off by the long list of ingredients, they are mostly spices that require no effort on your part other than tossing them in the pan so it is actually a really quick meal once the beans are cooked.  I even cheat by making my beans in the crockpot while I'm at work so I can start cooking as soon as I get home.  With that short cut this very hot meal takes almost no effort.

So there you go all my friends that are fans of insanely hot food, give this a try and let me know if it's hot enough for you.  If not I'm scared of but impressed by your idea of spicy.


Extremely Spicy Bean Curry

1/2 cup of dried chickpeas
1/4 cup of dried kidney beans
1/4 cup of lentils (puy lentils or black lentils are best)
2 tablespoons of coconut oil
1 generous teaspoon of black mustard seeds
1 teaspoon of cumin seeds
1 teaspoon of ground cumin
1 teaspoons of agave nectar
1 1/2 teaspoons of sea salt
1 teaspoon of ground coriander
1 teaspoon of turmeric
dash of cayenne
2 - 4 dried red chilies
1 large tomato, finely chopped
1 small clove garlic, minced
2 - 4 fresh red or green chilies, finely chopped


Rinse the chickpeas, kidney beans and lentils in a strainer. Soak overnight in enough water to cover. Drain, transfer to a large pot and bring to a boil. Reduce the heat to low, cover and simmer until the beans are tender - roughly 1 hour.  Or put beans in crockpot covered in water at low heat for 6 hours.

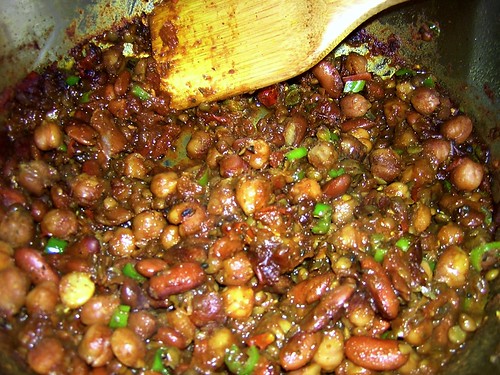
Heat the oil in a frying pan over medium heat. When hot, toss in the mustard seeds and cook until they begin to pop. Add the cumin seeds, ground cumin, agave nectar, salt, coriander, turmeric, cayenne and dried chilies. Stir quickly and add the tomatoes, garlic, and fresh chilies. Stir a few times and cook until the tomato is softened - roughly 5 minutes.

Drain off some of the water from the cooked beans and add the tomato mixture to the pot. Simmer, uncovered, stirring occasionally, for another 10 - 15 minutes or until the sauce thickens. Garnish with the fresh parsley or cilantro.  

Original recipe from Lisa's Kitchen blog. 

Tuesday, March 30, 2010

Vegan Mac and Cheese

 It's tasty and it's the right color but it still didn't cure my mac and cheese craving.

Anyone on this crazy French Diet is familiar with figuring out diet friendly substitutions for the forbidden foods you crave.  Pureed cauliflower takes over for the super carby mashed potatoes.  Almond flour becomes your best friend when you crave naan or pizza.  And ribboned vegetables make a great stand in for pasta.  But sometimes the thing you are craving is just out of your reach because it just might not be possible to make with the dietary restrictions you're working with.

 Just this sort of culinary failure is plaguing me today.  All I wanted was some macaroni and cheese.  I have no idea why.  When I could have eaten all of it I wanted it never occurred to me to eat it because it was never a favorite of mine.  But true to my contrary nature the second my body decided to was totally intolerant to dairy my brain went on a frantic quest to try to convince me I needed to eat mac and cheese immediately or the world would end.

I put off the craving as long as possible but today I gave in and looked into the ridiculous possibility of vegan cheese.   I'll try anything once so I gave it a shot with what was touted as the "world's best recipe for vegan cheese" on many a food blog.  Turns out making vegan cheese is a time consuming, soul killing, messy process with a very strange end result.  The sauce I made was cheddar cheese colored and tasty but it was not at all cheese like or cheese flavored but I continued on hoping that once it mingled with my gluten free pasta and breadcrumbs and got toasty it would be amazing.

It was not meant to be so.  After being baked, what little moisture was in sauce had disappeared, I'm assuming because I omitted the potato from the original recipe and was having a hard time reading the original recipe due to it being in an oddly ordered and so put in the wrong amount of margarine.  However for a dry distinctly uncheesy pasta dish it is really good and I'm not just saying that.  If someone presented it as yummy noodles I would be very happy eating it.  It was only my strong desire for mac and cheese that made it not a totally satisfying experience.  Out of the context of cheese it's tasty.

So I rearranged the recipe for (I hope) ease of preparation in the hopes someone else will try this with better results to let me know if I should try to make it again.  If  you want to give it a go with the potato from the original recipe then take out one cup of the carrots and use a small red potato then let me know what happens.

Vegan Mac and Cheese

NOODLES

4 quarts water
1 tablespoon sea salt
8 ounces macaroni

Just in case you don't know how to make pasta:  In a large pot, bring the water and salt to a boil. Add macaroni and cook until al dente. In a colander, drain pasta and rinse with cold water. Return to pot and set aside.

BREADCRUMBS

4 slices of bread, torn into large pieces
2 tablespoons non-hydrogenated margarine (I used Shedd's soy margarine)

In a food processor, make breadcrumbs by pulverizing the bread and 2 tablespoons margarine to a medium-fine texture. Put in a bowl and set aside.

“CHEESE" SAUCE

1 medium shallots, peeled and chopped
1 and 1/4 cup carrots, peeled and chopped  (about 3 medium carrots)
1/2 of a small onion, peeled and chopped
1 cup water

1 small clove garlic, minced
1/4 cup raw cashews
2 teaspoons sea salt
1/4 teaspoon black pepper
1/4 teaspoon paprika
1/8 teaspoon cayenne
1/4 teaspoon Dijon mustard
1/3 cup non-hydrogenated margarine
1 tablespoon lemon juice

Preheat oven to 350 degrees. In a saucepan, add shallots, carrots, onion, and water, and bring to a boil. Cover the pan and simmer for 15 minutes, or until vegetables are very soft.

In a food processor, blend the garlic, cashews, salt, black pepper, paprika, cayenne, mustard, margarine, and  lemon juice. Add softened vegetables and cooking water to the blender and process until perfectly smooth.

Pour “cheese” mixture onto the pasta and toss together until pasta is completely coated. Spread mixture into a 9 x 12 casserole dish, sprinkle with prepared breadcrumbs, and dust with paprika. Bake for 30 minutes or until the cheese sauce is bubbling and the top has turned golden brown.

Original recipe from Veg News food blog.

Monday, March 29, 2010

Simple Lamb Curry

I'm apparently little bit obsessed with my newest culinary discovery.  My article over on Forkful of News today is a review of two of Judith Jones' books and now I'm posting for your cooking pleasure one of my favorite recipes of hers.  

It's just that she's a great writer, has had a jealousy inducingly interesting life and she also has amazing taste in food.  Most of the things the fella and I have eaten recently have come from her cookbooks.  She takes something simple like a steak or a curry and adds a little something extra to it that will make you rethink the way you've been cooking things all along.  And for someone like me who likes to know why something works instead of just being told what to do, I love that her recipes always include the reasoning  behind the instructions she provides.  I learned a lot about cooking just from reading her recipes.

Her book the Pleasure of Cooking For One was a lot of fun to cook out of the last time the fella was out of town.  She is a big proponent of cooking well for yourself and makings something special when you're alone, to make dinner a treat instead of a chore.  With that in mind she scales down huge feasts like Julia Child's Beef Bourguignon or tells you how to cook a whole duck and use every part of it to make meals for yourself for the week.  

And the recipes are amazing, I ate really well that weekend while cooking alone.  I had scallops and butternut squash risotto and this lamb curry.  Both were somewhat fancy but very simple, I defiantly felt treated and enjoyed my food which is sometimes hard to do when you're alone.  

I upped the scale on the portions from her original recipe to post here so that it makes dinner for two or dinner with left overs for the next day for one person.  Either way this is one of my new favorite curry recipes.  There is just something about lamb and curry that appeals to me and I could probably eat it everyday.

Simple Lamb Curry
 
4 tablespoon veggie oil
1 1/2 pounds lamb, cut into 1 inch piece
1 onion or 2 shallots, chopped
1/2 red pepper, diced
2 cloves garlic, chopped
1 teaspoon fennel seeds
4 tablespoons curry powder
salt and pepper
lemon juice, to taste
1 1/2 cup broth of your choice
2 tablespoons unsweetened shredded coconut
1 small tart apple, cut into wedges

In a frying pan over medium high heat add 2 tablespoons of the oil until warm. Add the lamb pieces to the pan without crowding them. Brown the meat on all sides briefly without burning the meat or cooking the meat all the way through. Once browned set the meat aside.
 
Add the the other 2 tablespoons of oil to the pan and saute the onion, pepper and garlic for about 8 minutes or until softened but not browned. Add the cooked lamb, fennel seeds, and curry powder. Salt the lamb lightly then squeeze several drops of lemon juice into pan. Add broth of your choice, cover pan and cook at a decent simmer for about 10 minutes or until the sauce thickens. Reduce the heat and add more liquid if it evaporates too quickly.
 
When the sauce is your desired consistency add the coconut and apple slices, tossing them in the pan for about 5 minutes to warm through. Taste the curry, re-season with salt, pepper and lemon juice as needed then serve over rice or with flourless naan.

From Judith Jones' The Pleasures for Cooking for One. 


Wednesday, March 24, 2010

Fish Steamed Over Vegetables

While pouring a very interesting albeit not very enjoyable tasting of red wines from the Languedoc (they have a tendency to smell like a barnyard in the summer, not my idea of delicious) I got into a conversation about wine pairings with one of the tasters on a subject that I've never much thought about.  She was talking about  having just gotten into wine and how she's working on cellaring some wine.  However she is both a pescetarian (a vegetarian that also eats fish) and a lover of big red wines who was trying to come to terms with the fact she would never be able to pair all these great reds with an equally great meal.

I guess the whole "red wine with red meat, white wine with white meat" rule of thumb has become a bit too entrenched in the minds of starter winos.  And I say, rules?  Who needs them.  Do what you like.  If you're in the mood for fish and a red wine don't let the guy at the wine store who insists pinot gris is the only good wine to drink with white fish get in your way.  Of course a Cabernet and tilapia in a lemony sauce is going to be a little weird.  However pinot noir with a hefty fish like salmon is amazing.

So the other night when the fella and I were making this outstanding fish steamed over vegetables I tested out the red wine with white meat with good results.  The smooth, light bodied Castle Rock Pinot Noir from Geyserville, California had the right balance of gentle tannins and berry and stone fruit flavors to compliment the halibut steaks.  The steamed eggplant with the rich thyme and stewed tomatoes gave the fish enough heft that it could stand up to the Pinot.

Tada a red wine to pair with white fish.  It can be done.  And the recipe itself has the makings of a new favorite.  It was as easy as chopping up some vegetables and stirring it every once in a while.  And I can't believe I never thought of simply steaming fish over top of the veggies at the end, so much easier and waistline friendly than pan frying the fish.  Not to mention this is an excellent recipe to use, subbing in whatever random produce you have in the fridge.


Fish Steamed Over Vegetables

3 tablespoons oil
2 cloves garlic, minced
1 large onion, chopped
salt and pepper, to taste

2 medium zucchini, cut into 1 inch pieces
1 medium eggplant, cut into 1 inch pieces
1 medium pepper (any color), cut into inch pieces

2 medium tomatoes, roughly chopped
1 teaspoon fresh thyme
1/2 cup black olives

1 1/2 pounds white fish steaks (we used halibut)
1/2 cup fresh basil, roughly chopped

Put 2 tablespoons of the oil in a large deep skillet with a lid, over medium high heat.  Add the garlic and onion, sprinkle with salt and pepper.  Cook, stirring occasionally until the onions are soft.

Add the zucchini, eggplant, pepper and a but more salt and pepper to the pan,  Lower the hear to keep veggies from burning and cook, stirring occasionally for about 10 to 15 minutes or until eggplant is soft. 

Add the tomatoes, thyme and olives, cook stirring occasionally until the tomatoes begin to break up and create a sauce, or about 5 minutes.

Sprinkle the fish with salt and pepper then place flesh side down over the pile of vegetables.  Adjust the heat so that the sauce simmers then cover pan and cook from anywhere between 5 to 12 minutes or until a knife inserted to the thickest part of the fish meets little resistance.  Thin fish will be done in 5 minutes, my medium thick fish took 8 minutes.

Spoon a portion of the veggies to a plate then top with fillet of fish.  Sprinkle with a bit of fresh basil.

Tuesday, March 23, 2010

Gluten Free Sugar Free Hazelnut Brownies

Just recently I finally had the chance to go back and cook the outstanding hazelnut brownies I made over the winter, this time adjusting the ingredients for baking with agave nectar.  I didn't think it was possible but they were made even better this time around.  Cooking without sugar made them richer and moister, not to mention much less likely to be crumbly and fall apart.  It was a pleasant surprise.  The only problem with this recipe really is to try not to eat them all in one sitting.  They are very much worth the effort of making hazelnut flour which I will admit is no small task.  And even sugar free they still pair amazingly well with my vegan variation on David Lebovitz's Pear and Caramel Ice Cream with Raspberry Topping.


Gluten Free Sugar Free Hazelnut Brownies
6 tablespoons butter
3 ounces dark unsweetened baking chocolate
3/4 scant cup agave nectar
1 whole egg plus 1 egg white
1 and 1/4 cup hazelnut flour


pinch of salt
3 tablespoons brandy


Heat oven to 325 degrees. Grease an 8 or 9 inch square baking pan with butter.


Combine the butter and chocolate in a small saucepan over very low heat, stirring occasionally. When chocolate is just about melted, remove from the heat and continue to stir until smooth.


Transfer to a mixing bowl and stir in agave. Then beat in the egg and egg white one at a time. Gently stir in the hazelnut flour (make your own by toasting, removing the skin from and grinding the nuts in a coffee/spice grinder until very fine), salt, and brandy. Pour into the prepared pan and bake until just barely set in the middle, about 20 minutes. If in doubt under cook them slightly rather than over cooking them.

Monday, March 22, 2010

Whole Baked Trout with Fennel

This is a great meal to use should you need to impress someone without having the time to put tons of effort in to it.  Because nothing says "fancy" like serving someone a whole fish.  It seems complicated and complex but in actuality couldn't be easier.  Of course if you're squeamish about whole fish or know someone who is this probably isn't for you.

The fella surprised me by making this for dinner one night when we were having a friend over.  We were both quiet impressed and blown away by the presentation.  And this is a great way to prepare fish, it comes out at a perfect level of doneness so that is is flaky but very moist and flavorful.  The next time we made this dish I helped prepare it and realized just how easy it is to make and became an even bigger fan of this meal.

You can use any whole white fish, herbs and veggies you like.  This is just what we've come up with.  If you have any other combinations you find that you like let me know.

Whole Baked Trout with Fennel

3 tablespoons oil
2 whole trout, gutted
1 bulb fennel
4 sprigs fresh thyme
1 lemon, sliced
salt and pepper, to taste


Grease the bottom of a baking dish large enough to fit the fish using the oil.  Liberally salt and pepper the inside of the fish and place into dish.

Cut the fronds off of the fennel bulb and put half of the fronds into the cavity of each fish.  Cut the fennel bulb into 1/2 inch thick chunks and scatter around the bottom of the dish around the trout.  Salt and pepper the fennel.  Place 2 sprigs of thyme inside each fish.  Divide the slices of lemon between the fish and place in the cavities.

Place in over for 15 minutes.  Check for doneness by poking thickest part of fish with a knife, if the knife goes easily through the flesh the fish is done and ready to eat.  If the fish isn't cooked through put in for another 5 to 10 minutes at a time until it is cooked to your preferred level of doneness.

Remove fennel fronds, thyme, and lemon from inside fish and serve with roasted fennel bulb.

Wednesday, March 17, 2010

Vegetarian Crockpot Chili

It's been a busy week so there has been a lot of crockpot action going on in my kitchen.  Yesterday the fella threw this chili together for about the millionth time and I couldn't believe I hadn't written about it yet.  It's tasty and a great low fat/high protein meal. 

Aside from the basic seasoning and the inclusion of beans you could add whatever you have in the kitchen to this recipe to create whatever chili you're in the mood for that particular day.  It's a very forgiving recipe and beans hold up great in the crockpot so you really can't go wrong.  If you don't like spice you could skip the chipotles or go for a milder jalapeno.  Feel free to use whatever combination of beans you have around.  We used kidney and cannellini beans since we had a bunch left over from the pottage earlier in the week (I'm terrible at estimating how many dry beans to cook in order to get the amount of beans I need for a recipe.)   But we're also fond of a combination of black beans and chickpeas.

I like to top this with a little sour cream or yogurt and cilantro to add a little something extra to it while still sticking to the vaguely southwestern theme.  But if you wanted to be naughty some melted cheddar cheese on top would be amazing.  So go crazy and treat yourself to a meal  that cooks while you're at work.


Vegetarian Crockpot Chili

2 tablespoons oil
4 cloves garlic, minced
1 onion, chopped
1 teaspoon crushed red pepper flakes
1 teaspoon cumin 
2 tablespoon chili powder 

2 teaspoons oregano
2 tablespoons soy sauce 
1 28-ounce can tomatoes (or about 1 pound fresh tomatoes chopped) 
2 cups vegetable broth
1 6-ounce can tomato paste 
2 chipotles with some of their sauce, chopped
2 14-ounce cans black beans, drained
2 14-ounce cans red kidney beans, drained
salt and  pepper, to taste 

sour cream or yogurt, as topping
cilantro, as topping

    Sautee the onion, garlic and red pepper flakes until the onion is soft, about 3 to 5 minutes. Add the chili powder and cumin and cook for two more minutes. 

    Place the onions along with all the remaining ingredients, except sour cream and cilantro in the crock pot, stirring to combine.  Cover and cook on low for 6 to 8 hours.

    Top with sour cream and cilantro just before serving.

    Recipe made much more interesting from boring original over at  About.com

    Tuesday, March 16, 2010

    Boxed Wine? Yellow and Blue Torrontes


    Am I seriously going to suggest wine from a box to you?  Yes I am.  Even though I work in a wine store and should know better?  Yeah even with that in mind I can still say this is a great wine.  It just also happens to come in a box.

    I have to admit however that the only reason I bought the Yellow and Blue Torrontes in the first place was to mess with Lindsay during a wine tasting.  The theme of our wine tasting group that month was weird wines and I figured a boxed wine in a room full of wine snobs would be pretty weird.  But I didn't want anyone's preconcieved notions clouding their tasting of the wine so I poured in a carafe, not allowing anyone to know there was a box of wine in my house.  It worked, everyone though I was nuts to carafe a white but no one suspected what was really afoot in fact everyone kind of liked the wine.

    The group deemed it "pleasantly syrupy" and "like drinking the forest floor" in reference to the fact that it is both grassy, floral and earthy.  All of those characteristic come together somehow to create a really nice wine. It's a bit sweeter than some of the other Torrontes I've had.  My favorite the Michel Torino Don David Torrontes comes in at the far other end of the spectrum for the varietal at a much higher price point and much drier, crisp mouth feel.  But for an Argentinian Torrontes in a box for $9 the Yellow and Blue is amazing, I would have never thought while buying it I would actually like it enough to continue going back to buy it again and again.

    When I did the big reveal of the dreaded box everyone agreed I did the right thing not showing them the box because they would have refused to drink it.  Snobs!  The news that since it comes in a box so actually contains a bottle and a half worth of wine, instantly cheered everyone up.  That's the great thing about this wine, more wine for your money and that's one less glass bottle to contribute to the recycling bin/landfill .  Oh and it's also organic.  The bad news it the wine guy you buy it from will probably make fun of you.  I told my wine seller to hush though because even Robert Parker gave it 90 something points. 

    Monday, March 15, 2010

    Cannellini and Chickpea Pottage


     Even with the appearance of warmer weather there is just something about a big pot of well seasoned root vegetables and beans that is still really satisfying.  Then again I'm the type of person that has been known to suffer over a boiling pot of soup and cook a loaf of bread when it's 100 degrees so I might be biased.  I think we can all agree that a tasty one pot meal is pretty amazing regardless of the weather.

    The fella and I have been making this all winter and had it again yesterday and it still retains it's yumminess no matter how many times we cook it.  The only problem has been trying to find gluten free chicken sausages here in town.  Amy's Organic are the only ones I've been able to find and sadly they are precooked without a casing which results in a slightly less appealing texture since the sausage refused to crumble into the beans nicely.  But if you can handle any ole chicken sausage you are in luck because raw crumbly sausage ups the delicious scale of this meal.

    I've also found that I prefer giant white lima beans in this recipe instead of the cannellini beans from the orginal recipe.  The lima beans hold their texture much better during the baking process.  This was another one of those surprising discoveries, finding out that lima beans done right are out of this world.  More proof that just because you hated it when you were a kid doesn't mean you'll hate it later in life now that you know how to cook.

    First beets, then kale, now lima beans.  Soon I'll find a way to make kohlrabi edible.  Now that will be the day.


    Cannellini and Chickpea Pottage

    1 tablespoon oil
    4 chicken sausage links, casings removed (the only gluten free variety I've found in town is Amy's brand)
    1 yellow onion, chopped
    2 carrots, peeled and chopped

    1 cup chicken stock
    3 tablespoons tomato paste
    1 teaspoon agave nectar
    4 cups giant lima beans
    2 cups chickpeas
    3 tablespoons fresh thyme, divided use (or 1 1/ 2 tablespoons dried thyme)
    salt and pepper, to taste
    1 bay leaf
    1/ 4 teaspoon crushed red pepper flakes
    1/2 cup Parmesan cheese, finely grated

    Preheat the oven to 450 degrees.

    Heat a  Dutch oven over medium-high heat. Add about a table of oil and the sausage, breaking it up with a spoon as it browns. Once meat is browned, add the onion and carrots and sauté for 5 minutes or until both the carrots and onions look like they are beginning to soften. Add the garlic, and sauté for 2 minutes.

    Stir in chicken broth, scraping the pan to loosen browned bits stuck to pot.  Add the tomato paste, agave nectar, lima beans, chickpeas, one tablespoon of thyme, a pinch of salt and pepper, bay leaf and crushed red pepper. Bring to a boil, then cover, reduce heat, and simmer for 5 minutes. Remove from heat.

    Sprinkle shredded Parmesan cheese evenly over the pottage and transfer dish to oven (uncovered) for 20 minutes or until the top becomes brown and bubbly.

    Remove from oven, sprinkling any remaining thyme and Parmesan cheese over the top.

    Original recipe from Food52 Blog.

    Thursday, March 11, 2010

    Funky Raspberry Vinegar Latte

    Tonight I combined two of my favorite things about Madison--Alterra coffee from Barriques and crazy flavored vinegar from Vom Fass.  If you live any where else in the world prepare to wish for the first time ever that you lived in the Midwest because I'm about to tell you how those two things together make a great latte. 

    The great thing about working in a wine store that also is a cafe is the close proximity to two of my favorite things in life: coffee and wine.  This inevitably leads to opportunities to try a lot of tasty examples of each.  Even better is that on slow nights I can amuse myself by making unusual drinks on the espresso bar. 

    Today I happened to have just enough time to follow through with an idea I had been pondering over for awhile, can a fruity vinegar make a great addition to a latte?  Some of the sweeter vinegars from Vom Fass make a good substitute for sugary syrups when combined to with sparkling water to make good non traditional Italian sodas.  Having experimented with that I figured the chances were decent that the right vinegar would work to make a flavored latte.  And I was right.

    Turns out with the right ratio of fruity vinegar and honey to take the edge off the acidity this makes a fine drink.  It was a little weird at first but with a little more experimentation to find the perfect vinegar I believe the Vom Fass vinegar latte could outshine even my former favorite Emily experimental drink, the Earl Gray mocha.

    Of course unless you have an espresso machine at home I'm shamelessly teasing you with this recipe.  But that kind of is my job to tell you about tasty things even if a lot of them only exist in my own little world some of the time.


    Vom Fass Vinegar Latte

    1 scant ounce of a fruit flavored vinegar
    2 shots of espresso
    honey, to taste
    12 ounces of steamed milk


    I had good results with making this drink with the Raspberry Wadlburg Balsam Vinegar and the Blackcurrant Waldburg Balsam Vinegar from Vom Fass.  Buy some single serving sizes of some of the vinegars and experiment with what you like.  Or use your favorite fruity vinegar that you already have.

    Pour the vinegar, espresso and honey into the bottom of a warm mug and stir well.  Steam your milk making sure not to make it too warm or it will curdle the vinegar, and pour gently into the mug.  Give the latte a stir.  Taste and add more honey if the drink is still too acidic for you.  Top with whipped cream if its to your taste.

    Tuesday, March 9, 2010

    Homemade Rice Milk

    Now that I figured out how to make it myself I can't believe I've spent so much money on buying not so tasty rice milk in the store all these years.  To get an aseptic container of gluten free sugar free rice milk I was paying $2 or more a week.  Which isn't too bad considering how much a similar sized bit of organic hormone free dairy milk would be.  But I have left over rice at home all of the time and I'm obsessed with making everything myself so I figured there had to be a more cost effective way to enjoy rice milk.  Turns out there is and  it couldn't be easier.

    Surprise surprise all rice milk is made of is rice and water and a bit of vanilla makes things more palatable.  So why continue spending money on non-dairy milk products in the store that will lead to you throwing away extra cardboard containers in the land fill when you can do it yourself?   If you have five minutes and a blender you have no excuse to not do it.  It's ridiculously easy.


    Homemade Rice Milk

    1 cup warm brown rice
    4 cups warm water
    1 teaspoon vanilla

    In order to get milk and not rice sludge it is important that the water and rice are warm, not boiling but heated through.  Place all the ingredients in the blender.  Just in case the water is too warm, place the lid of the blender on an angle so air can escape when you start the blender, then cover the top of the blender with a towel in case anything splatters. 

    Start the blender on a medium speed and allow it to whir for 5 minutes.  You may have to run your blender for a minute at a time, agitating the mixture periodically.  When you have a uniform constancy in the blender pour the mixture through a fine mesh sieve into a storage container (I keep mine in left over yogurt containers.)  There will be pulp from the brown rice in the sieve, try to force as much liquid out of it as possible.


    This is what you want the pulp of your rice milk mixture to look like coming out of the blender after the liquid has all been forced out.  If it's any courser than this put it back in the blender for another minute or so.

    Allow mixture to cool then store it in a well sealed container in the fridge for up to a week.  Make sure to shake the milk before each use as the contents settle.

    Monday, March 8, 2010

    Ten Minute Tasty Asparagus and Brown Rice

    Sure Rachel Ray can make a slew of 30 Minute meals when all of her ingredients are pre-chopped and pre-measured.  That's not that big a deal really, we could all do that if we had a posse of people behind the scenes to prep our food for us too.  Worst of all her recipes are seldom very healthful.  Sometimes tasty and interesting but with enough fat and spice most things are.  

    Heidi Swanson over at the beloved blog 101 Cookbooks does what Rachel Ray only wishes she could.  Some of my favorite recipes from her are ones that are done in a matter of moments by using up the left over bits from the fridge and best of all she's a master at making delicious but healthy food.  The trick to these recipes like the one for Asparagus and Brown Rice below is to have everything prepped and ready to go before hand.  It might seem like a long list of ingrediants but all the work they require is chopping and cooking briefly.

    Aside from being a snap to make if you skip the almonds this dish is also excellent for those low fat/high carb nights on this diet that can get so tedious to try to cook for.  It has all sorts of benificial fiber from the brown rice and garbanzos, crisp green asparagus and the tahini dressing adds worlds of flavor wihtout tons of fat. This is one of my favorite go to meals for when I have left over brown rice and garbanzos, those are the important bit you could sub in any veggie you had on hand for the asparagus with similar results.


    Ten Minute Tasty Asparagus and Brown Rice

    Tahini Dressing:
    1 garlic clove, chopped
    1/4 cup tahini
    zest of one lemon
    scant 1/4 cup freshly squeezed lemon juice
    2 tablespoons extra-virgin olive oil
    2 tablespoons hot water
    scant 1/2 teaspoon fine grain sea salt


    3 tablespoons extra-virgin olive oil
    1 or 2 14-ounce cans of chickpeas, drained

    2 cloves garlic, minced
    1 medium yellow onion, chopped

    1 bunch asparagus, cut into 1-inch segments

    3 cups cooked brown rice
    1 cup almond slivers, toasted
    fine grain sea salt

    Make the dressing by whisking together the garlic, tahini, lemon zest and juice, and olive oil. Add the hot water to thin a bit and then the salt. Set aside.

    Add roughly 3 tablespoons of olive oil to a big skillet over medium-high heat. Swirl the oil around to coat the pan, then add the chickpeas and sprinkling of salt. Let the beans saute there for a couple minutes.

    Add the garlic and onions. Stir for a minute. Stir in the asparagus with another pinch or two of salt, cover with a lid for a minute or two to steam - just until the asparagus brightens and softens up just a bit. Uncover and stir in the rice and almond slivers, reserving a few almonds for garnish. Taste and add more salt if needed . Serve in a big bowl drizzled with a few tablespoons of the tahini dressing, let each person add more dressing to their tastes.

    Original recipe from 101 Cookbooks blog.

    Tuesday, March 2, 2010

    Jordanian Beef Stew

    This recipe defies all laws of the cooking universe as I knew them before making this meal.  It's practically magic.  There are only two spices and a handful of ingredients.  The meat cooks for an hour in plain old bland water.  There is no effort involved.  And yet this is the most delicious thing I've eaten all year.  I don't know quite why or how it's possible but I'm not complaining instead I plan in making this again and again and again.

    Basically this is Beef Burgundy without all the esoteric cooking instructions or all the extra fat.  Except this beef stew is from a Jordanian recipe and is twice as delicious.  I didn't even bother serving it over rice or with yogurt like the original recipe called for because that would have just distracted from the flavors of the beef which didn't need anything added to it to make it tasty. 

    Don't let the long cooking time deter you from wanting to make this.  Once you chop everything the food needs no attention so you won't notice how long the beef has been cooking.  Start it in the morning some day you have off and poke at it periodically, when its done let it cool and you'll have something great to eat that night or later in the week.  Personally I love food that cooks itself while I'm off watching a movie or playing with the dog.  This is the best kind of recipe if you ask me.


    Jordanian Beef Stew
    1 pound beef, cut into bite sized pieces
    1 pound green beans, cut into 2 inch pieces
    1 pound tomatoes, coarsely chopped
    2 cloves of garlic, crushed
    2 teaspoons coriander
    2 teaspoons cumin

    Sprinkle the beef with salt and pepper, place in a large skillet, and pour water over the beef until just cover. Place lid on skillet and simmer over a medium low heat for about 30 minutes or until meat is brown.

    Remove 1 cup of the broth from the beef and reserve it in the bowl of your food processor.

    Put the cut up green beans in with the beef and cook until tender.

    Add tomatoes and garlic to the food processor and pulse until smooth. 

    Once beans are done pour off a bit of water from the simmering beef so that there is enough to mostly cover the beef but there is enough room in skillet to add the tomato mixture. 

    Add pureed tomato mixture, coriander and cumin to skillet.  Salt and pepper generously.  Allow to simmer uncovered for another hour or until beef is fork tender.  Will taste even better a couple days after cooking when its had time to marinate in the refrigerator.