Showing posts with label cookbooks. Show all posts

Friday, June 25, 2010

Pear and Caramel Ice Cream with Rasperry Topping

I've loved ice cream for as long as I can remember.  So it was only natural when I started cooking everything myself that I would eventually start making fabulous ice creams as well.  My fella was even awesome enough to buy me the best ice cream making book ever, David Lebovitz's The Perfect Scoop, for my birthday last year.  I started playing around with making some of the recipes with agave and fructose for the French Diet but never got around to posting about them because I was too busy licking the ice cream maker clean after each experiment.

More recently this same book has been just left sad and lonely sitting on my shelf as I did the elimination diet and found out how truly ill dairy in all forms makes me.  My body can try to deny me many things but the only thing I will not give up is ice cream.  Even if I have to buy $6 pints of coconut milk ice cream sweetened with agave nectar at Whole Foods I will neglect myself other things to afford that ice cream.  So I decided to go back to my favorite ice cream book and start cooking dairy free sugar free versions of some of David Lebovitz's recipes. 

I will not give up ice cream and I will not leave my favorite dessert cookbook to get dusty on the shelf.  So in between moving and looking for a new job in a new city across the country I'm going to treat myself to homemade dairy free ice cream.  This will be the summer that I dare to make dairy free ice cream amazing.

My first experiment was with the Pear Caramel Ice Cream I'd made a couple of times before with heavy cream and really enjoyed.  It's a simple recipe so I didn't have to make a lot of substitutions to make it work as a dairy free recipe.  The toughest part was playing with caramelizing agave nectar.  It is possible but it doesn't quite give the thick, dark, and slightly scorched flavor of caramelized sugar however.  But like many things in sugar free or gluten free cooking if you stop thinking about what you're missing and focus on the new flavor you're discovering its still super delicious.

Pushing the pears through a sieve is a pain in the butt, I know but it is worth it for the creamy texture the process gives you.  If you don't care then by all means eat the grainy slightly chunky mixture as it is or give it a go round in your food processor to break it up a bit.

This ice cream is even better with some raspberry topping to add a tartness to the almost overpoweringly sweet caramel ice cream.  And if you're really feeling out going this all goes great on my Gooey Hazelnut Flour Brownies.  These three things together make the ultimate dessert. But worry not the highly decadent ice cream holds up very well on it's own.   I end up eating the whole batch before I even have time to turn on the oven.


When your agave nectar starts to look like this you've achieved caramel.


Pear Caramel Ice Cream

3 medium-sized ripe pears, peeled, cored and diced
1/2 scant cup of agave nectar
2 cups full fat coconut milk
1/8 teaspoon salt
a few drops lemon juice

Pour the agave nectar into a heavy saucepan, cooking over medium high heat while watching it very carefully.  When it darkens and starts to look like the picture above (this will take awhile, 10 to 15 minutes) begin pushing the liquid around with a heat proof spatula so the middle doesn't burn.

When the agave is a uniformly dark color and syrupy thick stir in the diced pear.  The caramel might become hard or make scary hissing noise but don't be afraid keep adding the pears and stirring the mixture for about 10 minutes or until the pears are cooked through.

Remove the pot from the heat and add about 1/2 cup of the coconut milk and stir.  Now add in the rest of the coconut milk and a couple drops of lemon juice.  

Let this mixture cool to almost room temperature then puree in the food processor until smooth.  Press this mixture though a mesh strainer or sieve with your flexible spatula.  This will remove the tough fibers of the pear.

Chill this mixture then run it through your ice cream maker.


Recipe adapted to be dairy and sugar free from a David Lebovitz recipe in the Perfect Scoop.


Raspberry Topping

handful of fresh or frozen raspberries
drizzle of agave nectar
water, as needed

Drop the raspberries and a generous drizzle of agave nectar into the food processor and blend.  If it is too thick add a small amount of water until you get the consistency you like.  Use to top the Pear Caramel Ice Cream.  This also is a nice topping for your oatmeal in the morning.


Tuesday, June 15, 2010

Chickpea "Fries"

Just because I'm on a crazy diet doesn't mean I can't have an urge for a burger and fries.  And because I'm highly motivated to satisfy my cravings while sticking to the parameters of the diet I made it happen in a weird and wonderful way.

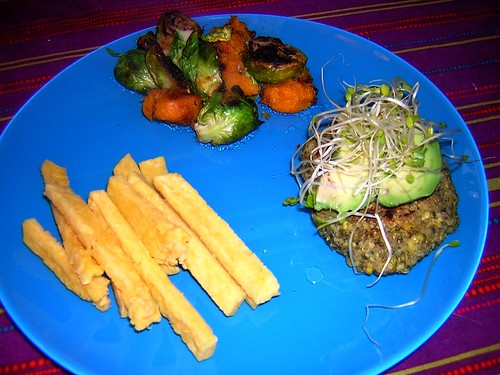
For burgers we had the very hearty and healthy Quinoa and Mung Bean Burgers from The Whole Life Nutrition Kitchen blog.  They are the people whose elimination diet I'm on so I figured they knew what they were doing.  With some avocado and sprouts they did the trick though without citrus they were a little bland.  Apparently I need to come up with a citrus substitute that doesn't lead to migraines.  Hmm.

Since I'm testing chickpeas to see if they cause a reaction (so far so good...yay!) I found a recipe for chickpea flour "fries" that seemed way too interesting to not try.  They are a little labor intensive but as a potato substitute, it is well worth the effort.  Next time I would mix something interesting directly into the batter though because they were hard to season after cooked.

This diet also has had the odd side effect of me craving odd things like Brussles sprouts which I was never a fan of before.  So I threw together some pan braised Brussles sprouts with some butternut squash thrown in to make then even tastier.   This randomly chosen flavor combination is one I keep recreating week after week.  I even got the fella to eat one Brussles sprouts while calling me "mom,"  I don't even think he tried to feed it to the dog.


Chickpea Fries

2 cups water
1 cup chickpea flour
1 tablespoon olive oil
salt and pepper, to taste

oil for frying

Put 2 cups of water in a medium pot on the stove to bring to boil.

Grease a small baking sheet with a rim and set aside.

When the water is boiling turn heat down to medium low and, slowly begin adding the flour in a bit at a time whisking well so no lumps form.  Continue this process until all the flour is combined with the water and you have a very thick polenta like paste.  Stir in the oil and salt and pepper at this point, mixing well.  Keep stirring as you let the mixture cook for one minute.

Turn the mixture out onto the greased baking sheet.  Careful it's super hot! If you have what I call "barista fingers" that can handle the heat, begin flattening out the mixture until it is about 1/8 of an inch thick.  If you are like my fella  and have lily white programmer's fingers you might need to press this mixture out with a barrier (like a silicone mat or greased parchment paper) between you and the hot goop because you really do need to work with this while it is still quite warm.

When you have it flattened out into a sheet of chickpea goo place the baking sheet in the fridge for 30 minutes or over night. 

When you're ready to eat the "fries" take them out of the fridge and use a pizza cutter to cut them into your preferred shape, the recipe suggests triangles but I wanted mine to cook faster and look like fries so I cut them thin.  Pour about 1/4 inch of oil in the bottom of a frying pan and bring up to temperature.  Fry the pieces of chickpea batter in small batches for about 3 to 4 minutes.  When they are slightly golden brown on the edges remove from oil to a plate covered with paper towel.  While they are still warm, sprinkle with salt or rosemary for added flavor.

Tuesday, May 25, 2010

Chocolate Lava Cake

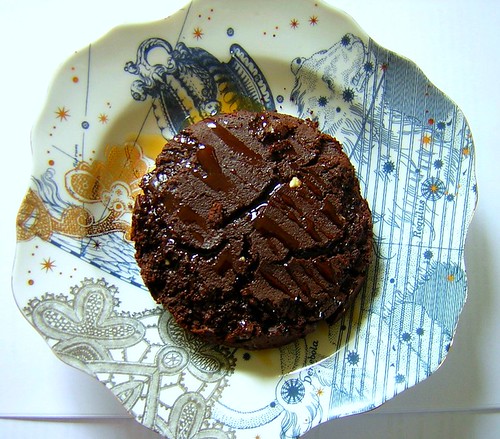
The only thing sexier than this beautiful little molten pile of chocolate is the woman who wrote the recipe.  

Suzanne Pirret is what would happen if Nigella Lawson and a sultry sex writer got together and decided to write a book.  She's my food writing hero.  She is hot and funny and totally engaging.  Not usually words one uses when describing a cookbook but this one is all those things and more.  Then again I suppose hotness its to be expected from someone wearing a form fitting white dress and 6 inch Louis Vuittons on the cover of a book called The Pleasure is All Mine.  Get your head out of the gutter, it's a book full of fancy but easy recipes for one because eating alone is no reason not to treat yourself well.

Seeing as I've been obsessed with this book as of late I've already shared her recipes for TomYum Kung Soup and Lemongrass Steamed Fish.  But I wouldn't be able to live with myself if I didn't write about the best recipe in the entire book.  It of course involves chocolate and is insanely decadent.  That didn't stop me from making this luscious melty mouth filling treat over a dozen times last week in order to experiment with getting the sugar free version of the recipe perfect.  It was tough but I made it through.  This is the type of rigorous testing I suffer through just for my loyal blog readers.     

In the end I came up with a gluten and sugar free recipe that is so good I couldn't tell the difference between the one that had sugar and the one that didn't.  I have to warn you though Suzanne Pirret says this is a single serving treat, unless you're immune to high doses of sexy chocolate induced caffeination you might want to find someone to share it with.  Or not who am I kidding it's too good to resist eating the whole damn thing.  

If you want to make the sugary version or need help figuring out how making this cake works check out this video for the recipe and watch Suzanne Pirret work her magic.  Someday I'll be the type of person coordinated enough to wear a designer dress and high heels while working with chocolate.  Or at least I can dream.


Chocolate Lave Cake

3 ounces unsweetened dark chocolate

1 tablespoon butter (soy butter also works nicely)
3 teaspoons fructose
1 egg

 1 tablespoon almond flour
1 dash sea salt

unsweetened cocoa powder
drizzle of agave nectar

Preheat the oven to 360 degrees.

In a small sauce pan over low heat very slowly melt the chocolate.  When chocolate starts to melt, briefly remove pot from heat and stir, then place back on heat to further melt.  Repeat the process until chocolate is completely melted and set aside to cool a bit.

Melt the butter in a small mixing bowl then whisk in fructose and egg until well combined.  Slowly begin to drizzle in the melted chocolate, whisking as you pour.  You want to add the warm chocolate a little at a time so it doesn't cook the raw egg.  The mixture should be very stiff and thick at this point, too dense to stir easily and that is the perfect texture.

Add in the flour and salt and stir once again briefly. 

Grease a small ramekin then sprinkle the inside with cocoa powder.   Tap the sides of the ramekin to remove any excess powder then pour the batter into it.  Bake for 9 minutes.  Don't over cook!  

When the cake is done cooking it should be firm on the outside but liquid on the inside.  If you tip the cake over a plate and it slides out it's done.  Drizzle with agave nectar or top with ice cream to take an edge off the bitterness of the chocolate.

Modified to be sugar and gluten free from a Suzanne Pirret recipe in The Pleasure Is All Mine.

Monday, May 17, 2010

Lemongrass Steamed Fish

Over on the other blog I write for I've been blathering about how much I love Asian markets and all the crazy ingredients that are to be found there.  Last week I wrote about all the crazy things I bought on my last trip through the Asian groceries of Madison and today I posted a delicious and easy soup recipe that I used to combine all the things I bought.   Now Tom Yum Kung soup is one of my favorite things to make. It seems complicated but it comes together super easily.

The only problem with a recipe like that and all the specialty ingredients is you are inevitably stuck with left over bits of things you have no idea what to do with.  Like lemongrass tends to come in big bunches but each recipe only calls for one stalk, so what to do with the rest?  Or you managed to track down lime leaves and galangal and they were kind of expensive so you don't want the rest to just rot, now what?

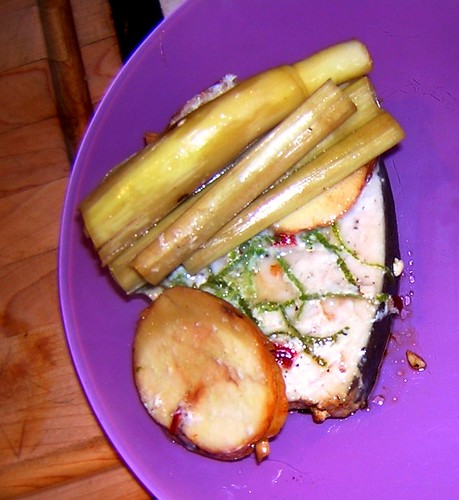
Steamed fish is the perfect solution.  Gather all the left over bits of Asian oddities and pile them on fish, wrap them up in parchment and you have an easy but creative dish that will save those stalks of lemongrass from going to waste.  It isn't pretty but it's very tasty and with just enough spice to be exciting.


Lemon Grass Steamed Fish

2 fillets of swordfish or other meaty fish
2 dried red chili peppers, chopped
2 limes, zested
4 thin slices of galangal (or ginger)
2 stalked lemon grass, bashed up with the edge of a knife and cut into 2 inch lengths
1/2 cup sake or white wine
2 dashes of fish sauce

Preheat the oven to 400 degrees.

Cut two pieces of parchment paper a bit larger than your pieces of fish.  Pat dry each fish fillet and season with salt and pepper on both sides before putting each piece of fish on a square of parchment.  

Sprinkle the top of each piece of fish with chili pepper, lime zest, galangal and lemongrass.  Now comes the interesting part.  Using string or staples gather together the parchment so that the fish is wrapped up like a present with just a small opening at the top of the packet.  When the fish is secured in the parchment, carefully pour 1/4 cup of sake into each wrapped up piece of fish.  Then drizzle in just a little bit of fish sauce to each fish packet.

Bake for about 20 minutes or until a knife stuck into the fish meets little resistance.  Be careful unwrapping the fish so that you don't get burnt by the steam.  


Monday, April 19, 2010

Swordfish and Olive Pasta

The fella and I were both extremely wary of this meal as we were cooking it.  Fish plus pasta seemed curious and had a likelihood to not be as tasty together as the two delicious bits are separate.  In this case the genius of the recipe won out over our doubts.  Not only is it a very yummy recipe it is also very easy.  The meaty texture of the broiled fish contrasted nicely with the pasta which then covered with the salty bits of caper and olive made a nicely balanced meal.  This recipe is going into our rotation of quick filling things to make when I don't feel like cooking.


Swordfish and Olive Pasta

6 ounces of swordfish
2/3 cup black olives, finely chopped
salt and pepper
6 ounces curly pasta (gluten free rice rice pasta works well)
2 large shallots, thinly sliced
2 cloves garlic, thinly sliced
3 tablespoons olive oil
1 teaspoon herbs de Provence
4 tablespoons capers
1/ 2 starchy water reserved from boiling pasta
fresh parsley

Line broiler rack with aluminum wrap, rub on a little oil, set fish on top and broil 4 minutes on one side.  Turn the fish, top with olives and broil 2 or 3 minutes longer.

Bring a large pot of salted water to a boil and drop in the pasta.  While it cooked, saute shallot and garlic in the olive oil over low heat until they are soft, don't let them brown.  Add the herb de Provence and capers.  Slice the swordfish in thin strips and spoon the olives into the shallot mixture.

When the
pasta is al dente, drain it, reserving 1/ 2 cup of the cooking water and mix the pasta in with the swordfish,adding pasta water a little bit at a time as needed to moisten the pasta in order to make a few tablespoons of sauce to cover the pasta.

Salt and pepper the dish.  Toss one last time and top with parsley to serve.

Monday, March 29, 2010

Simple Lamb Curry

I'm apparently little bit obsessed with my newest culinary discovery.  My article over on Forkful of News today is a review of two of Judith Jones' books and now I'm posting for your cooking pleasure one of my favorite recipes of hers.  

It's just that she's a great writer, has had a jealousy inducingly interesting life and she also has amazing taste in food.  Most of the things the fella and I have eaten recently have come from her cookbooks.  She takes something simple like a steak or a curry and adds a little something extra to it that will make you rethink the way you've been cooking things all along.  And for someone like me who likes to know why something works instead of just being told what to do, I love that her recipes always include the reasoning  behind the instructions she provides.  I learned a lot about cooking just from reading her recipes.

Her book the Pleasure of Cooking For One was a lot of fun to cook out of the last time the fella was out of town.  She is a big proponent of cooking well for yourself and makings something special when you're alone, to make dinner a treat instead of a chore.  With that in mind she scales down huge feasts like Julia Child's Beef Bourguignon or tells you how to cook a whole duck and use every part of it to make meals for yourself for the week.  

And the recipes are amazing, I ate really well that weekend while cooking alone.  I had scallops and butternut squash risotto and this lamb curry.  Both were somewhat fancy but very simple, I defiantly felt treated and enjoyed my food which is sometimes hard to do when you're alone.  

I upped the scale on the portions from her original recipe to post here so that it makes dinner for two or dinner with left overs for the next day for one person.  Either way this is one of my new favorite curry recipes.  There is just something about lamb and curry that appeals to me and I could probably eat it everyday.

Simple Lamb Curry
 
4 tablespoon veggie oil
1 1/2 pounds lamb, cut into 1 inch piece
1 onion or 2 shallots, chopped
1/2 red pepper, diced
2 cloves garlic, chopped
1 teaspoon fennel seeds
4 tablespoons curry powder
salt and pepper
lemon juice, to taste
1 1/2 cup broth of your choice
2 tablespoons unsweetened shredded coconut
1 small tart apple, cut into wedges

In a frying pan over medium high heat add 2 tablespoons of the oil until warm. Add the lamb pieces to the pan without crowding them. Brown the meat on all sides briefly without burning the meat or cooking the meat all the way through. Once browned set the meat aside.
 
Add the the other 2 tablespoons of oil to the pan and saute the onion, pepper and garlic for about 8 minutes or until softened but not browned. Add the cooked lamb, fennel seeds, and curry powder. Salt the lamb lightly then squeeze several drops of lemon juice into pan. Add broth of your choice, cover pan and cook at a decent simmer for about 10 minutes or until the sauce thickens. Reduce the heat and add more liquid if it evaporates too quickly.
 
When the sauce is your desired consistency add the coconut and apple slices, tossing them in the pan for about 5 minutes to warm through. Taste the curry, re-season with salt, pepper and lemon juice as needed then serve over rice or with flourless naan.

From Judith Jones' The Pleasures for Cooking for One. 


Wednesday, March 24, 2010

Fish Steamed Over Vegetables

While pouring a very interesting albeit not very enjoyable tasting of red wines from the Languedoc (they have a tendency to smell like a barnyard in the summer, not my idea of delicious) I got into a conversation about wine pairings with one of the tasters on a subject that I've never much thought about.  She was talking about  having just gotten into wine and how she's working on cellaring some wine.  However she is both a pescetarian (a vegetarian that also eats fish) and a lover of big red wines who was trying to come to terms with the fact she would never be able to pair all these great reds with an equally great meal.

I guess the whole "red wine with red meat, white wine with white meat" rule of thumb has become a bit too entrenched in the minds of starter winos.  And I say, rules?  Who needs them.  Do what you like.  If you're in the mood for fish and a red wine don't let the guy at the wine store who insists pinot gris is the only good wine to drink with white fish get in your way.  Of course a Cabernet and tilapia in a lemony sauce is going to be a little weird.  However pinot noir with a hefty fish like salmon is amazing.

So the other night when the fella and I were making this outstanding fish steamed over vegetables I tested out the red wine with white meat with good results.  The smooth, light bodied Castle Rock Pinot Noir from Geyserville, California had the right balance of gentle tannins and berry and stone fruit flavors to compliment the halibut steaks.  The steamed eggplant with the rich thyme and stewed tomatoes gave the fish enough heft that it could stand up to the Pinot.

Tada a red wine to pair with white fish.  It can be done.  And the recipe itself has the makings of a new favorite.  It was as easy as chopping up some vegetables and stirring it every once in a while.  And I can't believe I never thought of simply steaming fish over top of the veggies at the end, so much easier and waistline friendly than pan frying the fish.  Not to mention this is an excellent recipe to use, subbing in whatever random produce you have in the fridge.


Fish Steamed Over Vegetables

3 tablespoons oil
2 cloves garlic, minced
1 large onion, chopped
salt and pepper, to taste

2 medium zucchini, cut into 1 inch pieces
1 medium eggplant, cut into 1 inch pieces
1 medium pepper (any color), cut into inch pieces

2 medium tomatoes, roughly chopped
1 teaspoon fresh thyme
1/2 cup black olives

1 1/2 pounds white fish steaks (we used halibut)
1/2 cup fresh basil, roughly chopped

Put 2 tablespoons of the oil in a large deep skillet with a lid, over medium high heat.  Add the garlic and onion, sprinkle with salt and pepper.  Cook, stirring occasionally until the onions are soft.

Add the zucchini, eggplant, pepper and a but more salt and pepper to the pan,  Lower the hear to keep veggies from burning and cook, stirring occasionally for about 10 to 15 minutes or until eggplant is soft. 

Add the tomatoes, thyme and olives, cook stirring occasionally until the tomatoes begin to break up and create a sauce, or about 5 minutes.

Sprinkle the fish with salt and pepper then place flesh side down over the pile of vegetables.  Adjust the heat so that the sauce simmers then cover pan and cook from anywhere between 5 to 12 minutes or until a knife inserted to the thickest part of the fish meets little resistance.  Thin fish will be done in 5 minutes, my medium thick fish took 8 minutes.

Spoon a portion of the veggies to a plate then top with fillet of fish.  Sprinkle with a bit of fresh basil.

Sunday, February 28, 2010

Gluten Free Sugar Free Gingerbread Cookies


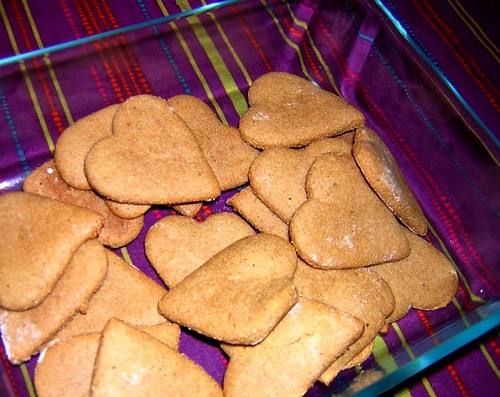
These little lovelies are proof that you don't have to give up amazing flavor to eat gluten free and sugar free.  I took them to two different parties this weekend and everyone loved them.  Total sugar and wheat addicts were passing over sinful store bought chocolate covered treats in favor of these simple little cookies.  Now that is saying something when sugar eaters go for your cookies instead of Peeps.  I was even able to provide a vegan party goer with a tasty treat since these cookies happen to be egg less as well.

I first made these for Christmas, using half the dough.  The rest of the dough I discovered recently and it was just as great as it was when it was first made.  So yes the recipe makes a huge number of cookies but it's worth it to save half of them for latter.  I love leaving surprising myself by hiding random things in the freezer that will make me happy when I find it later.  It's one of the small pleasures of life.

The frosting issue is still a problem however.  I've tried twice now to make sugar free frosting without some unwelcome ingredient like cream cheese or boxed pudding mix and neither worked out well at all.  I tried this recipe on Saturday and ended up with a pot of sticky brown goo, I'm still not sure what I did wrong but it didn't work out for me.  So I will keep trying.  If you have a good sugar free frosting recipe please do send it my way.

Really these cookies are so good they don't need frosting though.  They are just spicy enough from the cinnamon and amaranth flour that the agave and molasses even it out for a perfect gingerbread flavor.  They are totally addictive so beware.

Gluten Free Sugar Free Gingerbread Cookies

2 1/3 cups brown rice flour
1 1/2 cups amaranth flour
1 1/2 cups arrowroot powder
2 tablespoons baking powder
2 teaspoons baking soda
1 tablespoon ground cinnamon
1 teaspoon ground ginger
1/2 teaspoon ground nutmeg
1/2 teaspoon ground cloves
1 teaspoon sea salt

1 cup agave nectar
1/4 cup molasses
1/4 unsweetened applesauce
1/3 canola oil
2 tablespoons vanilla extract

Preheat the oven to 350.  Line 2 baking sheets with parchment paper.

In a large bowl, stir together the rice flour, amaranth flour, arrowroot powder, baking powder, baking soda, cinnamon, ginger, nutmeg, cloves, and salt. 

In a separate bowl, combine the agave nectar, molasses, applesauce, canola oil, vanilla.  Mix well and pour over the dry ingredients.  Stir until the 2 mixtures are thoroughly combined.  Cover and chill the dough 2 hours or more.

Sprinkle your work surface with arrowroot powder.  Divide the chilled dough into 4 equal parts.  Return 3 parts to the refrigerator to keep chilled.  Roll out the dough 1/4 inch thick.  Cut out gingerbread with cookie cutters and place them on the prepared baking sheets.  Bake for 6 to 7 minutes.

The cookies will be slightly soft when they are removed from the oven.  Allow to cool for 5 to 10 minutes then move to cooling racks to cool completely.  These freeze very well in plastic freezer bags.  Makes approximately 5 dozen cookies.

From Baking with Agave Nectar  by Ania Catalano.

Saturday, February 20, 2010

Salty Stuffed Tomatoes

These were a lovely and perfectly salty accompaniment to the sweet beef dish that was the main dish of dinner.  Everyone was as shocked as I was at how good these tomatoes were.  Even the fella dug into his, and we all know how he feels about tomatoes.  And the big meaty Chilean Cab from Cousino-Macul Antiguas Reservas that we drank while enjoying dinner was a nice contrast to the acidic and salty stuffing in the tomatoes.
 All the wonderful wines that we paired with dinner.  Full tasting notes of all the wines over at Forkful of News.

I could see making these again with more tuna and less capers to cut down the salt and make them more substantial.  For some reason I've never been a fan of stuffed peppers but these really did it for me.  It could have had something to do with the deeply satisfying and meditative scraping out of the juicy delicate tomato centers.  Not that I'm creepy and sometimes like to de-seed squishy fruits every once in a while or anything. 

I even saved all the juicy bits from the inside of my tomatoes and used them instead of diced tomatoes in a soup later on in the week, so this meal helped out in later recipes.  How can you not love a recipe that leaves you with left overs that hint at what you should cook next?

Also included in this meal:

Red Quinoa with Roasted Vegetables


Salty Stuffed Tomatoes

6 large tomatoes
4 red peppers

salt, to taste
3 tablespoons olive oil
1 7-ounce can tuna
2 tablespoons capers
4 tablespoons chopped black olives
1 lemon, zested
2 tablespoons, chopped parsley

Cut a small circle around the stalk of each tomato and cut out a cap in the top of each.  Using a grapefruit spoon, scoop out the seeds and flesh inside the tomato.  (Save the insides for later when you have a recipe that calls for a can of diced tomatoes.)

Roast the pepper yourself under the broiler or buy good quality pre-roasted red peppers in a jar.  If roasting them yourself, peel, de-seed and chop into strips.

Put the strips of red pepper in a large mixing bowl along with all the remaining ingredients.  Gently fold everything together.  Fill the cavities of the tomatoes with this filling.

Arrange the tomatoes on a shallow baking dish and bake in a 350 degree oven for about 20 to 30 minutes.  Check on them fairly often so that the tomatoes never get to the point where that explode or fall apart in the pan.  They are done when the filling is warmed through. 

Thursday, February 18, 2010

Orange, Olive and Argan Oil Salad

Being a non traditionalist instead of planning a romantic Valentine's Day dinner the fella and I had six of our favorite people over for dinner this past weekend.  And to trick us all into forgetting it is still the deepest darkest days of winter I cooked all Moroccan dishes.  The colorful highly spiced dishes and all the amazing wine made it feel like summer for a few wonderful hours around my table. 

And if you've been following my posts at Forkful of News you will already know that my obsession with Moroccan cooking has been going on for a little while.  If nothing else go read my post about argan oil which besides being an amazingly cool oil also plays a huge role in the recipe for the starter course of my meal.  Plus there are hilarious pictures of tree climbing goats so it is just about a requirement that you go find out about argan oil.  It's worth a few minutes of your time I promise, the goats will make your day.

I decided to start dinner out with this simple orange and olive salad.  The thing I love most about Moroccan dishes is so often all it requires is gathering, measuring, cutting the ingredients, adding heat, waiting for amazing food to happen.  It requires very little maintenance.  This salad doesn't even need heat, it just needs tossing and then you instantly have awesome.

The citrus was made somehow more amazing with the hint of cumin and paprika and the nutty argan oil made it even better.  You could just use a high quality olive oil if you're not in the mood to track down and invest in yet another oil with pretty much the same result.  And a crisp not too grassy Bogle Sauvignon Blanc courtesy of my foodie friends Tim and Jess was an excellent compliment to the salad. 

I was super decadent and served this beautiful salad alone in tiny plates so that there was no other food on the table to steal it's glory.  It was that pretty that I was willing to do extra dishes for it.  Also I felt fancy serving dinner in semi-proper courses.  And of course I got to stun all my friends by serving them something with such an exotic ingredient and tell them the story of it.  A very excellent start to a successful dinner.

Also included in this meal:

Red Quinoa with Roasted Vegetables

 
Orange, Olive and Argan Oil Salad

4 oranges, peeled and cut in into bite sized pieces
16 black or kalamata olives
1/ 2 red onion, finely chopped

1 lemon, juiced
2 tablespoons argan oil
1 tablespoon olive oil (you can do all olive oil if investing in argan oil is not in your budget)
salt, to taste
1/ 2 teaspoon cumin
1/ teaspoon paprika
pinch chili powder

2 tablespoons parsley

Put chopped oranges in a serving bowl along with the olives and chopped onion.  Toss well.

Make the dressing by whisking together all the remaining ingredients except for the parsley. 

If making ahead of time store the dressing separately and pour over salad at the very last minute.  If serving right away pour dressing over salad and toss well then sprinkle with the parsley and serve.

Makes enough to serve a party of 8 a starter size portion.

From Claudia Roden's Arabesque: A Taste of Morocco, Turkey, and Lebanon.

Sunday, January 24, 2010

Gluten Free Pistachio Cake


Another day another failed soufflé  I shouldn't be surprised but I still am every time.  And yet I've been lucky enough that of my four recent unfluffy unimpressive soufflés they have all been at least tasty, making up in flavor for what they lack in beauty.  And this one worked out exactly that same way.  Le sigh.

Pistachio cake with rose water syrup sounded like a recipe too good to pass up.  And the fella is a freak for pistachios so I knew I would get points for making a dessert he would go crazy for.  Perhaps next time I cook something that requires him wash every dish in the kitchen twice he won't curse me so much.  When I told him what I was making it also got me help shelling about a pound of nuts which otherwise could have taken me hours going at it alone.

The rest of the baking didn't go so smoothly.  It was nearly impossible to fold fluffy egg whites into a sugary pistachio paste.  I'm still not quite sure how that was supposed to work out but I did the best I could and ended up with a cake that alternately had chunks of nuts or areas of egg white when it was cooked.  Which sounds kind of unattractive but you'd be surprised how good it is when covered in rose water syrup.

Also I didn't realize fructose would react so differently than sugar to being baked.  The original recipe called for baking the cake for 45 minutes but after about 20 minutes mine started smelling burnt.  So I had to do the biggest soufflé no no and open my horrible windowless oven and see what was going on in there.  Turns out I had a very very brown cake that had fallen from  fluffiness long ago.  I'm not sure what I should have done differently to prevent this failure but it tasted just fine so I'll take the hit for the sugarless team and let the world know that fructose in a soufflé is not a good idea.  If you figure out how to make this work let me know.

Regardless of what it looked like the fella and I had no problem eating this sweet, gooey creation all last week.  It was worth the work.

Pistachio Cake

SYRUP:
1/2 cup fructose (or 1 1/ 2 cups sugar)
3/4 cup water
1 tablespoon lemon juice
2 tablespoons rose water

CAKE:
5 eggs, separated
1/3 cup fructose (or 1 cup powdered sugar)
1 1/2 cups pistachios, finely ground
1/3 cup pistachios, chopped coarsely

Make the syrup first.  Bring fructose, water and lemon juice to a boil and simmer just until fructose is dissolved.  The syrup will be very thin and will not reduce.  Remove from heat and stir in rose water.  Let syrup cool to room temperature and then put in refrigerator to chill.

Preheat oven to 350 degrees.  Grease and flour a 9 or 10 inch diameter nonstick round cake pan.

In a large bowl beat the egg yolks and the fructose until it is a pale creamy texture.  Add the finely ground pistachios and mix very well.  Beat the egg whites until stiff in a small bowl using a standing mixer(read Julia Child's advice in Mastering the Art of French Cooking on egg whites for more in depth tips on how to make it work) and then fold them gently into the pistachio mixture.

Pour the mixture into the prepared cake pan, sprinkling with the course chopped pistachios and cook for about 25 minutes (45 if using sugar.)  The cake will poof up slightly like a soufflé and will pass the toothpick test when finish.  Immediately turn the cake over onto a deep serving dish.  Using a tooth pick make holes over the top of the cake then pour the syrup over it.  The cake will taste best after 2 hours when the syrup has had time to soak into the cake.

Made Montignac friendly from a recipe by Claudia Roden in Arabesque.

Wednesday, December 30, 2009

Failed But Yummy Souffle


I've had a lot of fun cooking this year.  I ate a lot of things I never thought I would, cooked things I've never attempted before and learned a completely new way of eating.  There are just two cooking goals I had for myself before the year ended that I didn't get around to: mastering a soufflé and making a gelatin dessert that set properly.  So on Christmas day with the chef to egg me on I thought I would try a simple (or so I thought) soufflé so I could get that obstacle out of the way. Like so many things in life it didn't turn out the way I thought it would but it was still fun and delicious.

A lot of little things went wrong while I was trying to soufflé  I forgot to sift my flour.  The whisk wasn't perfectly dry.  My safety net disappeared to attend to a cat feeding before the snow got too bad emergency just as I was starting the part of the process I was unsure about.  I was flustered from being at an annoying job for the 6 hours before dinner.  And my family was walking in the door just as I got to the step where I couldn't walk away from my ingredients without them falling.  It wasn't an ideal situation to begin with so I wasn't too surprised when my soufflé didn't poof.  Fearing just this out come I had given the fella strict instructions on which bottle of wine to open for me in my fallen soufflé sadness and just the right tone to say “there there bunny” to me.

I pouted over the sad looking soufflé but since everything else on the table looked so fabulous I never managed to look any where near as pathetic as my fluffy obviously starving to death princess did. 


Besides I had every one I loved around a big purple table with amazing food, even a soufflé failure couldn't get me down.  And the surprising thing was that the soufflé, as unattractive as it looked tasted really great.  A creamy cheesy warm treat.  It nicely filled the gap in the dinner left by the crispy rolls or focaccia  we usually have at holiday dinners. 

So the good news was the soufflé despite its ugliness was tasty enough to warrant the effort which means I'll be motivated to try it again on a day with less stress when I can better focus.  And Julia Child has an entire section devoted to soufflés in Mastering the Art of French Cooking that I apparently need to read over a couple more times.  I will make a puffy wonderful soufflé happen.  Most people have resolutions about losing weight, I have them about cooking somewhat complicated food stuffs.  I'll let you know when I succeed.


Cheese Soufflé

1 teaspoon butter
1 tablespoon Parmesan

1 cup milk
3 tablespoons butter
3 tablespoons sifted rice flour
1/2 teaspoon salt
1/8 teaspoon pepper
1/8 teaspoon cayenne pepper
1/8 teaspoon nutmeg

4 egg yolks

5 egg whites
1/8 teaspoon salt
1 cup coarsely grated swiss or Parmesan cheese

Before you start:  place your eggs on the counter so they will be room temperature when you need them, measure out all your ingredients and have them close at hand, and make sure all the bowls, whisks and mold are very clean.

Preheat oven to 400 degrees.

Butter inside of soufflé mold and sprinkle with cheese.  Set aside for later.

In a small pot put the milk on a medium heat to begin boiling.

Melt the butter in a medium saucepan.  Stir in the flour with a wooden spatula and cook over moderate heat until foamy, about 2 minutes.  Remove from heat.  When mixture is no longer bubbling pour in the boiling milk.  Beat vigorously with a whisk until well blended.  Beat in the seasonings.

Return to medium high heat and boil, stirring with the whisk for about 1 minutes.  Sauce will be very thick when you're finished.  Remove from heat and set aside while you separate eggs.

Drop the four egg yolks one at a time into the hot sauce pan, reserving the whites in a metal or ceramic bowl for later in the recipe.  With the whisk beat the yolks individually into the sauce.  Continue with each yolk until well incorporated.  Keep the mixture at a tepid temperature while preparing the egg white mixture.

Beat the five egg whites and salt with a whisk or in a stand mixer until stiff by starting at a low speed, gradually increasing it as the eggs become foamy.  Take about a minute to raise mixer speed from low to high, constantly using a spatula to push the eggs off the sides of bowl and into the beaters.  Stop when the beaters leaves slightly shiny peaks in the surface of the mixture.

Stir a big spoonful of the egg whites into the warm sauce.  Stir in all but one tablespoon of the grated cheese.  Delicately fold in the rest of the egg whites being careful not to over fold and break the fuffly consistency.

Put the incorporated soufflé mixture into the prepared mold.  It should be about 3/4 of the way full.  Tap bottom of mold on counter to smooth the surface of the soufflé  Sprinkle with the remaining cheese.

Set rack in middle of the oven and immediately turn heat down to 375.  Do not open the door for the next 20 minutes.  In 25 to 30 minutes the soufflé will have puffed a couple inches over the rim of the mold and the top will be nicely browned.   Serve at once.

Gluten free version of recipe from Julia Child's Mastering the Art of French Cooking.

Thursday, December 10, 2009

Gooey Gluten Free Hazelnut Brownies


I was having one of those nights where the fella was out of town so there was no one to talk me out of my overwhelming urge for a brownie. A big ooey gooey chocolaty mess of a brownie. Rich and fudgy and melting off the fork before it even gets to your mouth kind of brownie. You know the kind I'm talking about.

None of these adjectives however tend to apply to any gluten free brownie I've ever seen. All of the recipes I could find online looked disappointing or down right scary. I was not to be deterred from my brownie craving so easily so I took Mark Bittman up on his promise to know How to Cook Everything. Sure enough he had a brownie recipe that I was fairly sure I could modify with some sort of nut flour and come up with something tasty.

When the hazelnuts fell out of the cupboard I took that as a sign. I toasted them and ran them through my little coffee grinder and made fine ground hazelnut flour, pouring it in until I had the gooey consistency I was hoping for. But it was still missing something, looking at the liquor shelf I realized what it was...booze! So I threw in some brandy just to be super decadent.

Now I crossed my fingers that this experiment would result in the best brownies ever as I was in no mood to be denied chocolate. I figured that if worse came to worse this would be a very yummy boozy batter to lick raw from the pan if it for some reason refused to cook. Luckily it didn't come to that because 20 minutes later I had the best brownies in the world in my kitchen. Better even than any gluteny brownie. These literally were the best brownies I had ever tasted.

The chef, the roomie, and her friends all happened to be witness to my fabulous creation so I sat them down and “forced” them to taste test my brownies. I didn't stop at the brownies however. I had made Carmel Pear Ice Cream from David Lebovitz's book The Perfect Scoop the day before and so put a tiny scoop of that on the warm melty brownies. The ice cream which was almost too sweet on it's own was the perfect contrast to the dark chocolate. Everyone agreed these were the best brownies in creation. We made so many yummy noises the house was probably vibrating.

Then the chef had to go and say something about how the only way these could be any better was with raspberry sauce on top of the ice cream. So of course the next afternoon I bought some raspberries and made it so. He was right the chocolate, pear, raspberry creation is out of this world. As you can imagine this tray of brownies barely lasted two days. And I'm still dreaming of them, trying to resist the urge to make more, trying to wait at least a couple more days before giving in and baking them again.

I was so focused on getting these brownies to turn out that I didn't experiment this time around with substituting in agave nectar. When I give in and bake them again I will update the recipe. Until then I put in parenthesis the modifications to the ingredients I think would make using agave instead of sugar work. If someone wants to give it a try please let me know what happens.


Gooey Gluten Free Hazelnut Brownies

8 tablespoons butter (reduce to 6 tablespoons)
3 ounces dark unsweetened baking chocolate

1 cup sugar (replace with 3/4 cup agave nectar)
2 eggs (replace with 1 egg plus 1 egg white)
1 cup hazelnut flour

pinch of salt
1/ 2 teaspoon vanilla (omit this)
1/ 4 cup brandy (reduce to 3 tablespoons)

Heat oven to 350 degrees (325 if cooking with agave nectar.) Grease an 8 or 9 inch square baking pan with butter.

Combine the butter and chocolate in a small saucepan over very low heat, stirring occasionally. When chocolate is just about melted, remove from the heat and continue to stir until smooth.

Transfer to a mixing bowl and stir in sugar (or agave.) Then beat in the eggs one at a time. Gently stir in the hazelnut flour (make your own by toasting, removing the skin from and grinding the nuts in a coffee/spice grinder until very fine), salt, vanilla, and brandy. Pour into the prepared pan and bake until just barely set in the middle, about 20 minutes. If in doubt under cook them slightly rather than over cooking them.

Top with Caramel Pear Ice Cream and Raspberry Topping for the ultimate dessert.

The sugar free gluten free version of this recipe can be found here.

Wednesday, December 9, 2009

Pureed Pea Soup with Truffle Oil

This is revenge soup and boy was it tasty.

See a year or so ago I worked at a not great Mexican...er oh so sorry, my bad...South Western restaurant here in Madison. The menu at the place hasn't changed in over 10 years and the cafe part of the place grossed about 20 bucks a week, if that gives you a hint of the culinary bleakness of this supposed dining establishment. Since there were no customers to speak of and I wasn't allowed to help with tables in any way shape or form I had a lot of time to eaves drop and chat with co workers.

So though the menu was unpalatable and often the cause of gastroenterological distress the owner managed to have a seriously bloated ego about his cooking skills. One day he had the whole staff ooing and ahing at some canapés he had made out of the French Laundry Cookbook as he pointed back and forth to the picture in the book and his creation. Much brown nosing occurred in the form of “it looks better than the picture” and so on and so forth.

After an 8 hour shift of making one latte and then repeatedly cleaning every square inch of the espresso machine to stay busy I was less than impressed. I did however peak at the book once he was gone. It's a beautiful book with very very fussy recipes which I suppose for a lot of people is a big thing. When he came back to claim the book and stared at me with the disapproval reserved for the lone employee than refuses to be a sycophant I was looking at a recipe for some fancy chocolate cake. I blurted out something about wanting to give it a try.

“Well dinner there costs hundreds of dollars there you know. My wife and I ate there on our honeymoon.” These and many other details I was supposed to be impressed by sailed over my head to which I replied, “No I mean it would be fun to cook.” He looked at me like I had peed in his crème Anglaise, scoffed while snatching away the book and walking away saying something about that being doubtful under his breath.

The end of my tenure at this particular restaurant was as needlessly dramatic as this man's food was horrible so I've held a bit of a grudge. And you can ask the fella I hold grudges for life. I'm still mad at a boy who tried to pull my pants down on the playground in kindergarten for example. So when I was looking at cookbooks at the library and found the French Laundry book I knew I had to cook something out of it just to prove my old boss wrong by cooking something fabulous from it. Not that he would ever know of course nor would he care but I wanted to put that energy into the universe and end this grudge I've been holding. A perfect “I told you so” moment that would end in me and the fella eating something nice for dinner.

Looking through the book now that I know how to cook and spend time with a chef I was able to see that the French Laundry isn't even that special. I eat better most nights of the week albeit sans caviar and foie gras. Not to mention none of those desserts were going to gluten free friendly even after heavy modification. So instead I went in search of a hoity toity recipe that would put to use some of this bottle of truffle oil I have and worry about spoiling while it sits in the back of my cupboard. In the process I found a recipe for pea and truffle oil soup. And since I was on a soup kick it seemed perfect.

It is sadly however not spring so finding English peas to shell and cook to perfection following all Thomas Keller's fussy instructions was not going to happen. So I bought frozen peas and carried on from there. It turned out to be a genius move seeing as his complicated instructions end in flash freezing the peas and then pureeing them so I just thawed the peas and went on with the recipe from there.

It was a lot of work and not really worth the effort for the end result. Forcing pea puree through a sieve has got to be up there with child birth on the scale of long difficult and painful life experiences. It did however make for a very creamy soup. And a very beautiful green soup as you can see from the picture that hasn't been color edited. Plus it was a good excuse to make Parmesan crisps which are as fun to make as they are tasty and I really enjoyed my truffle tinted green soup sipped from a mug with a crispy thin bit of cheese.

So there you have it, revenge soup. In your face snotty restaurant owner man.


Pureed Pea Soup with Truffle Oil

2 pound bag of good quality frozen peas
1/4 cup agave nectar (approximate)
salt to taste
1/2 vegetable stock
1/4 cup water (approximate)
white truffle oil
Parmesan crisps (recipe below)

Place frozen peas in colander and run cool water over them just until they are no longer frozen but not until they are mushy. Run thawed peas through food processor until smooth. Pour about a cup at a time of pureed peas in a mesh sieve Force the pea puree through the sieve into a large bowl, this will take a lot of time and elbow grease so be prepared. You should have bright green very smooth puree in the bowl and the dry tougher outer portion of the peas left in the sieve Discard the pea hulls (or save to toss in risotto or pasta later) and run the remaining cups of pea puree through the sieve

When you have pushed all the peas through the sieve add the puree back into the food processor. Add agave nectar (I used about 1/4 cup) and salt to the puree to your particular taste and process to combine. Check peas for taste and adjust seasoning as you like.

Add vegetable stock and water (enough to make the soup the consistency you like) to food processor and processor briefly again until combined. If serving cold pour into mugs or small bowl with narrow tops. If serving warm, gently heat soup over low heat and pour in mugs. Just before serving drizzle a bit of truffle oil in each mug of soup and top with a Parmesan crisp “lid.”


Parmesan Crisps

1/ 2 finely grated Parmesan
silicon baking mat

Preheat oven to 325 degrees.

Sprinkle about 2 teaspoons of cheese near one corner of the silicon mat and using your fingers spread the cheese into a thin 2 inch circle. Repeat with the remaining cheese, leaving a 1/2 inch of space between the cheese circles.

Bake for about 8 to 10 minutes or until they are golden brown. Use a small metal or heat safe spatula to very gently dislodge them from the mat and transfer to a plate to cool. They will be soft while removing from mat but will harden as they cool. Use to top pea soup as a decorative lid.


Modified and made slightly less complicated from a Thomas Keller recipe in The French Laundry Cookbook.

Saturday, November 7, 2009

Rice Flour Angel Food Cake


The fella has only one requirement for his birthday: there must be an angel food cake with blue frosting. I love him more than air but in case you've never tried angel food cake making is a pain in the behind. There is also the fact that boxed cake mixes are my Achilles heel of baking. I can make a three layer hummingbird cake with cream cheese frosting from scratch without breaking a sweat but show me a boxed cake and I can almost guarantee it will not turn out.

The first two years the fella and I were together I made the mistake of thinking a boxed angel food cake would be the way to go because even though baked goods in boxes are my nemesis it had to be simpler than doing it from scratch. Right? Both times I spent an afternoon in the kitchen glaring at the box and swearing at the electric mixer. No matter how much I beat the mix it wouldn't fluff up. Convenience food? Ha. After much pacing of the kitchen and many choice words I did end up with a mostly in tact cake placed on the table and frosted and me with a smile on my face, trying not to let on to the fella the amount of crazy I had just re-harnessed behind my beaming faux house wife facade before he got home.

There were a couple moments while making those cakes when all the angel food cakes I would make for the rest of my life flashed before my eyes and I wanted to give up. Was a deep meaningful relationship with a man I love dearly and connect with on almost every level worth making angel food every year? It turns out it is but I still dislike angel food.

This year a box mix wasn't even an option. If I was making this cake I was making a gluten free cake I could eat and if I was going to go through that much effort I was going to make the best freaking angel food cake ever. This would be the year I made piece with angel food.

It worked. I took the super simple recipe for basic angel food cake in The Joy of Cooking and switched rice flour in for the cake flour and stirred in some chocolate flakes to make it more interesting. It was a long 35 minutes waiting for that cake to finish. There is no window in my oven door and opening to peak in would have ruined anything so for 35 long minutes I was sure that I had just wasted a dozen eggs and my afternoon for nothing. When the timer went off and a perfectly risen fluffy gluten free made from scratch angel food cake came out of the oven I couldn't help but do a little dance and congratulate myself. The fella was thrilled and belly laughed at me for my lack of modesty.

Now there was the issue of blue frosting. I thought of all sorts of creative and crazy ideas for flavors or ways to make it blue without food coloring but in the end I went simple. Homemade whipped cream with blue food coloring heaped on the top of the angel food cake so that it looks like a fluffy blue cloud of yum. As you can see the fella was excited by this prospect and I'm excited that I finally made a yummy birthday cake for him.

Turns out angel food cake isn't that difficult after all. The trick is reading the recipe a million times before starting and making sure absolutely all the tools you'll need for all the steps are within arms reach because once you turn that mixer on for the first time you are not leaving that corner of the kitchen for a good 10 minutes but the result is worth it.

So happy birthday to the fella, hope you've had the best birthday week ever.


Rice Flour Angel Food Cake

1 cup brown rice flour
2/3 cup sugar
1/2 teaspoon salt

1/ 4 cup dark chocolate pieces or chips

12 cold egg whites
1 tablespoon water
1 tablespoon lemon juice
1 teaspoon cream of tartar
1 teaspoon vanilla

2/3 cup sugar

Preheat oven to 350. Have ready an un-greased 10 inch tube pan.

Sift together the flour, sugar and salt three times into a medium bowl.

Pulverize the chocolate chunks in a food processor until finely chopped. Set aside.

In a large bowl beat together on low speed with an electric mixer for 1 minute the egg whites, water, lemon juice, cream of tartar, and lemon. Increase mixer speed to medium and continue beating until the mixture increases in volume about 5 times and resembles a slightly translucent soft foam. This should take around 2 to 3 minutes. The foam will hold soft moist peaks when beaters are lifted.

One tablespoon at a time slowly beat in the remaining 2/3 cup of sugar. Do this process over the course of 2 minutes. When the sugar is added the foam will be a creamy white and hold soft glossy peaks that bend over at the points. Do not beat until stiff.

A 1/4 cup at a time sift a fine layer of the flour mixture evenly over the surface of the batter and fold gently with a rubber spatula just until the flour is nearly incorporated. Repeat 7 more times with the rest of flour mix until no traces of flour are visible. During the last addition of flour mixture add the chocolate pieces.

Pour the batter into the pan and spread to level the top. Bake until a toothpick inserted in the center comes out clean, about 35 minutes. Let cool upside down for at least 2 hours, setting the tube over a bottleneck or resting the pan on 4 glasses.

Original recipe from Irma S. Rombauer, Marion Rombauer Becker and Ethan Becker's The Joy of Cooking.

Saturday, September 26, 2009

Julia Child is a Cruel Mistress

This saucy pile of potatoes covered in fat and oil is so not diet friendly. Not for the Montignac Method, not for anyone. So I won't be posting the recipe here. It's just that after not posting for over a month I needed to get back into the swing of things. And after spending two days cooking this for a friend's highly esoteric monk fish roasting party someone needed to see this madness.

So behold Salade Nicoise a la Julia Child. Or as I will be calling it from now on Bitch Salad.

It seems simple enough until you're boiling those potatoes you can't seem to convince your CSA to stop sending you every week, that your friends are sick of you pawning off on them. About then when it's too late to turn back you really read the recipe and see it is three recipes hidden in a recipe for a freaking salad. Two different vinaigrettes and a potato salad? Seriously?

My potatoes committed some sort of explosive suicide while I was wire whipping (Julia is kind of kinky, I always thought of it as a whisk) the first vinaigrette. At which point I gave up and went to a wine tasting and thought about not cooking for awhile considering everything I've tried to make this week was an epic failure.

My spirits were a little higher this afternoon when I skipped out of work half way through the day and gave the potatoes a stern talking to. They weren't pretty and were over done but with the other vinaigrette coating them they were plenty tasty. I have to give it to Julia Child she is a huge picky fussbudget but it's usually for a reason. That one bite of potato salad was the best I've ever had and not just because I miss potatoes. It was delicious and subtle, with scallions making up most of the favor instead of the unfortunate cloying German mayonnaise and mustard version that is so popular.

The fun really started when I got to pile massive amounts of random vegetables and fish on the potato and lettuce bed. I'm actually surprised at how tasty it looks. Hopefully the carb eaters of the world will enjoy it. If it's a disaster after following all of Julia's wacky instructions I really might make the fella take over the cooking. The one thing I can say for this recipe is it didn't ask me to taste raw eggs to check the seasoning which was an actual instruction last time I cooked out of Mastering the Art of French Cooking. Oh that Julia Child she's a character.

Sunday, August 9, 2009

Braised Cucumbers


Today a movie changed my life.

It's terrible and cliché but true just this once. But it gets worse. It was a Nora Ephron movie. And I cried at it. A lot. Like a shameful I shouldn't even be telling you this amount. Who is this person I have become that gives into trends and likes things that “everyone” else is talking about? Oh who cares.

Yes I went to see Julie and Julia and it was freaking fantastic. Not just because all the actors are amazing and perfectly cast. Not because it's about food and writers and being lost and finding your passion and the person that fits you best in the world. And not even because it's about a couple living through a crazy cooking project that felt exactly like my life. Though the movie is great for all those reasons. You should probably sit down before I tell you the best thing about the movie. Ready?

Braised cucumber.

No that isn't code for something. Cucumbers cooked in butter are orgasmic. I'm a convert. Never will I relegate cucumbers to salads and sushi, as nothing but an interesting texture. I may have found my new favorite vegetable. Hear that artichoke? You better shape up or you'll be replaced.

I've read about this recipe about a million times. First in the Julie and Julia Project that inspired the movie and I was quite skeptical. Then it kept coming up and I still didn't believe it even after many of my favorite food writers talked about cooked cucumbers. Meryl Streep however I couldn't ignore, I was too curious. So being the crazy foodie I am I came home from the movie, let the dog out, took the gianormous cucumber out of the fridge and braised that sucker.

Oh my good god! Ten minutes later I was wandering around in circles in the kitchen muttering to myself. It's really really good.

Obviously butter makes everything amazing but it was more than that. Somehow the heat completely changed the flavor profile of the crunchy tangy cucumber into a buttery slightly soft salty creation. It reminded me of one of those rare buttery chewy mouth filling Russian River Valley Chardonnays that you would gladly pay $30 a bottle for. And I say this as someone who usually abhors Chardonnay and only buys $10 wine. Braising cucumbers transforms something tolerable into something delicious. It doesn't seem possible.

Julia Child I can't believe I've ignored you this long. I'm getting Mastering the Art of French Cooking and going on an insane cooking binge. The fella wants to bone a duck and try an aspic. To which I say who is coming over to help me eat these insane creations? I'll make you braised cucumbers if you can talk me through a terrine.


Braised Cucumber

1 huge cucumber (or 2 regular sized)
1 tablespoon butter
1 dash salt
1 teaspoon lemon juice
1 pinch dried mint

Peel cucumber. Cut into quarters and remove seeds. Cut into 1 inch pieces.

Melt butter in a pan and add cucumber. Cover and cook about 5 minutes on medium heat.

Stir in salt, lemon, and mint. Cover and cook another 2 minutes.

Enjoy eating heaven on a plate.


Saturday, June 27, 2009

A Whole Lot of Sauvignon Blanc and Puy Lentil Salad

I'm really blessed to know a lot of great people who love wine almost as much as I do. I few of them even love wine more than I could ever hope to and put me to shame with their knowledge. Once a month for a little over a year now we've been getting together to taste wine and get Wasted. Well we do tend to get tipsy but that's also the name of the group. It's all Lindsay's fault she started it.

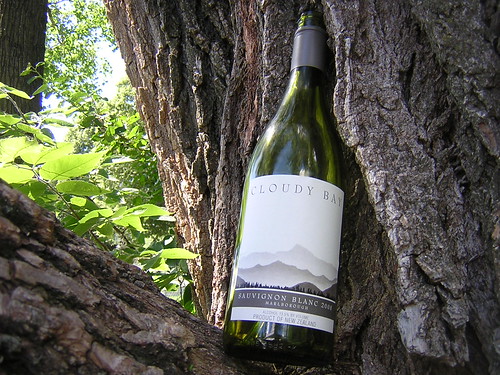
This month the fella and I hosted a Sauvignon Blanc tasting, the perfect wine to ring in summer in our backyard. Unfortunately the weather didn't cooperate and we ended up packed into our tiny living room enjoying ourselves immensely until the rain ended. We tried some good and no so good stuff. I'll leave it up to Lindsay to do the hard core reviewing and I'll stick to taking ridiculous pictures of the wine and posting a recipe for the lentil salad that had everyone making yummy noises.

The 2008 Cloudy Bay Sauvignon Blanc from the Marlborough region of New Zealand was the winner of the tasting as far as I was concerned. It was light with just the right amount of citrus and sweetness. At about $22 it is well worth investing in especially if you don't think you like Sauv Blancs this one will prove the varietal has redeeming qualities.

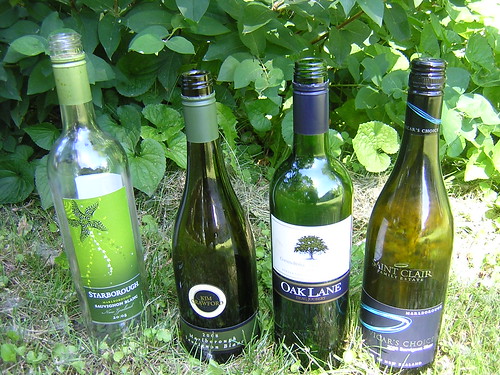
There is this weird thing with Sauv Blancs where in the $15 or under range buying them is a bit of a crap shoot. There are a few good ones like the Riesling-esque $9 a bottle Quarry Hills Sauv Blanc that just came in to the wine store and we can't keep on the shelves for all the people buying it by the case. Aside from getting lucky and finding the rare keeper a lot of them make you wonder if you've accidentally poured yourself a glass of lawn clippings or cat urine (sorry for that image.) And four of our wines that day definitely fit in the overly green and grassy category.

I chose the 2008 Vicar's Choice Sauvignon Blanc once again from the Marlborough region of New Zealand and the 2008 Kim Crawford Sauvignon Blanc from the same region. Both grass monsters. The Vicar's Choice Reserve Sauv Blanc is actually complex and has a slightly sweet grapefruit kick, I should have spent the extra couple of bucks and got that. The Kim Crawford was just disappointing, it's been so good in past years and tasted like the lawn this time around.

The 2008 Starborough Sauv Blanc from the Marlborough region was the best of the grassy wines since it wasn't over poweringly green but still not something I would buy. The 2008 Beau Joubert Oak Lake Chenin Blanc/Sauvignon Blanc blend from Stellenbosch South Africa was interesting but also packed too much green-ness to really fall in love with. I was just glad to have a South African wine that had none of the artificial banana flavor that so many of the whites in that area seem to be ruined by.

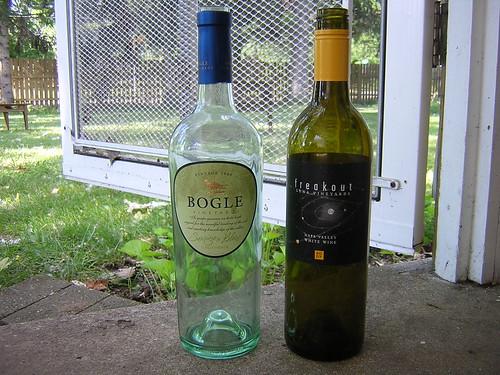
In the midst of the young Sauv Blancs that were making us all feel like we were chewing on field of clovers there were a couple really nice bottles that shook things up and surprised us all. The 2008 Boogle Vineyards Sauv Blanc from Clarksburg California was a delight. It was a bit sweet and light, something I would find and buy. The 2007 Luna Vineyards Freakout White Blend from Napa Valley was just a good departure from all the New Zealand wines and gave us a chance to rest our palates on something super easy to drink.

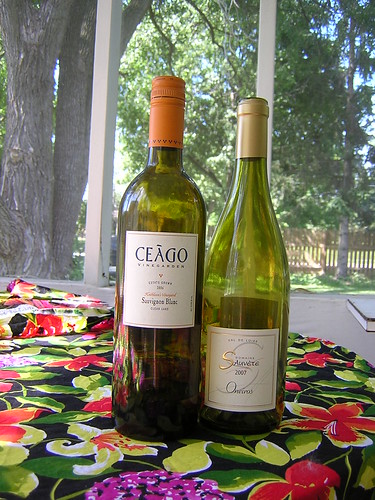
And then sadly there were the two wines that just didn't quite work out in the scheme of things. I'm almost positive the bottle of 2006 Ceago Sauv Blanc from Clear Lake California was a bad bottle. Supposedly it doesn't happen much in screw tops but I've heard really good things from customers and my wine genius boss about this wine. I refuse to believe all these people are drinking vinegar and enjoying it so I will give this one another try and get back to you.

The 2007 Domaine Sauvete Sauvignon de Touraine Oneiros from the Loire Valley might just have been too different from everything else to be enjoyable. We probably should have drank it first with clear palates because it was very French and very typical of the traditional Sauv Blanc with a heavy cat pee nose. It wasn't my favorite but I can see someone who enjoys French whites really getting into it.

Blah, blah, blah. Wine, wine, wine. I know you all just came for the lentil salad so here it goes.

Nigella is amazing and I want to cook everything from her book Forever Summer and am very happy I started out with this lentil and goat cheese divinity. It's simple and oh so delicious. Just make sure to use the Puy lentils as they have the structure to hold up to this salad. My other advise is to use the oil from sun dried tomatoes for the olive oil in the recipe, it added an extra layer of yummy go the recipe and it made sure that oil didn't go to waste which I always feel guilty about. Now I will always know what to do with it.

The hard part is resisting the urge to eat all the marinated goat cheese before you serve this. Not that it would be too much of an issue considering this recipe makes enough to serve a hungry houseful of winos and have enough left over for three people to eat for lunch. It is the gift that keeps giving.

As you can see the fella was a big fan. Or maybe it was just the wine. Who knows.


Puy Lentil and Goat Cheese Salad

1 10-ounce log goat's cheese
1 lemon, zested and juiced
4 tablespoon olive oil
1 teaspoon dried mint (I omitted this)

3 cups Puy lentils
1 onion, quartered
4 cloves garlic, crushed
1 tablespoon chili oil

4 tablespoons olive oil
12 ounces jarred sweet peppers in oil
bunch fresh mint, chopped (also omitted this)

Crumble the goat's cheese and marinate in half the juice and zest of the lemon, 4 tablespoons olive oil (I used excess oil from a jar of sun dried tomato) and dried mint. Seal in a container and reserve until just before serving.

Put lentils in a large saucepan of water and add onion, garlic cloves and chili oil. Cook for about 25 minutes or until tender then drain. Keep an eye on the lentils so they don't get too soft and don't think of substituting the Puys for another lentil with less character and structural integrity.

Pour 4 tablespoons of olive oil over the warm lentils in a large serving bowl. Season with salt and pepper, then add the remaining half of the lemon juice and zest. Drain the sweet peppers, chop them coarsely and mix them into the lentils. Mix with your hands or very carefully with a wooden spoon making sure not the crush and mangle the lentils.

When the lentils have reached room temperature add the marinated goat's cheese and sprinkle over them with the fresh chopped mint and serve immediately.

Original recipe from Nigella Lawson's Forever Summer cookbook.